


Message cards you’ll want to give for Halloween.
Store-bought ones are cute, but if possible, you’d love to handcraft one yourself, right?
In this article, we’ll introduce Halloween cards that are perfect for making by hand!
You might think they’re difficult, but there are plenty of videos that carefully walk you through the steps, so even first-timers will want to give it a try!
With illustrations, decorations, fun pop-ups—your message card options are endless depending on your ideas.
They’re sure to make your Halloween even more special!
- Cute Halloween Song Collection! A carefully selected lineup of adorable tracks that both kids and adults can enjoy
- Halloween in childcare gets exciting! Dance ideas for moving and having fun
- Recommended for daycare activities! A Halloween song you can sing and play with
- Songs that amp up Halloween: a roundup of perfect tracks for party BGM!
- Halloween songs released in the Reiwa era | Perfect as party BGM too!
- When it comes to Halloween songs, this is the one! A special feature on Japanese tracks that hype up the karaoke crowd
- Vocaloid Halloween Song Special [Trick or Treat]
- K-pop recommendations for Halloween: a special feature to enjoy artistic, conceptual worlds
- [2026] A roundup of popular and recommended Halloween songs for YouTube Shorts
- [Showa × Halloween] A roundup of chilling songs with scary lyrics and an unsettling atmosphere!
- A Halloween song for children. A fun Halloween song.
- Halloween songs you can use for Instagram Reels. Tracks that set the mood.
- [Easy Halloween Vibes] Perfect BGM and Theme Songs for a Halloween Party
Handmade Halloween Message Cards! From Illustrations to Moving Mechanisms (1–10)
A playful ferris wheel pop-up card

This is a lively message card where various Halloween motifs rotate like a Ferris wheel.
It’s made using a pop-up mechanism: when you pull the top of the card, the Ferris wheel rises up in three dimensions.
The base is created by laminating three sheets of paper and consists of a pull-up mountain fold mechanism and a foundation piece, with the rotating Ferris wheel attached to the mechanism.
Because the Ferris wheel mechanism stands out, you might design the gondolas—represented by Halloween motifs—to open up, providing space to write messages inside.
Also, when the Ferris wheel pops up, a space appears in the front; you could hide an illustration there to create a surprise element, which would be fun as well.
A Halloween card with ghosts popping out
A Halloween card with pop-up ghosts full of surprise is a card that both adults and children will want to open again and again.
Print the template, cut out each part along the outlines, and add fold lines.
After attaching the ghost parts to the base, prepare another base sheet and stick them together with double-sided tape.
Be careful to align the slits in the ghost and the base so they don’t shift when you attach them.
Glue on the pumpkin’s face, and if the card opens and closes smoothly, it’s complete.
It would also make a delightful invitation for a Halloween party.
A message card with a rotating mechanism
The moment you open it you’ll find yourself saying “Wow!” This rotating pop-up message card captivates with its unexpected movement—perfect for a Halloween surprise.
Print the template and cut it to match your construction paper.
Stretch a thread across the center of the paper and tape the heart pieces together around the center.
Since it’s Halloween, we recommend using bat or pumpkin designs instead of the heart.
Stick the same shape on both sides to hide the thread.
Fold in two places like an accordion, then attach the second mechanism base.
It’s a perfect Halloween card that feels both special and handmade—give it a try!
[Hand-drawn] Simple Ghost Halloween Card
![[Hand-drawn] Simple Ghost Halloween Card](https://i.ytimg.com/vi/DV70knN8oq8/sddefault.jpg)
With just minimal supplies, you can make a ghost-themed Halloween card that parents and kids can enjoy creating together.
Prepare a sheet of construction paper and stick a wide strip of masking tape down the center.
Draw a ghost over it with colored pens.
To give it a Halloween vibe, add a witch’s hat and a bow tie—now you’ve got a ghost in costume.
Finally, peel off the masking tape, add color, and write your message.
Including an original message is a lovely touch.
You can also draw bats and pumpkins around it or add Halloween-patterned masking tape to make the card even more festive.
[Origami] Pumpkin ghost frame that can also be used as a message card
![[Origami] Pumpkin ghost frame that can also be used as a message card](https://i.ytimg.com/vi/Aggo93UjUtk/sddefault.jpg)
The pumpkin ghost frame made with origami is great for message cards and is also recommended for anyone who wants to enjoy making Halloween decorations with children.
Prepare your origami paper and start by making the creases.
When folding the pumpkin frame, the key is to keep the width and balance even.
You can add variation by cutting black or yellow origami paper and placing it inside the mouth.
Writing a message inside or inserting a photo and hanging it on the wall can boost the Halloween vibe and make things more festive.
[Origami] Skull Message Card with a Movable Mouth
![[Origami] Skull Message Card with a Movable Mouth](https://i.ytimg.com/vi/XFxnlgORPDA/sddefault.jpg)
An idea where pulling the skeleton’s mouth reveals a message.
This is made entirely from origami, with the skeleton body and the message portion created separately.
There aren’t any particularly difficult folding steps, but the mouth area involves some fine work, so fold carefully.
For the message section, use origami paper cut in half, then attach the finished piece to the body so it slides.
Try changing the origami color and the expression you draw on the skeleton with a pen to create the look you like.
A message card with a moving ghost
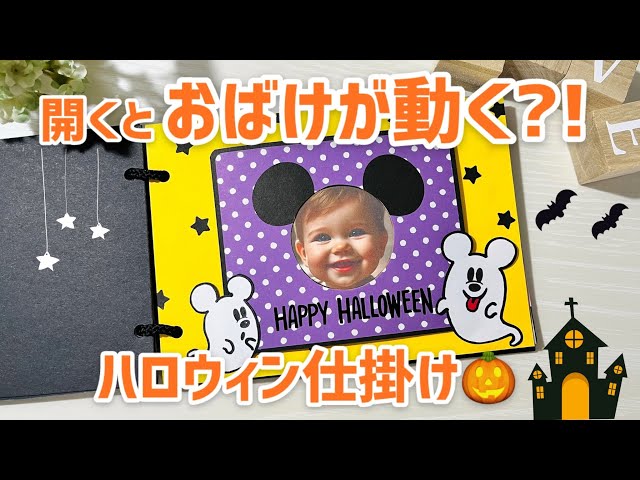
When you open the card, a child’s photo appears, and a ghost twirls around it.
Glue purple and orange origami paper onto black construction paper to create a colorful base, then draw and cut out a circular hole on the cover.
This will be the window where the photo shows through.
Fold a strip of thick paper into a mountain fold and a valley fold to create the rotating axis piece, combine it with a circular frame that will be the ghost’s base, and attach it to the card.
Add the photo and the ghost, write a message in the blank space, decorate, and you’re done.