
“Marble Rolling Art” is an art activity where you place a sheet of drawing paper inside an empty box, drop in marbles coated with paint, and tilt the box at various angles to roll the marbles around and create patterns.
Kids are sure to be captivated by the way the marbles roll here and there and by the mysterious patterns that keep forming!
In this feature, we’re sharing plenty of project ideas that make the most of Marble Rolling Art.
We’ve packed in ideas you can use in many settings—tied to events, reflecting the seasons, and more.
Be sure to use these as a reference and have fun trying them together.
Because we are presenting ideas for creating works that highlight children’s individuality, we use the term “seisaku (制作)” in the main text to mean “making/creation.”
- Kids and adults alike will be captivated! A collection of DIY marble run ideas
- [For toddlers] Simple but amazing craft ideas — including toys they can play with
- [Childcare] Recommended for 3-year-olds! Craft activity ideas
- Let’s make it with 3-year-olds! Fun handmade toy ideas
- [For Kids] Let’s Make Ghosts! A Collection of Craft Ideas
- [Childcare] Cute and rotund! Snowman craft ideas
- [Milk Carton Crafts] Fun ideas for elementary school kids. Perfect for summer vacation homework!
- Easy! Let's make an acorn with origami. How to fold an acorn for 3-year-olds.
- An empty box becomes a toy! A collection of ideas for handmade toys
- Fun to play! A collection of handmade toy ideas made with construction paper
- Cardboard Play Ideas by Age Group to Enhance Childcare
- [For 3-year-olds] A roundup of craft ideas to enjoy in summer! Introducing various motifs and techniques
- [Nursery/Kindergarten] Make Your Sports Day a Hit! A Collection of Fun Beanbag Toss Variations
Let's paint by rolling marbles! Marble rolling art ideas (1–10)
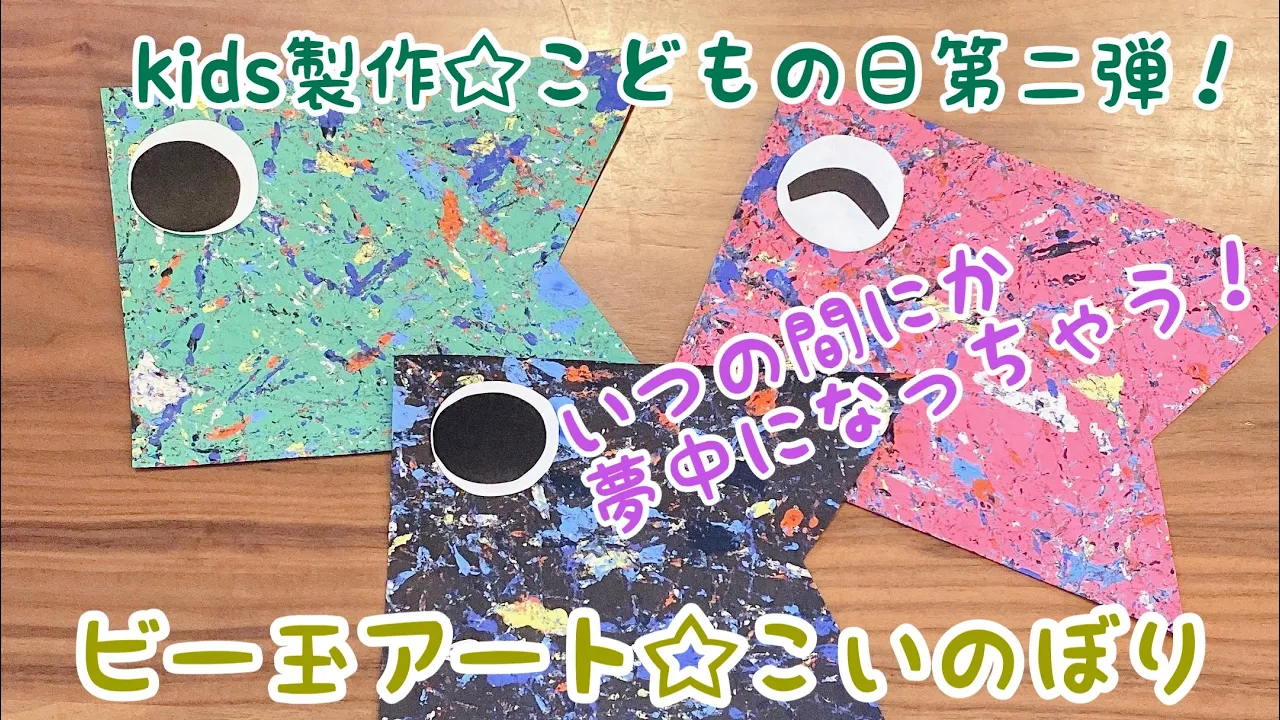
carp streamer

Even making koinobori windsocks can take on a unique twist if you use marble rolling art! It’s fun to make lots and display them.
First, prepare drawing paper and roll marbles coated with paint across it.
If you place one marble with one color of paint in a small container, the colors won’t mix and the result will look neat.
Roll them inside a box, and you’ll get vibrant patterns! Once the paint dries, cut the paper into the shape of a koinobori and attach an eye.
It’s a craft that both children and adults can enjoy together.
The goldfish can’t escape.
Goldfish that you often see at festivals.
To keep them from escaping, you need to make sure they’re securely placed in a bag.
With that in mind, let’s make a craft of a goldfish swimming lively inside a bag.
To evoke the cool look of water, roll paint-covered marbles over white construction paper to create patterns.
Then, paste cut-out paper goldfish on top—and it’s done! Finger stamping to add seaweed and other details is also recommended.
Let the children handle rolling the marbles and doing the finger stamps, while the teacher should take care of cutting the paper and gluing the parts together.
snail
Art using marbles is gaining attention.
It’s fun to dip marbles in paint and roll them around on paper to create unpredictable patterns, and it can also lead to surprising results beyond your expectations.
Here, choose a round sheet of paper in your favorite color and roll marbles coated in colors you like to make a pattern on it.
We’ll use that as the snail’s shell.
Snails go well with rainy scenes, and the traces left by the marbles—like after a rain—should match nicely, creating a lovely atmosphere.
Colorful-shelled turtle
Roll marbles coated with your favorite paint to create beautiful patterns on a turtle’s shell! Line the bottom of a box with construction paper that will become the turtle’s shell, then place the paint-covered marbles on top and roll them around.
Using darker colors is recommended, as the patterns will stand out more clearly.
Tilt the box to roll the marbles, and once you’ve got a nice pattern, take out the paper and cut it into the shape of a shell.
Attach the head, tail, and legs, and you’ll have a lovely turtle with a traditional Japanese-style pattern!
Halloween pumpkin, bats, and spider
When you use marble art to draw patterns based on Halloween motifs like pumpkins, bats, and spiders, the result is delightfully surreal! Line a box with drawing paper, then paint patterns on a pumpkin cutout with orange and yellow, and on bat and spider cutouts with black and gray.
Once you’ve achieved the patterns you like, take them out of the box, cut along each shape, and you’re done! Don’t you think the irregular patterns created by the marbles’ unpredictable movements perfectly match the slightly spooky Halloween vibe?
Heart-shaped chocolate
This is a craft for making stylish heart-shaped “chocolates” with irregular patterns.
First, secure a brown sheet of construction paper inside a box, then drop in some marbles coated with paint.
If you attach the paper to a piece of cardstock or cardboard beforehand and then set it in the box, it may make it easier to cut into a heart shape later.
Roll the marbles around to create patterns, then take the paper out of the box and cut it into a heart.
It’s cute as is, but adding a stick and a ribbon gives it a lollipop-like finish! It’s perfect for gifting to parents or friends.
yo-yo

How about making festival-favorite yo-yos using marble painting? First, cut construction paper into circles.
For infant classes, the teacher should do the cutting; from preschool age up, let the children cut them themselves.
Next, prepare the paints.
Use a container that can hold several colors, such as a palette or an empty egg carton.
Dip a marble in the paint color of your choice and roll it across the paper circle.
To keep the colors from mixing, use a separate marble for each color.
Once the paint is dry, freely stick on round stickers.
Using stickers of various colors and sizes makes it look much more like a traditional yo-yo.
It’s a perfect craft for summer.