Useful in care facilities! Ideas for autumn wall decorations

As the summer heat begins to ease, some of you might be starting to think about autumn-themed wall decorations.
In this article, we introduce ideas perfect for fall wall displays, so feel free to use them as inspiration.
From autumn leaves and red dragonflies to seasonal treats like persimmons and chestnuts, you’ll find plenty of ideas you can use for your displays.
Of course, staff at facilities can make them, but the simple ideas that can be completed in a short time are also great for creating together with users while having fun.
Be sure to look for your favorite ideas!
- [For Seniors] Let’s Make It Together! Wonderful November Wall Decoration Ideas
- [For Senior Care Facilities] Feel the Autumn! Collection of Maple Leaf Wall Decoration Ideas
- [For Seniors] Fall Wall Decoration Ideas
- [For Seniors] Wall Decorations to Enjoy October
- [For Seniors] Simple crafts that feel like autumn: a fun creative activity
- For seniors: Year-round ideas for wall decorations
- [For Seniors] Enjoy Autumn with Cosmos Flower Wall Decorations! Easy DIY Ideas
- Simple, Recommended Autumn Crafts for Seniors
- [Day Service] Handmade Autumn Crafts: Take-Home Project Ideas
- Wall decoration ideas for seniors recommended for September
- [For Seniors] Simple Craft Ideas to Feel the Autumn Season with Fall Foliage
- Recommended winter wall decorations for seniors: heartwarming ideas
- [For Senior Care Facilities] Easy! September Craft Ideas to Feel the Autumn Season
Useful in care facilities! Ideas for autumn wall decorations (21–30)
Swirling Paper Ghost

The idea of having the ghost’s bottom part as a spiral is really cute.
First, draw a picture of the ghost on white paper.
Think of a snail as your reference—the idea is to draw a snail but make its face a ghost’s face.
Once you’re done, cut away the unnecessary parts around it with scissors, and carefully cut out the spiral section.
Punch a hole in the ghost’s head and hang it with string; the cut spiral will drop downward in a circular shape, making a very striking decoration.
Attach it to a stick and it becomes a portable item too!
Halloween Pom-Pom

Those little pom‑pom dolls made of yarn that you often see in dentists’ waiting rooms—personally, I spot them all the time.
It turns out there are lots of enthusiasts, and there are plenty of tutorial videos online showing how to make them.
Why not give it a try on a long autumn evening? You can even find a “pom‑pom maker” tool for making fluffy balls at 100‑yen shops.
Once you have the tool, all you do is wrap the yarn around—perfect for beginners.
Make them in Halloween‑style orange and purple, okay? You can also find cute googly‑eye stickers at 100‑yen shops, so be sure to look for those!
Paper core bat

These bats are incredibly handy when decorating a room with a Halloween vibe.
Make plenty of them and they’ll look like a swarm, boosting the spookiness.
First, cut a toilet paper roll in half—leave it as is if you want a bigger bat—and cover it with black paper.
It’s a good idea to line the inside with black paper too.
For the wings, use cellophane or plastic and craft the shape.
Make the eyes a vivid yellow or gold to contrast with the black! If you decorate with fluorescent paint, they’ll glow in the dark.
These bats will spark all kinds of creative ideas!
dragonfly ornament

When it comes to autumn scenery, many people probably imagine a scene at dusk with dragonflies darting about.
This activity shows you how to make dragonflies—an essential element of that autumn landscape—using disposable chopsticks and washi origami.
First, wrap hemp twine around a cut piece of chopstick to create the dragonfly’s body.
Next, attach coiled twine pieces as the eyes, and form a loop from origami paper; shape it and attach it in the position of the wings to complete the whole piece.
Choose your colors and shapes to bring out your own originality.
origami red spider lily

Let’s make origami red spider lilies, which bloom around the autumn equinox in September.
Combine several sheets of origami paper with long, thin slits cut into them, and curl each strip using a pencil or another thin stick.
For the center of the flower, it’s best to use tissue paper crumpled into a small ball.
Put these parts together, add a long, rolled strip of green paper for the stem, and you’re done! You can turn it into a three-dimensional wall decoration, or arrange the flowers in a bottle like a vase.
Enjoy this seasonal, precious flower and feel the arrival of autumn.
Grape wreath made with chirimen fabric

Here’s how to make a grape wreath using chirimen fabric and covered buttons.
Cut the chirimen fabric into circles.
Place the rounded side of a covered button in the center of a fabric circle and secure it with glue as if wrapping it.
Once wrapped, press in the remaining part of the covered button with the metal side facing up.
This completes a grape berry.
Attach the grape berries to a backing sheet to form a bunch of grapes.
Decorate the wreath base with paper grape leaves and the grape bunches.
The texture of chirimen fabric adds warmth to the piece.
It’s a craft that older adults are likely to enjoy as a lovely grape-themed project.
Grape wall hanging decoration
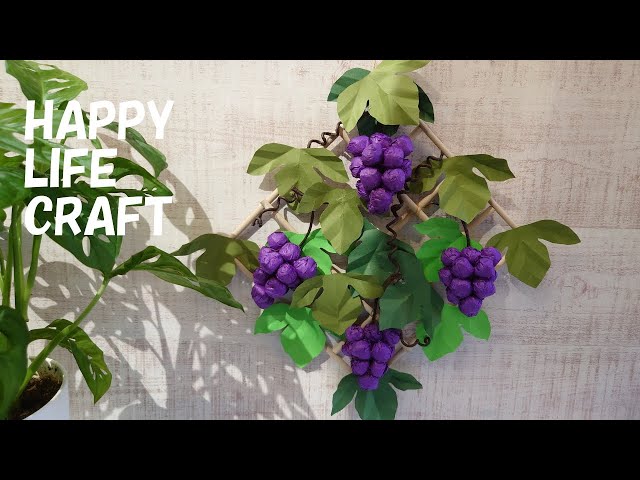
When there’s a grape craft displayed indoors, some older adults may think, “Ah, autumn has arrived.” Here’s an easy grape wall decoration you can make with familiar materials.
Take a small rectangular piece of tissue paper for flowers and wrap a small balled-up piece of tissue inside so it forms a round shape.
Use colors that evoke grapes, like blue or purple.
Connect the crumpled tissue pieces to create a grape cluster.
Assemble paper straws to make a hanging base and attach the grapes.
Make leaves and a stem as well, and stick them on to complete the piece.
You can make it using only items from a 100-yen shop, so please use this as a reference and give it a try.