Windowsills and walls transformed! Paper-cutting ideas to color your Halloween


How about decorating your home with paper cutouts that are perfect for Halloween? The light filtering through cutouts placed on windowsills or walls creates a magical atmosphere.
Motifs like pumpkins, ghosts, and black cats really shine with the delicate expression unique to paper cutting and are sure to draw attention.
You don’t need special tools—just scissors and paper such as origami or construction paper to get started easily.
In this article, we’ll introduce Halloween paper-cutting ideas, from simple patterns anyone can make to more elaborate designs.
- Lots of cute ghosts! Halloween ghost paper cup craft
- [For Seniors] Fun Halloween wall decorations: from ghosts and pumpkins to spiders and castles
- Halloween in childcare gets exciting! Dance ideas for moving and having fun
- Recommended for daycare activities! A Halloween song you can sing and play with
- Cute Halloween Song Collection! A carefully selected lineup of adorable tracks that both kids and adults can enjoy
- [Easy Halloween Vibes] Perfect BGM and Theme Songs for a Halloween Party
- A Halloween song for children. A fun Halloween song.
- Songs to Listen to and Play on Halloween! A Selection of Recommended Piano Pieces
- Halloween songs for seniors to enjoy at events: from nostalgic classics to exciting new favorites
- [From Kids to Adults] Dance Songs You’ll Want to Groove to at a Halloween Party
- When it comes to Halloween songs, this is the one! A special feature on Japanese tracks that hype up the karaoke crowd
- [For Seniors] Have Fun Moving with Halloween Exercises! Introducing Songs You Can Dance To
- Halloween songs released in the Reiwa era | Perfect as party BGM too!
Window sills and walls transformed! Paper-cutting ideas to color your Halloween (21–30)
Frankenstein

When it comes to classic Halloween monsters, it’s got to be Frankenstein! The stitches on his forehead and the bolts sticking out of his body are his trademarks.
In this paper-cutting idea, we’ll use green origami paper to make Frankenstein’s face.
First, fold the origami paper in half and sketch Frankenstein’s face.
It’s easier to cut if you draw the parts on the larger side.
Try to draw features that enhance the eerie vibe, like droopy, sunken-looking eyes and a big nose.
A big spider
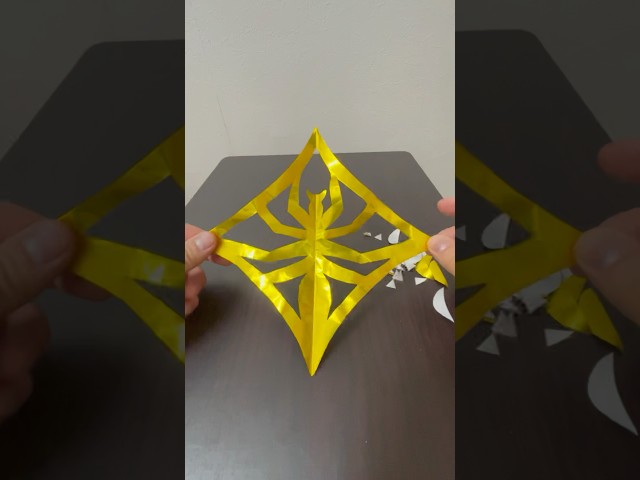
Here’s a simple paper-cutting idea for making a spider.
Fold a sheet of origami paper into a triangle three times, then draw six small triangles and one semicircle—prep done.
After that, just cut along the lines with scissors and you’ll end up with a big spider! You might wonder, “How do you get a spider without drawing one?” But the spider shape will clearly emerge within a diamond-shaped frame.
Spiders are a classic Halloween decoration, so try linking a few together to make a garland or use them as accents for wall decor.
Have fun putting them to use in different ways!
Windowsills and walls transformed! Papercut ideas to color your Halloween (31–40)
Ghost wreath
We’ll show you how to make a cute wreath of ghosts holding hands in a circle.
Fold a sheet of origami paper into a triangle, and repeat this step four times.
For the first three folds, fold the entire piece; on the fourth fold, only fold part of the paper toward the center.
Sketch a ghost design, then cut along the lines.
A tip: use a hole punch to cut out the eyes.
When you unfold the paper, your wreath will open up into a ring of ghosts.
The shadows it casts enhance the spooky vibe, making it a perfect item for Halloween.
In conclusion
Halloween decorations made with paper cutting create a special atmosphere where handmade warmth and a sense of the season harmonize. The magical world born from a single sheet of paper casts gentle shadows in your room, adding color to a memorable and delightful Halloween day.