
Windowsills and walls transformed! Paper-cutting ideas to color your Halloween


How about decorating your home with paper cutouts that are perfect for Halloween? The light filtering through cutouts placed on windowsills or walls creates a magical atmosphere.
Motifs like pumpkins, ghosts, and black cats really shine with the delicate expression unique to paper cutting and are sure to draw attention.
You don’t need special tools—just scissors and paper such as origami or construction paper to get started easily.
In this article, we’ll introduce Halloween paper-cutting ideas, from simple patterns anyone can make to more elaborate designs.
Windowsills and walls transformed! Papercutting ideas to color your Halloween (1–10)
spider

An idea for a slightly realistic spider that might make you go “Whoa!” at first glance if you don’t realize it’s paper cutting.
Perfect for anyone who wants a more authentic Halloween decoration.
Prepare black origami paper, fold it three times with the black side facing inward to make a small triangle.
Draw a spider illustration on top, then cut it out with scissors to create a wreath of four spiders! You can glue it onto a backing sheet or hang it as is for decoration.
You can also cut them apart and combine them with a separately made spiderweb papercut.
The Ghost, the Bats, and the Witch’s House
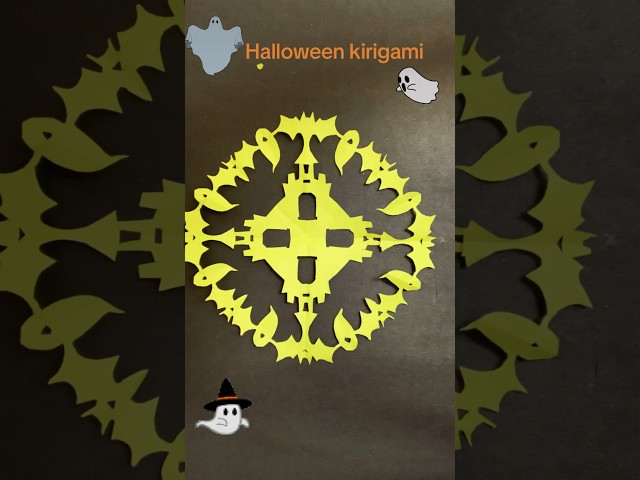
Around a witch’s house, there are surely lots of ghosts and bats, just like in this paper-cutting! To depict that slightly spooky scene as a papercut, you’ll need a single sheet of origami paper.
Fold the paper into a triangle three times, then sketch ghosts, bats, and the witch’s house.
Draw the witch’s house in the center of the paper, and place the ghosts and bats toward the edges so they surround it.
Once your sketch is ready, cut along the lines.
You’ll need to make fine cuts, so be careful not to cut your fingers—and don’t cut through any parts of the design that should stay connected.
Finally, unfold it, and you’re done!
Pumpkins and Bats

The cute paper-cut garland of pumpkins and bats is perfect for decorating a Halloween party with children! Prepare one square sheet of origami paper and cut it into three equal strips.
Join them together end to end to make one long strip.
Fold it in half once, then make small accordion folds from both sides toward the center crease.
Using that center crease as a guide, continue folding the whole strip into a compact stack.
When it’s folded enough, sketch pumpkin and bat shapes on top.
Cut along the outlines with scissors, then unfold the paper to reveal your design.
Make lots in different colors and decorate the room!
Pumpkins and Ghosts

It looks like a very intricate paper cutout, but you only need to draw three illustrations! Give it a try.
First, fold a sheet of origami three times to make a small triangle.
You’ll draw the illustrations there: at the top, draw half a pumpkin and a ghost; then in the center area of the triangle below, draw a wavy line.
Make sure each illustration overlaps at least one line somewhere so the pieces stay connected after cutting.
Once you’ve finished drawing, cut along the lines with scissors.
If the ghost’s or pumpkin’s eyes are hard to cut, using a craft knife is also an option.
Four Frankensteins
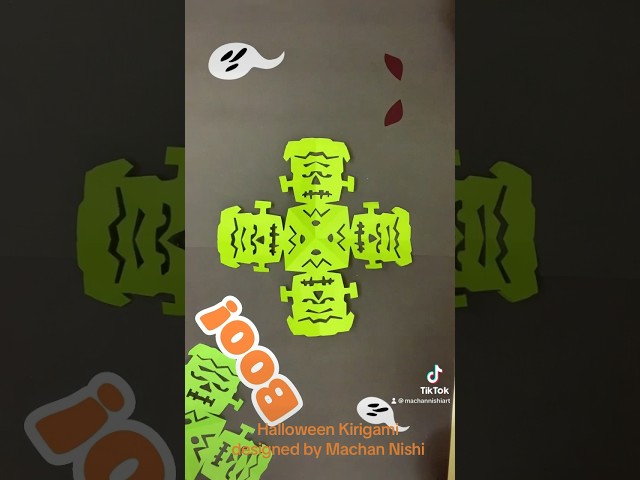
This paper-cutting featuring as many as four spooky Frankensteins—when even one is creepy!—can be easily made with origami.
Fold the origami paper into a triangle three times, then sketch Frankenstein’s face.
Cut along the guidelines with scissors, and unfold to reveal the finished piece.
If small children are making it, it’s best to skip the intricate details and go with a simple Frankenstein design.
If you want a more realistic look, try adding features like wrinkles for extra detail!
the letters of HALLOWEEN
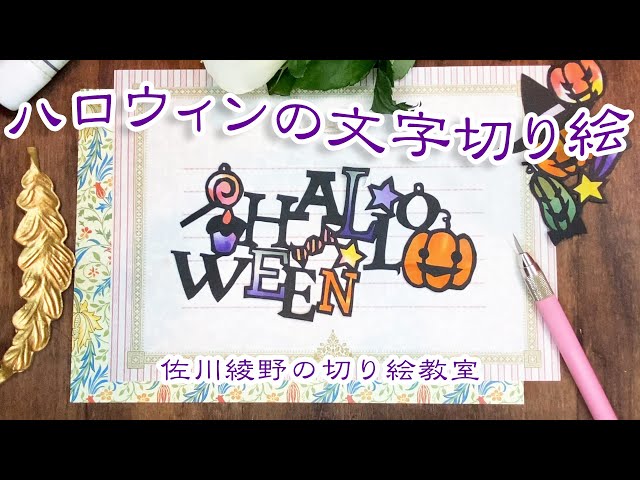
When you’re throwing a Halloween party, try expressing “Halloween” stylishly with lettering! First, sketch out the word “HALLOWEEN” in your preferred design.
It’s also a great idea to add drawings around it, like pumpkins or candy.
Once your draft is ready, use a craft knife to cut away the unnecessary parts.
It will already look wonderful, but if you want to make it even nicer, add color by attaching colored paper or colored cellophane to the cut-out areas.
You can make it larger and stick it directly on a wall or window, or make a smaller version and display it in a frame!
ghost

Ghost paper cutouts are perfect for creating a Halloween atmosphere.
Making them simply with white paper is lovely, but using colorful paper will make them even more fun.
Designs that can be easily made with just scissors seem great to enjoy with children.
Fold origami paper in half, lightly sketch a rounded ghost body with eyes and a mouth, then cut along the lines.
With a bit of creativity, you can open up a whole world of cute ghosts.
Display the finished cutouts on windows or hang them as mobiles to fill your room with Halloween spirit! Why not try making ghost paper cutouts yourself?