![[Educational] DIY Montessori-style toy ideas](https://i.ytimg.com/vi/gmdgWu981wk/sddefault.jpg)

Have you ever heard about the educational theory proposed by Montessori?
Montessori education is profound, and there are nursery schools and kindergartens that put it into practice.
There’s a growing movement to handcraft toys that align with its educational principles and use them to promote children’s cognitive development.
It’s also called “at-home Montessori,” and many families are trying it at home.
In this article, we’ll introduce ideas for handmade toys that support children’s learning.
All of them are easy to make, so please use them as a reference!
- Easy DIY! Introducing educational toys that can be easily made with 100-yen shop items and things around the house.
- [Let’s Make and Play!] Handmade Toy Ideas You Can Create Yourself
- [Easy] Handmade puzzle ideas. Toys for kids. Great for independent research projects, too!
- [For Elementary School Kids] Handmade Toy Craft Ideas
- Make it with everyday materials! A collection of DIY toy ideas recommended for 1-year-olds
- [Handmade Picture Books] A curated selection of recommended ideas perfect for early childhood education
- Handmade ideas for wall-mounted toys for 0-year-olds
- Popular with toddlers! A collection of homemade toy ideas
- [Daycare/Preschool] Handmade toys that delight infants
- It's fun to spin! A collection of DIY toy ideas
- Handmade Anpanman toy ideas
- [For Kids] Today’s Handmade Craft Ideas
- [Make with Kids] Handmade Outdoor Play Toy Special
[Educational] Montessori-style DIY toy ideas (1–10)
Velcro play
Here’s an idea for using cable ties sold at 100-yen shops as toys.
There’s no need to make anything—you can just play by peeling apart the hook-and-loop fastener on the cable ties and wrapping them around a stick.
The action of peeling requires pulling with both hands, which is good fine motor practice for small children.
The ripping sensation is fun too, and many kids will get absorbed in it.
Since many children’s shoes use hook-and-loop fasteners, this also helps them when putting on their shoes by themselves.
sensory mat

Let’s try making a Montessori sensory material: a sensory mat.
Sensory mats stimulate the nerves on the soles of the feet, promoting brain development and helping children develop a sense of balance.
Prepare a variety of items with different textures—such as sponges, plastic bottle caps, CD-Rs, and decorative pom-poms—and attach them to interlocking foam mats.
Then connect the mats to make a path and have your child walk along it.
As long as the materials are safe, anything is fine, so try exploring a variety of textures.
Pouring-and-transferring play
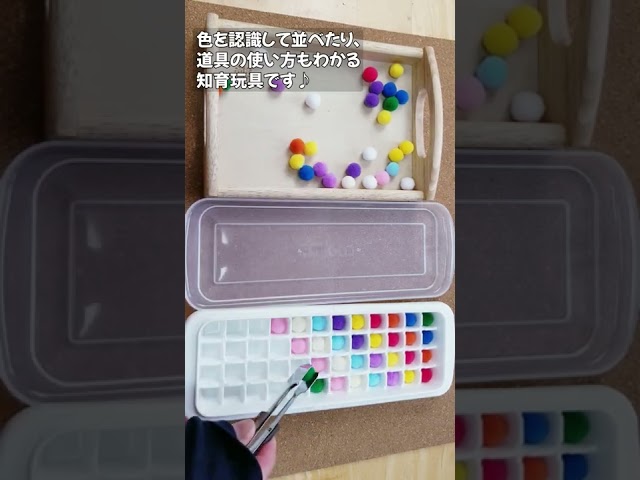
Let’s try a transfer activity using a small ice cube tray and pom-pom balls.
Transfer activities help children develop control of their fingers and wrists.
There are many kinds of transfer activities, but here we’ll use tongs to move pom-pom balls into the ice cube tray.
If you prepare colorful pom-poms, children can have fun while recognizing colors, and using tongs helps them learn how to handle tools.
You can also adjust the difficulty by changing the balls or tools depending on the child’s age.
Infinite Tissues

It’s a problem when tissues get pulled out, but you still want to support your child’s “I want to try it,” right? In that case, why not make infinite tissues? Kids can pull to their heart’s content and play over and over, satisfying their curiosity! All you need are two items from the 100-yen shop: a pull-out box and kitchen dusters.
It’s easy to make—just put the kitchen dusters into the pull-out box and you’re done! After everything’s been pulled out, stack and fold the dusters, and they can play again and again.
sensory bottle

Let’s make a sensory bottle that’s fun to look at with its sparkle and can be tilted or shaken to play with.
Prepare a small bottle, glitter or beads to put inside, liquid laundry starch, baby oil, and cooled boiled water.
Simply add the glitter or beads to the bottle, then pour in either the laundry starch, baby oil, or cooled boiled water.
The speed at which the contents move will vary depending on which of these you use, so try making different versions and enjoy the differences!
bodkin (drawstring threader)

Here’s an idea for making a lacing toy using cardboard.
Lacing toys are great for developing fine motor skills and offer focused play.
Cut the cardboard into the shape of a car, then attach a car cut from construction paper in the same shape, along with windows and tires.
Reinforce it by covering the surface with OPP tape, then punch holes all the way around the edge.
With the base of the lacing toy complete, next make the laces.
Cut vinyl cord or similar to your preferred length, taper the tip, and wrap it with tape.
drop-in box toy

For babies, the actions of looking, holding, and dropping are quite challenging.
But since these are fundamental movements, you’ll want them to pick them up little by little.
So let’s make a simple drop-in toy using items from the 100-yen shop.
Use a container like a coin bank, and for the pieces to drop, use name keychains.
Remove the metal fittings from the keychains, and decorate the name label area with stickers or masking tape to make them cute.
Besides name keychains, popsicle sticks or flower tags are also recommended.
To be able to take out the contents, cut out the bottom of the coin bank and make it open and close.