![[Enrollment] Handmade bag ideas you can use at daycare](https://i.ytimg.com/vi/BwkoCQmjxRQ/sddefault.jpg)
[Enrollment] Handmade bag ideas you can use at daycare


Here are some handmade bag ideas perfect for starting nursery school.
Pick out your child’s favorite characters, animals, or colorful fabrics together and come up with an original design.
Double the excitement!
It’s best to make the handles sturdy.
Adding pockets makes it easier to carry lunch boxes and snacks, so try making one while getting inspiration from various ideas.
For safety, it’s also important to secure and finish off the ends of the threads properly.
Looking forward to the finished bag will surely make your child excited for their first day of nursery school!
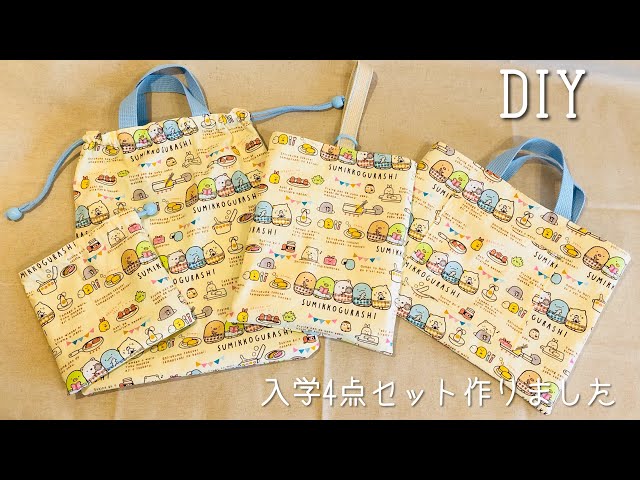
[Enrollment] 10 handmade bag ideas you can use at daycare
A change-of-clothes bag you can make without zigzag stitching
Lift your spirits with a favorite clothes-change bag! Here’s an idea for making a clothes-change bag without any zigzag stitching.
A clothes-change bag for daycare is used to store the extra clothes a child brings to daycare.
Typically, these bags have a tag or label with the child’s name, making it easy to tell them apart from friends’ bags.
Using this idea, you can make a bag sized 30 cm wide, 38 cm tall, with a 6 cm gusset.
Try making one with fabric featuring your child’s favorite characters or motifs!
Lesson bag made from a single piece of fabric

No lining or pattern needed! Here are ideas for making a lesson bag from a single piece of fabric.
Many people may be trying handmade crafts for the first time when their child starts daycare.
This time, let’s make a lesson bag with materials you can get at a 100-yen shop.
The main items you’ll need are quilted fabric and bag straps.
Choosing the fabric and colors together with your child can become a lovely memory.
Take this opportunity as your child enters daycare to give it a try with ease.
Scalloped Pochette with Double Gussets

Let me share an idea for a scalloped crossbody pouch for girls! A scalloped pouch has a flap that looks like flower petals—so cute.
To make this pouch, you’ll need two pieces each of exterior and lining fabric for the body, one piece each for the side panel, outer pocket, and the flap’s exterior and lining, plus a shoulder strap and one magnetic snap.
First, attach the magnetic snap to the pocket’s exterior and the flap’s lining.
Next, with right sides together, sew the pieces to make the flap and the pocket.
Make small snips in the seam allowance of the side panel, then sew it to the exterior body.
Sew the lining, and finally assemble all the parts together—and you’re done!
A reversible bag that can also hold a toolbox

Here’s a handmade idea for a large reversible bag.
First, cut your fabric: two outer pieces, one bottom piece, one main lining piece, and two pieces for the pockets.
Apply fusible interfacing to all pieces.
Make two pockets and sew one onto an outer piece and the other onto the lining.
Sew the two outer pieces to the bottom piece, then attach the handles.
Next, sew the outer and lining pieces together and create the gussets.
Turn the bag right side out through the opening, then stitch all the way around the bag opening to finish.
Because it’s reversible, you can enjoy two different designs.
A lesson bag you can make without a sewing machine

Perfect for handmade beginners! Here are ideas for making a lesson bag without a sewing machine.
Even if you’ve been putting off making a handmade lesson bag, this no-sew option makes it easy to get started.
The main body comes pre-assembled, so you just prepare your favorite outer fabric and stick it on—simple and satisfying.
You can also choose the handle color, which makes it fun to decide together with your child.
Give it a try!
How to make a small gym clothes bag

A perfect small size for preschoolers to use! Here’s how to make a smaller gym clothes bag.
Using this idea, you’ll end up with a double-drawstring gym bag with a simple structure—no lining and no gusset.
All you need are a 74 cm × 30 cm piece of fabric and two 75 cm color cords.
It’s great that you can choose a fabric you like together with your child, right? This is a wonderful idea that even those who feel intimidated by handmade projects can easily try!
Handmade indoor-shoe bag
When children move up to the preschooler class, some schools switch to a two-shoe system, meaning indoor shoes are required.
In that case, try making this indoor shoe bag with the following idea.
Prepare two outer fabric pieces, two lining pieces, one long and one short acrylic strap, and a D-ring.
First, sew the long acrylic strap into a loop onto one outer fabric piece, and on the other outer piece, sew a looped strap threaded through the D-ring.
With right sides together, sew each outer piece to a lining piece, then open them up and sew the two assembled pieces together with right sides facing.
Don’t forget to leave a turning gap.
Turn the bag right side out, close the turning gap, then topstitch all the way around the open edge to finish!