
When you want to make water play even more fun, waterway play is a perfect fit.
You can connect milk cartons to make a long channel, build slopes to roll super balls and toys—there are endless ways to play.
This article introduces DIY waterway ideas and toys you can use for water play.
Most materials are upcycled and easy to make, and we also share ideas for creating a water table using items from 100-yen shops.
If you like, try incorporating them into your summer water play!
- [Easy DIY] Let's make a water table by hand!
- Introducing DIY pool slides! Make your pool time even more fun.
- Handmade Water Gun Idea Collection
- Recommended for lower elementary school students! A collection of plastic bottle craft ideas made with everyday materials.
- [Enjoy Summer to the Fullest] Roundup of Toys and the Newest Gadgets for Playing in the Pool
- [Let’s Make and Play!] Handmade Toy Ideas You Can Create Yourself
- Fun and easy toy ideas made from empty Yakult bottles
- Kids and adults alike will be captivated! A collection of DIY marble run ideas
- Let's make toys with milk cans! Upcycling methods suitable for babies
- Let's make and play with kids! A collection of handmade yo-yo ideas
- [Handmade] Let's play with shuriken! A collection of homemade target practice ideas
- [For Kids] Today’s Handmade Craft Ideas
- [Playable from infancy] Fun DIY water play toy ideas
Handmade water channels for water play. Fun waterway toys (1–10)
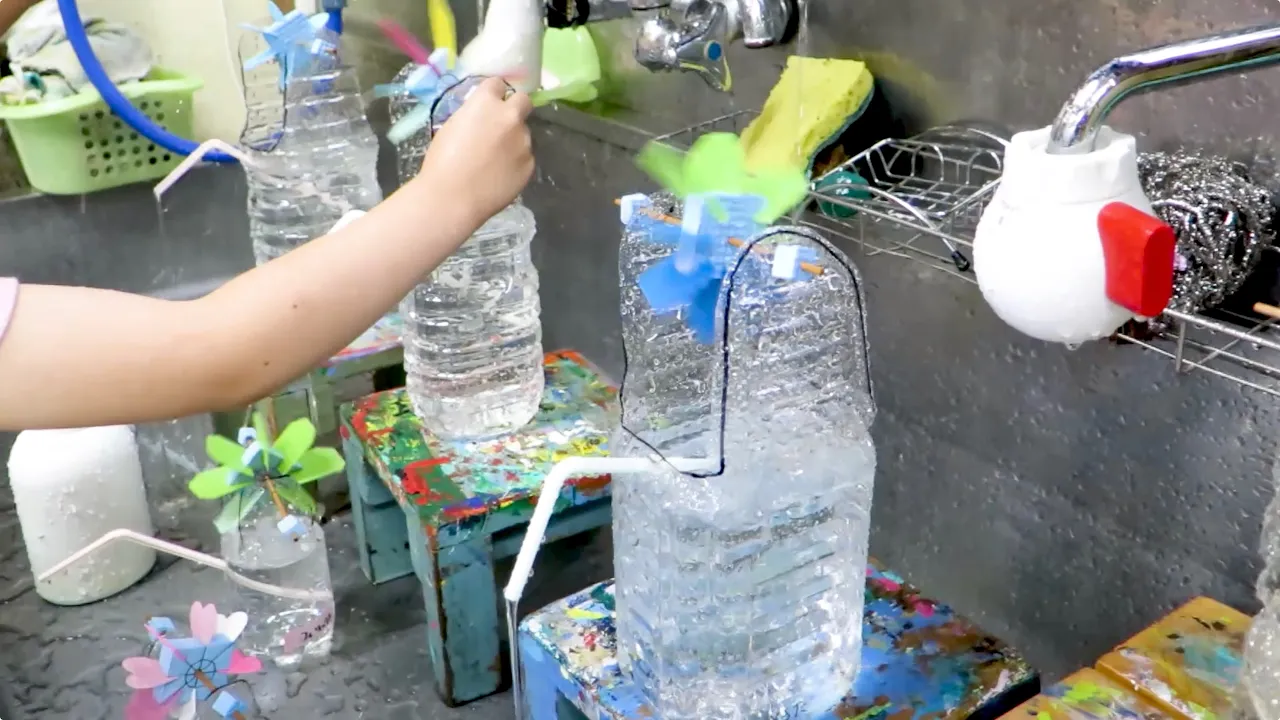
Plastic bottle waterwheel

Water wheels are fun to watch as they spin around and around, aren’t they? Here’s an idea for making a water wheel using a plastic bottle.
First, prepare a large plastic bottle and cut off the mouth.
Then cut the front and back sides down to about the middle, and make holes in the remaining left and right sides.
Attach a sponge hub to a bamboo skewer and insert the water wheel blades.
Pass it through the holes, and to keep it from slipping out, add sponges on both sides.
Finally, make a hole in the front of the bottle, insert a straw, and you’re done.
Plastic bottle tower

How about making a plastic bottle tower you can pour water through from the top? Cut off the bottoms of plastic bottles and cover the cut edges with vinyl tape or similar to prevent injuries.
Then simply stack them one by one with the mouth facing down.
You can enjoy watching the water flow downward, or drop marbles or acorns through it.
You can adjust the height by the number of bottles—keep it low when playing with younger children, or challenge older kids to see how tall a tower you can build!
[PET Bottle] Water Table
Here’s an idea for a water table that creates a waterway using plastic bottles.
Make the base by attaching a wire grid to a garment rack.
Remove the caps from the bottles and cut openings so you can pour water in.
Since the cut edges can be sharp, be sure to cover them with vinyl tape for safety.
Arrange the bottles so that when one tilts under the weight of the water, the water flows into the next bottle, forming a channel.
It’s also a great idea to connect hamster pipes or tubes to extend the waterway.
Swirly Shower

Here’s an idea for a fun “Spinning Shower” that turns when you pour in water.
You’ll need one milk carton, four straws, and some cotton twine.
Cut off the spout of the milk carton, then make one hole in the lower right side.
Also make two holes on the upper left and right sides of the carton.
Insert a straw into the lower hole, and thread the twine through the upper holes to make a handle—that’s it! For the straw end that sticks out, cut a small slit and wrap tape around it to make it narrower.
Pour water in from the top and have fun watching it spin.
milk carton slope

As an easy-to-make water channel, let’s try building a slope using milk cartons.
The parts you’ll make are the rail portion of the slope, two pillars, and two bases into which the pillars will be inserted.
For all the milk cartons you use, cut off both the spout and the bottom beforehand.
Create the rail by connecting milk cartons that have been cut in half lengthwise.
For the bases, cut out the central area of the side that will face upward.
For the pillars, cut out openings at the top and bottom of the milk cartons so the rail can slide through.
Once the parts are ready, assemble them to complete the build.
You can adjust the slope angle by changing the height of the pillars to your liking.
PET bottle waterway

Here’s an idea for making a long water channel by connecting plastic bottles.
Cut off the mouth and bottom of a plastic bottle, then split it lengthwise into two halves.
To prevent injuries, cover the cut edges with vinyl tape or similar.
After that, connect more bottles cut the same way, and your water channel is complete! If you want a large channel with a dynamic flow, use 2-liter bottles.
If you want a narrower, smaller channel you can extend over a long distance, use 500 ml bottles.
After playing, you can even repurpose it as a tool for nagashi-somen (flowing somen noodles), so give it a try!
Plastic bottle fountain

Fountains are a must-have, fun item for water play, aren’t they? This idea uses a 2L and a 350ml plastic bottle.
Cut off the mouth section of the 2L bottle and cover the cut edge with vinyl tape.
Make a small hole in the cap of the 350ml bottle.
After sticking vinyl tape on the lower part of both bottles, make holes through the taped areas.
Insert the ends of a long, connected straw into each hole, and your fountain is complete.
Fill the 2L bottle with water, lift it, and transfer the water to the 350ml bottle.
When it fills up, water will spout out from the hole!