
Preschool observation day is when guardians come to see how their children are doing at daycare or kindergarten.
It’s an event that not only the children but also their guardians look forward to.
Many teachers may be thinking, “We want to make observation day a special time that parents and children can enjoy together!”
So this time, we’re sharing recommended craft ideas for observation day.
We’ve gathered plenty of project ideas that parents and children can enjoy together—memorable keepsakes, toys you can play with after making them, and instruments that make sounds.
Everything can be made easily with familiar materials, so please use these as a reference!
We hope your observation day will be full of smiles and deepen the bond between parents and children.
- [Nursery/Kindergarten] Crafts you can play with after making them
- Parent–child interactive play. Fun activities popular in childcare settings and at parent–child observation days.
- [Childcare] Recommended for 3-year-olds! Craft activity ideas
- [Childcare] Playful craft ideas to enjoy with 5-year-olds
- Make it with everyday materials! A collection of DIY toy ideas recommended for 1-year-olds
- [For toddlers] Simple but amazing craft ideas — including toys they can play with
- Handmade Instruments for Preschoolers | Instruments You Can Make Together with Your Child
- Let's make toys with paper cups! Simple and fun handmade toys
- Let’s make it with 3-year-olds! Fun handmade toy ideas
- Indoor games for parents and children: fun activities that use the body and the mind
- Let's make toys with milk cartons! Easy and fun DIY crafts!
- Childcare: Fun February craft ideas to make with 1-year-olds
- [Today's Craft] Fun craft ideas recommended today that are useful for childcare!
Ideas for craft activities that parents and children can enjoy together at a preschool observation (1–10)
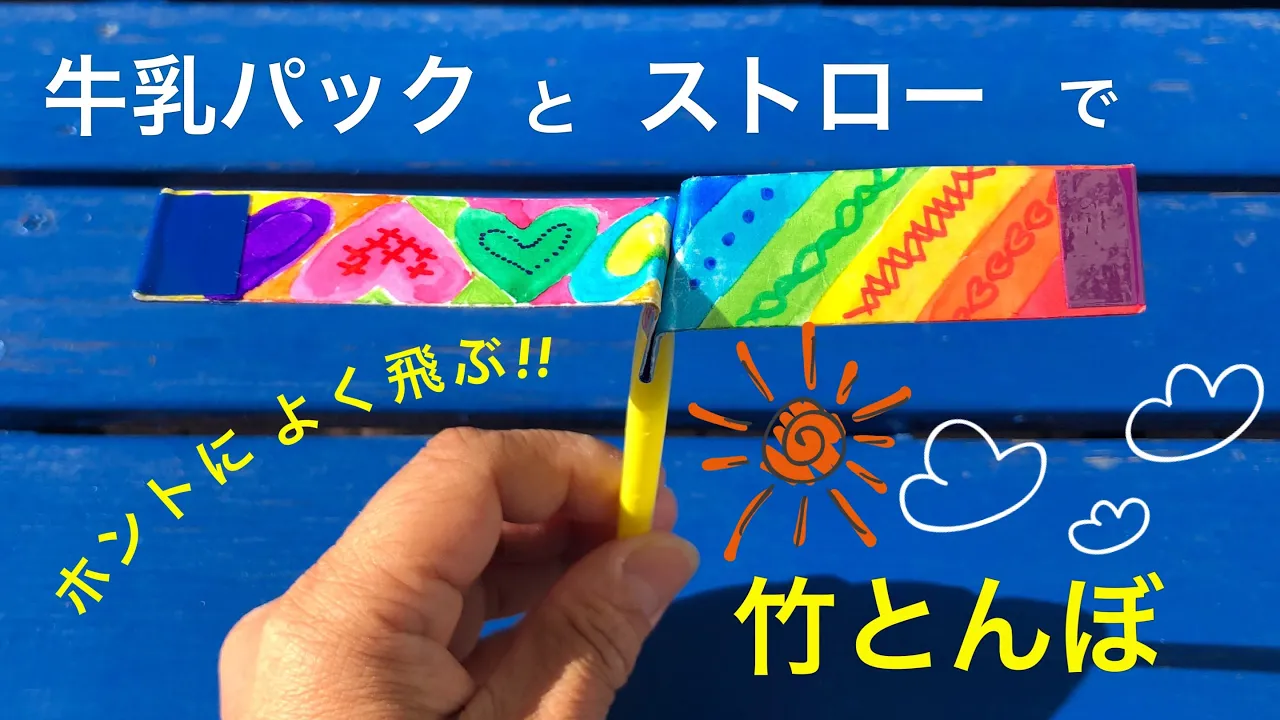
straw dragonfly

This is a handmade bamboo-copter (taketombo) made from a milk carton.
Cut the milk carton into strips and draw patterns on them with a pen.
Coloring them brightly makes it look beautiful when it spins! Next, make a slit in a straw that will serve as the handle, and insert a milk carton piece folded in half.
Staple the inserted part firmly, then fold the milk carton diagonally and spread the wings to both sides to finish.
To make it spin well, add a bit of weight by putting tape on the tip of the milk carton—this is the key! Since it’s made from a soft milk carton, it’s safe to play with indoors.
Chomp Chomp Castanets

Let’s handcraft castanets—star performers in any ensemble—using a milk carton.
Cut the milk carton into pieces sized for the top and bottom parts of the castanets, and glue construction paper on the outside.
From here, it’s the kids’ turn! Have them freely draw animals or their favorite characters on the construction paper.
Tearing paper for collage or decorating with stickers will also make it look great.
Next, use an awl to make holes, thread a chenille stem (pipe cleaner) cut to a length that fits a finger, and attach plastic bottle caps on the inside so they make a clicking sound.
Your original castanets are complete!
Frisbee

This is a handmade frisbee made by cutting open paper cups.
Divide the circumference of two paper cups into five equal parts each, and make straight slits down the sides.
Open them out into flower shapes, then decorate one with patterns using pens or stickers.
Place the other paper cup over the opposite side (the side without the drawing) and staple them together to complete a colorful frisbee! Be careful not to pinch your fingers when using the stapler.
Once you’re done, have fun with the frisbee’s unpredictable and amusing movements.
Tokotoko doll

This is an adorable toddling toy made by combining a paper cup and a battery, and the way it scampers along is irresistibly cute.
Make small slits at two spots on the rim of the paper cup and at the two spots directly opposite them, then fold the slits outward.
Prepare a part by attaching a rubber band to a battery and securing it with cellophane tape.
Hook the rubber band into the slits so it sits inside the cup, and tape it in place.
After adding animal ears or legs to the cup, or drawing your favorite character on it, twist the battery and set the cup upside down.
You’ll be delighted to see it move faster and cuter than you imagined!
photo frame

Let’s try making a handmade photo frame to beautifully display pictures with your family and friends.
Prepare a piece of cardboard sized to fit your photo, and cut out the center, leaving the frame portion.
Next comes the important decoration of the frame! Tear and paste origami paper in various colors and patterns, add stickers, or attach origami motifs—decorate freely as you like.
Stick double-sided tape on the back of the frame and attach it to the photo to finish! When you pair a cherished photo with a frame filled with memories from the daycare visit, you’ll have a lovely object you’ll want to display forever.
koma

The spinning tops made from paper plates have wonderfully striking patterns that appear when they spin.
Fold the paper plate to make a cross-shaped crease, then freely draw your designs.
If you stick a plastic bottle cap at the point where the creases intersect, it’s done in no time! Pinch the bottle cap, give it a spin, and play.
As the top spins, the colors blend and look even prettier, so it’s recommended to finish with a colorful design using pens and stickers.
Since you only need a paper plate and a bottle cap to make one, you might find lots of kids saying, “I want to make this at home, too!”
Paper Cup Rocket

This is a paper cup rocket that launches with a burst the moment you let go.
Stick origami paper on the sides of a paper cup and make four slits.
Combine two rubber bands and hook them into the slits, then use construction paper and pens to finish it into a rocket.
Prepare another paper cup as the launch pad and place the rocket cup over it from above—thanks to the rubber bands, your rocket will pop out with a spring! Feel free to make it as a favorite motif for kids—like characters or animals—instead of sticking strictly to a rocket theme.