Paper quilling ideas made by rolling strips of paper

Paper quilling is a craft made by combining parts created from thin strips of paper rolled up tightly.
It is said to have originated with European nuns, who created it to decorate religious items.
The name comes from the quill—the bird feather shaft—around which the paper was originally wound.
In this article, we’ve gathered ideas for paper quilling featuring cute, uniquely spiraled designs.
We also recommend arranging beautiful petals into bouquets or using them to decorate message cards.
Be sure to check out these paper quilling pieces that add a touch of elegance to home decor and gifts.
- Christmas crafts for adults: stylish project ideas you'll want to display
- Easy flower craft ideas you can make with a single sheet of origami paper
- [Craft] Sparkling! A Collection of Handmade Kaleidoscope Ideas
- Ideas for paper cup crafts for adults: from interior decor to practical items.
- [Easy] Stylish Paper-Cutting Craft Ideas Collection
- Handmade ideas for paper items: DIY tips to help with wedding preparations
- Construction paper craft ideas adults can enjoy—from small accessories to stylish home decor
- Let's Make and Play! A Collection of Homemade Kendama Ideas
- Simple and easy! Crafts perfect for killing time
- Stylish ways to wrap with wrapping paper: A roundup of cute gift-wrapping ideas
- A collection of handmade bouquet ideas that convey feelings of gratitude and celebration
- Three-dimensional carnations made with origami: a collection of simple, cute ideas
- Ribbon made with origami! A collection of simple and cute folding ideas
Paper quilling ideas made by curling and rolling paper (11–20)
Snowflakes
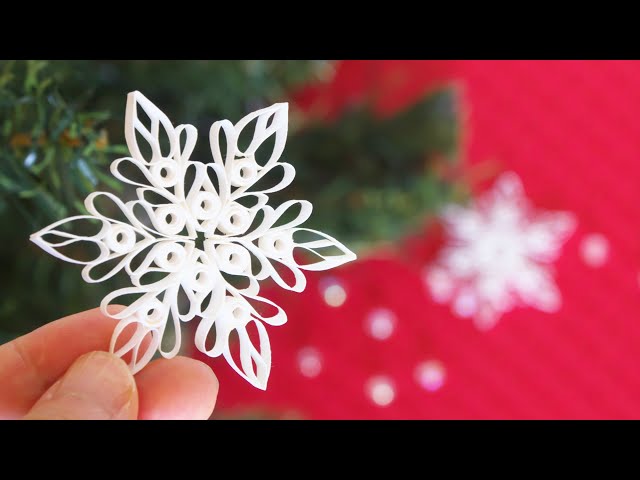
Let’s make snowflakes with paper quilling that could also work as Christmas tree ornaments.
To start, prepare 12 tight circles and 18 heart pieces.
For the hearts, fold a strip of paper in half and glue both ends to the crease.
Next, make six pieces where the left and right sides of the heart are glued together, and six more heart pieces with a tight circle sandwiched and glued in the center.
After that, all you have to do is assemble them! Begin by gluing the heart parts with a tight circle into a flower shape.
Once you’ve made the parts, it’s just a matter of gluing them together, so it’s easier to make than it looks!
In conclusion
Paper quilling, which is made by repeating simple steps, hinges on the stage where you glue each part together with bond or other adhesives after creating them. By adjusting the placement and angles of the parts, you can create highly polished decorations. It’s also appealing that adding them to a gift for someone special or to your interior brings a touch of elegance. Give paper quilling a try and enjoy the warm, natural feel of motifs like flowers and living creatures.