Ribbon made with origami! A collection of simple and cute folding ideas

Have you ever felt like you want to try making a cute ribbon out of origami, but you might give up halfway if the folding is too complicated? In fact, there are several easy ways to fold a ribbon using just one sheet of origami paper.
They’re perfect for decorating small gifts or adding a charming touch to letters, and the finished result looks so gorgeous you wouldn’t believe it’s origami.
In this article, we’ll introduce simple origami ribbon folds you can try right away.
Even if you’re not very handy, you’ll find these fun to make—so feel free to give them a try!
Ribbon made with origami! A collection of easy and cute folding ideas (1–10)
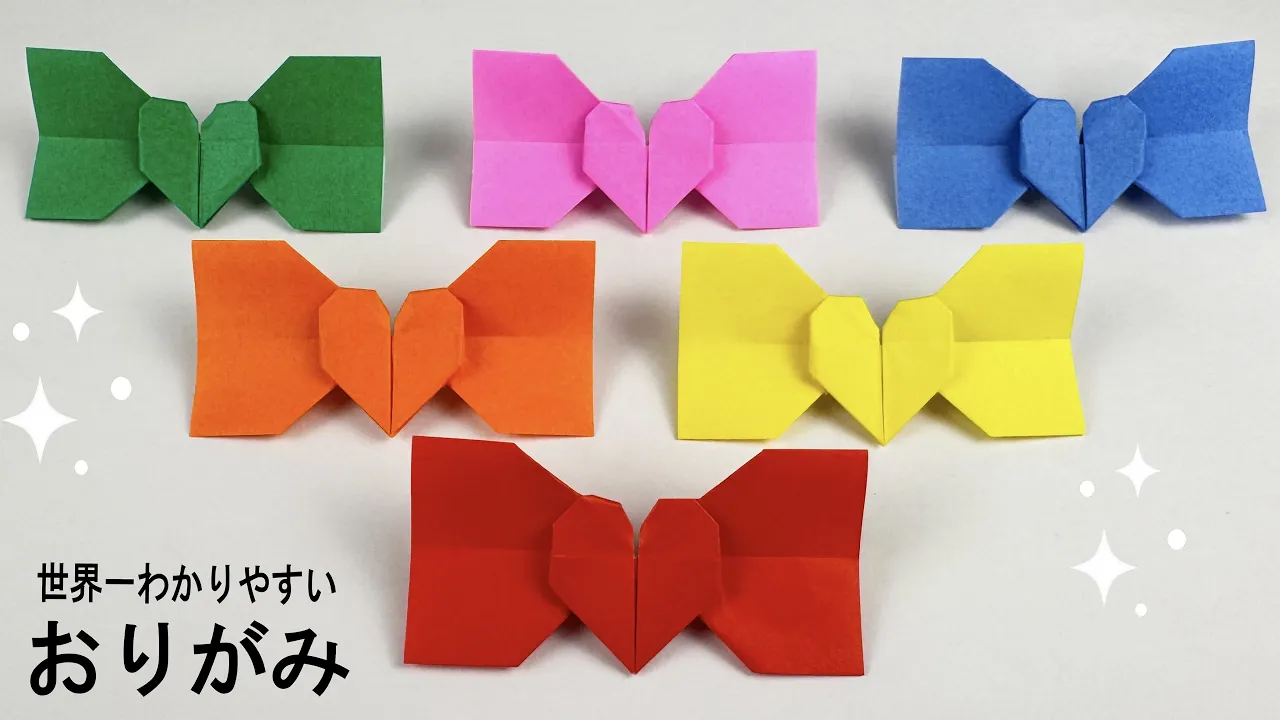
Origami ribbon with a heart

This is an adorable ribbon featuring a heart in the center.
It’s amazing that it’s made from just a single sheet of origami, isn’t it? Pick your favorite color or patterned paper and let’s get started! After cutting the origami paper in half, fold it lengthwise.
Unfold it and fold the sides along the crease.
Fold it in half vertically to start forming the ribbon shape.
Along the way, you’ll be able to create a heart in the center.
Some steps are a bit intricate, but you’ll feel a great sense of accomplishment once it’s finished.
It also makes a wonderful gift for children or for women.
A relatively easy ribbon origami

Here’s how to fold a ribbon you can use in many situations.
Fold the square into three equal parts.
Fold the bottom layer up to align with the top edge.
Now fold the top edge down to align with the bottom edge.
Fold the top and bottom to meet at the center, then fold the upper-right center layer up to align with the top edge.
Now fold the top edge down to align with the bottom edge.
Fold the top and bottom to meet at the center, then fold up to the upper-right center.
Squash-fold the center into a square shape.
After turning it over, open the left and right sides into a ribbon shape and adjust to finish!
Easy and cute! How to fold a ribbon

This is a three-dimensional piece where both sides of the knot are shaped like petals.
It’s a great idea for those looking for a ribbon shape different from the classic triangle.
First, fold the top and bottom corners of the origami toward the center, then fold the same way once more.
Fold it in half by bringing the left and right sides together, then open the two corners along the crease and squash them into triangles.
Turn the origami so the triangular parts are on the inside and a flat surface is facing up, then fold back the previously layered left and right sections to the opposite side, aligning them with the squashed triangles.
Fold all four corners of the new creases into small triangles, then gently open the origami to the left and right to complete the ribbon.
A customizable origami ribbon

You can write a message in the opening! Here’s how to fold a cute ribbon card.
Place the origami with the white side facing up.
Fold it using the Kannon fold, then fold both top corners down to the center.
Using the folded corners as a starting point, fold the corners diagonally.
Make a fold about 2.5 cm below the top corner.
Fold the center corner upward.
Fold the bottom edge up to meet the folded corners.
From the edge as the starting point, fold the corners diagonally downward.
Tuck the folded part into the gap.
Fold the center corner just a little, and your ribbon card is complete!
Origami heart with a ribbon

A ribbon pops out of a heart! Here’s a very cute origami to try.
First, fold into a triangle twice to make creases, then squash along the creases.
Squash-fold the inner sections so they become triangles.
Fold all four corners up along the edges, then fold down both corners on one side.
Flip it over and shape it into a heart.
Turn it to the front and fold the two bottom corners diagonally outward so they stick out.
Open the top part into a pocket and adjust it into a ribbon shape, and you’re done! Writing a message and adding it as a gift will make it even more delightful.
A Playable! Ribbon Ring Origami

Also great for pretend play! This is an origami ring with a cute ribbon.
First, fold into a square and fold the front edge up to the center, then cut.
Take the cut piece and fold the top and bottom edges to align with the crease.
Fold the left and right edges in to meet the center.
Fold the top and bottom edges to the central crease.
Unfold, then make inside reverse folds along the creases.
Open it and fold the layers inward along the creases.
Fold the left side to the right, using the upper and lower right corners as a guide, to the right.
Fold only the top layer of the top and bottom to align with the center slit.
Next, fold the left and right edges.
Flatten the triangles.
Turn it over and tuck the left and right edges into the inner gaps.
Once tucked, fold the ends.
Fold the left and right sides along the outside of the triangles to shape it into a ring, and you’re done!
Easy and cute! How to fold a ribbon

Let’s make a very simple ribbon using a single sheet of origami paper! Fold your chosen color of origami in half horizontally, then fold the sides in toward the crease.
Unfold, and fold the top and bottom toward the center crease.
Rotate it and fold in half, then fold the sides toward the crease.
Fold it in half vertically and horizontally, open the center, spread it into a triangle and squash it; repeat on the other side.
You’re almost there! With this very simple folding method, you’ll have an adorable ribbon.
It’s easy enough for small children and older adults, so give it a try.