Irresistible Ideas You’ll Want to Make: Cute Origami Box Designs

Origami boxes are not only practical—they’re perfect for small gifts and trinket holders, too.
If you’re going to fold one, wouldn’t you like to finish it with a cute design you’ll want to show off? In this article, we’ve gathered a wide range of ways to fold adorable origami boxes.
From simple shapes to lidded versions, these ideas are great for everyday use and special events alike.
Enjoy them with your kids, or incorporate them casually into your daily life—give them a try in all sorts of situations!
Irresistible to make! A collection of cute origami box ideas (1–10)
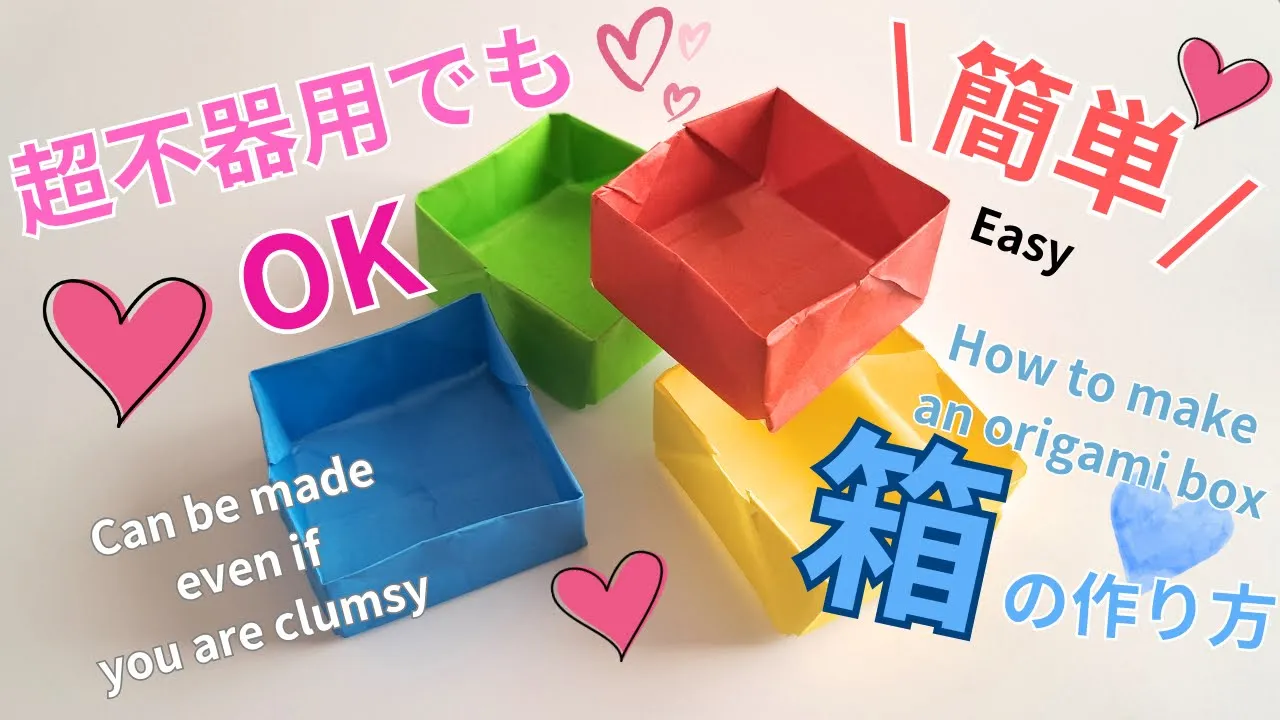
Easy! How to Fold a Cute Box

Even beginners at origami can make this! Here’s an easy way to fold a box.
First, flip the paper over, fold it into a triangle twice, and open it.
Fold each corner toward the center.
Open it up, then fold all four corners to the center along the crease lines.
After folding to the middle, lift one layer and fold it upward.
Keep folding along the lines, lift one layer, and fold it up.
Fold the triangular flaps to the back, then open it out so it forms a box shape.
Adjust the shape and you’re done! You can use it in many situations, so try making it to match the season.
How to fold a cute flower-shaped little box

Here’s a cute idea for a box that blossoms open in a flash.
First, fold an origami paper into a triangle twice, open up the pocketed part and squash it to make a square.
Place it with the corner that will be the center of the piece pointing down, then fold both bottom edges in to meet the center line.
Do the same on both sides.
Using these creases, open the pocketed sections again and squash them, then fold both side corners of every face in to meet the center line.
Fold the top corner down at the color boundary, then gently open it up to form a box.
Make two of these boxes and stack them to complete the flower box.
Square box with lid

Let’s make a cute lidded trinket box.
Rotate the paper and fold it into thirds twice to create creases for a 3×3 grid.
Add diagonal creases to the corner squares, then fold along the creases to form the box shape.
For the lid, first do a zabuton fold with the origami paper, then fold the top, bottom, left, and right edges in sequence to meet at the center.
Unfold those sections, and using the creases as guides, repeat the same folds once more.
Leave the two corners that are diagonal from the first folds intact, open all the other folded parts, and collapse into a box shape.
Next, tuck the rim inward to make the side height one-half.
Finally, attach a bead as a handle, and you’re done!
A box shaped like candy

This is an adorable candy-shaped box that adds a little surprise to everyday life.
The idea involves a series of steps that create fine creases.
Using those creases, you’ll ultimately form a hexagon in the center with triangles on either side, finishing it in the shape of a candy.
Since the creases are crucial, please proceed carefully with each step.
If the creases are properly made, the shape will hold without needing tape or other fasteners.
Use polka-dot or striped origami paper for a fun, pop look.
A simple and stylish box

This is a simple and stylish tall origami box with a clean, attractive shape! First, with an edge facing you, crease the paper into eighths both vertically and horizontally.
Next, fold it into a triangle twice to make creases, then add creases to the left and right sides.
It’s important to align the creases precisely when folding.
Once you’ve made creases at all four points, fold along them from the sides so that all faces form the shape of a box.
Finally, firmly crease each edge again to refine the shape, and you’re done! It can be used as a small container or for wrapping, making it a handy, easy-to-make practical item.
A cute box with mini drawers

Here’s an idea for a drawer made by combining two square boxes.
One of the boxes has a handle, so it scores top marks for both design and usability! Fold two opposite corners of the origami to the center, then fold again into thirds to make creases.
After that, fold the remaining corners inward to form the box shape.
To make the box with a handle, fold one of the corners that would normally be folded to the center back outward.
Make several and combine them to create a chest of drawers.
Hexagonal box accessory case

Fold a square sheet of origami to make a rectangle in your preferred size, then use a glue flap to form it into a tube.
Flatten the tube so it’s halved, then fold it into thirds.
After creasing firmly, return it to a tube and it will form a hexagon.
Make cuts along the creases, glue to form the base, and create a lid using the same steps.
Reinforce the base and lid by layering additional origami paper, then decorate with beads to finish.
You can make the tube and lid from the same paper, or use different colors for a cute look.