
What I’d like to introduce this time is a fun handmade toy that’s entertaining when you spin it.
We’ve gathered lots of ideas for toys you can make from familiar materials like paper cups and paper plates, as well as from recyclables like empty boxes and plastic bottle caps.
Once they’re finished, they’re full of clever mechanisms that make you want to spin them again and again! You can get the other materials at 100-yen shops or home improvement stores, so be sure to find a toy you like, make it, and have fun playing with it!
- Moving! Spinning! Flying! Fun handmade toys made with rubber bands
- Made with toilet paper rolls! Exciting and fun easy handmade toys
- Made of paper! A fun collection of DIY toy ideas you can play with
- Fun for elementary school kids! A collection of craft ideas using plastic bottle caps!
- [DIY] A Collection of Handmade Moving Toy Craft Ideas
- Fun and easy toy ideas made from empty Yakult bottles
- Let's make toys with paper cups! Simple and fun handmade toys
- Make It with Pipe Cleaners! A Collection of Simple, Fun, and Playable Toy Ideas
- [For Kids] Spins in the wind! A collection of recommended DIY pinwheel ideas
- Handmade toys with cardboard! DIY game ideas that will captivate kids
- Kids and adults alike will be captivated! A collection of DIY marble run ideas
- Let's make toys with straws! Easy and fun DIY toys
- [Let’s Make and Play!] Handmade Toy Ideas You Can Create Yourself
Spin it around and have fun! A collection of handmade toy ideas (1–10)
Spinning Picture Match

Let’s make a spinning picture-matching toy! First, we’ll make the reels, so prepare three cardboard tape cores.
Paste pictures you like around them.
Close off the sides of each core with construction paper.
If you put something that makes noise inside, like a bell, it will jingle when it spins and be extra fun! Next, make the main body out of cardboard.
Punch holes in the cardboard so a plastic wrap tube can go through, slide the three reels onto the wrap tube, then fix the tube to the outside of the cardboard with glue.
Finally, cover it with construction paper to finish it nicely! Because the pictures spin and it makes sounds, little kids and babies will be fascinated!
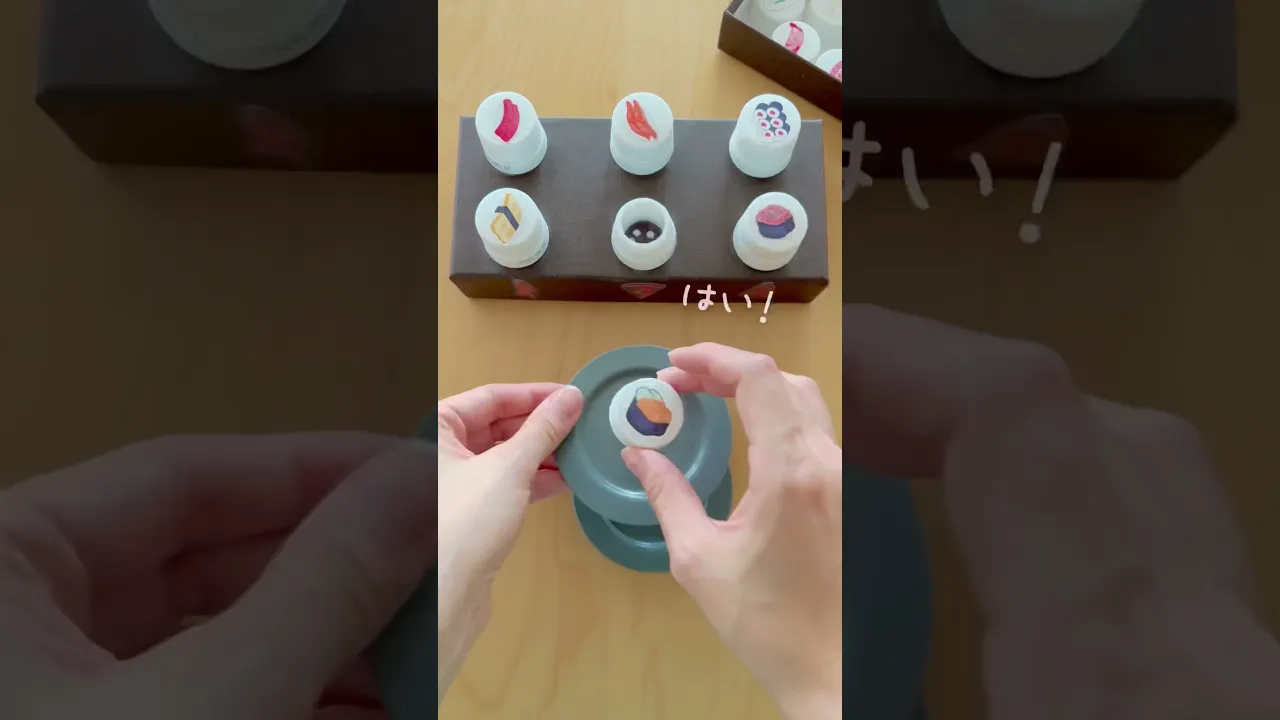
conveyor-belt sushi

Here’s an idea for making a spinning sushi shop using plastic bottle caps.
Get an empty plastic bottle, glue, and a box ready! Cut off the spout of the plastic bottle with scissors.
After cutting, glue it to the box to secure it.
Then stick sushi stickers or drawings onto the bottle caps, and you’re done! When an order comes in, find the cap with the ordered sushi, twist it to unscrew it, and serve it on a plate.
The kids are sure to get excited!
Bubbles that gently spread

Let’s make a bubble-blower toy.
You will need curling ribbon, hole-punched stickers (reinforcement labels), a straw, double-sided tape, and scissors.
First, cut 12 ribbons, each 16 cm long.
Next, stick the cut ribbons onto a hole-punched sticker, placing them diagonally across from each other.
Once they’re attached, secure them from above with another hole-punched sticker.
Do the same on the opposite side to form a sphere.
Next, apply glue to a sheet of origami paper, roll it into a rod shape, and insert it through the hole.
Then cut a straw to about 6 cm and make four 1 cm slits at the end.
Apply double-sided tape to the four slit sections, insert the straw from the bottom of the rod, and press it together with the ribbons.
At the top, make four 1 cm slits in the rod as well, and attach the ribbons in the same way.
It’s done!
Swirling Charge Ball

Here’s how to make a Swirly Charge Ball.
Prepare rubber bands, a toy capsule, magnets, colored pens, a hole punch, and paper large enough to wrap a thin, stick-shaped magnet.
Draw a picture on the inside of the toy capsule with the colored pens.
Wrap the magnet in paper and secure it with cellophane tape, then punch a hole and thread a rubber band through it.
Open the top and bottom of the capsule, thread rubber bands through two holes on both the top and bottom, and hold them in place with chopsticks.
Once that’s done, start tying the rubber band that’s attached to the magnet.
Tie the rubber bands from the top and bottom capsule halves together, remove the chopsticks, and close the lid to finish! Spin the rubber band and magnet inside, then roll it and observe how it moves.
It’s sure to be a hit!
A spinning toy made from plastic bottle caps

We’ll show you how to make a toy using plastic bottle caps that feels satisfying to spin.
One ring is made from 12 plastic bottle caps, so prepare as many caps as you need for the number of rings you want.
Use an awl to make a hole in the center of each cap, thread twine through them, and form a ring.
For the outer frame, use milk cartons.
Stand two milk cartons upright on either side of a piece of cardboard.
Slide the ring you made onto a rod, then insert the rod into both milk cartons like a horizontal bar, and you’re done! If you stuff the milk cartons with newspaper or similar material to reinforce them, they’ll be less likely to tip over.
twirling spin stick

Here’s an idea for a twirling spinner that’s fun to watch as it falls while spinning.
You’ll need snow blocks, sponge blocks, wire, vinyl tape, glue, and wooden chopsticks.
You can get everything at a 100-yen shop! First, wrap the wire around a chopstick and secure the end with vinyl tape.
Poke the stick into a sponge block to make a hole.
To fix it in place, put some glue into the hole before inserting the stick.
Make several sticks the same way, and you’re done.
If you place the hole of a snow block onto a stick, it’s fun to watch it drop while spinning around and around!
Rotating octopus fishing

Here’s an idea for an octopus toy that spins just by lifting it up.
Prepare a paper cup, string, a chopstick, scissors, and a pen.
Paint the paper cup in your octopus color, then make cuts with scissors from the rim toward the bottom to create the tentacles.
Fold all the tentacles upward at about one-third of their length, on a diagonal.
Poke a hole in the center of the bottom, thread the string through, and tape it on the inside so it won’t slip out.
Tie the other end of the string to a chopstick, and you’re done.
When you lift it up from the floor, the octopus will spin around! Finish it off by drawing a face and suckers with a pen.