Recommended for 1-year-olds! Craft play ideas and fun crafting techniques


Creative activities are not only great for developing fine motor skills; they also let children touch a variety of materials, enjoy different textures, and express their own ideas—making them an essential part of healthy growth.
In this article, we’ll introduce craft ideas recommended for one-year-olds.
From projects that use various techniques to ones you can play with after making, it’s packed with fun, sensory-rich ideas.
We’ve gathered lots of activities that one-year-olds can enjoy, like crumpling paper and touching paint with their fingers.
Watch over the children’s expressions and creative gestures, and try making them together!
Because the children’s creations are regarded as works (art pieces), we use the term “seisaku” (制作) in the text to refer to them.
Recommended for 1-year-olds! Craft play ideas and fun crafting techniques (1–10)
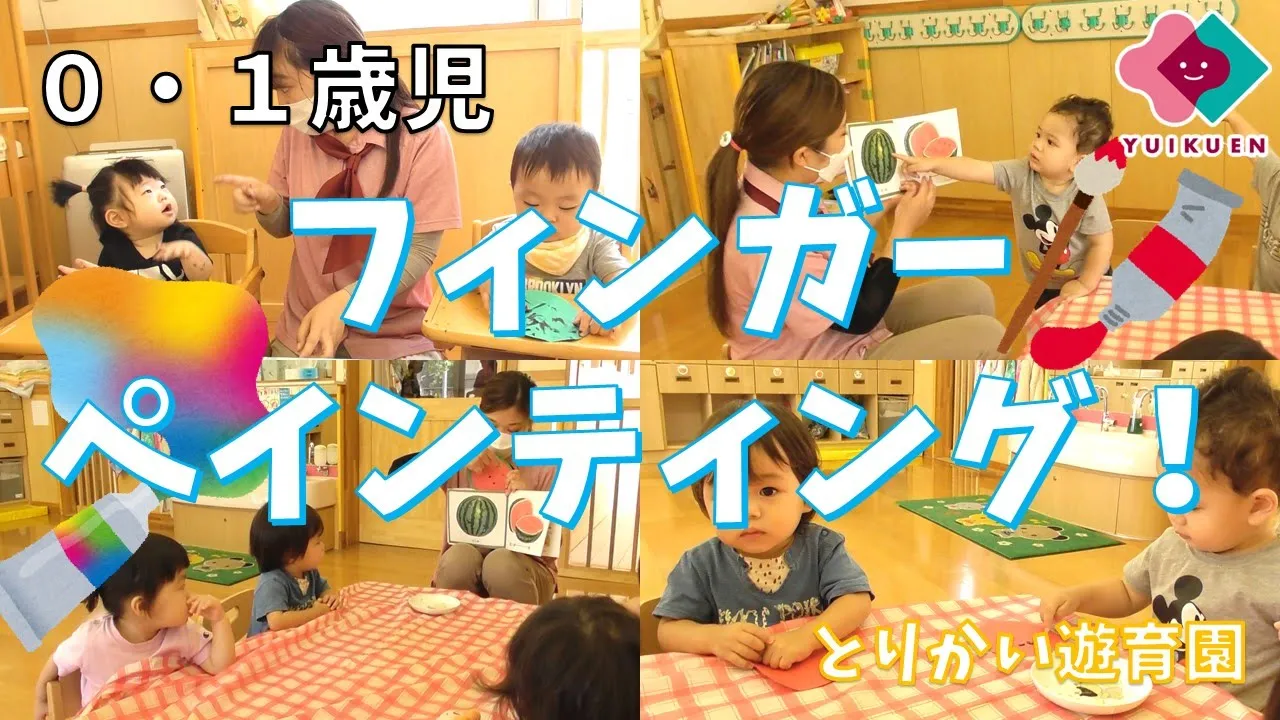
Watermelon in finger painting

One technique that promotes the development of fine motor skills while having fun is finger painting.
Feeling the texture of the paint with their fingertips and trying it out on drawing paper provides new stimulation for children.
Free drawing is of course great, but preparing a watermelon template and guiding them to paint the seeds makes it easier for children to form an image, so it’s recommended.
While talking with them about what the seeds looked like in picture books or in real life, let’s dab the paint—dot, dot—onto the paper.
You’ll end up with a wonderful, one-of-a-kind watermelon!
Instrument making

Let’s try a hands-on craft activity you can play with—making a musical instrument! For a craft suitable for a one-year-old, a drum is recommended.
Prepare two deep paper plates, place their rims together, and secure them with tape.
If you use washi tape with various patterns or illustrations, it will look more festive and your child will love it.
Then let your child decorate it freely by sticking on stickers.
You can also have them paint with a sponge and paints or draw whatever they like.
Once it’s done, try tapping it freely or play along to a song and have fun!
Making yo-yos with crayons and stickers

How about making cute yoyos using crayons and stickers? Prepare construction paper pre-cut into yoyo shapes, and have your child add patterns to the yoyos.
If you paste the yoyo-shaped pieces onto another sheet of paper, you won’t have to worry about crayon marks going outside the lines.
Let your child draw lines and patterns with crayons and add stickers however they like.
If your child isn’t yet used to crayons, it’s a good idea to first show them how to use them before starting.
Give it a try as a fun summer craft activity!
Making umbrellas with sponge stamps

Let’s make a cute umbrella using a sponge as a stamp! Prepare construction paper cut into umbrella shapes ahead of time, and have your child do the stamping.
Cut the sponge into a size your child can hold.
Dip the sponge in paint and let them stamp different colors however they like.
Once they’re done, attach a pipe cleaner or similar material to the back of the paper to make the umbrella handle.
If you want to make it three-dimensional, roll the paper into a curve first and then attach the pipe cleaner handle.
Give this a try as a craft activity during the rainy season!
Marble Art

Let me introduce marble art, where you can create mysterious patterns using marbles! Since all you do is roll paint-covered marbles inside a tissue box, even a one-year-old can enjoy it.
You will need one tissue box, a postcard-sized sheet of drawing paper, paints in your favorite colors, 3–4 marbles, scissors, and rubber gloves.
Here’s how to make it: First, cut off the top part of the tissue box.
Next, place the postcard-sized paper inside the box.
Then put the marbles into the paint so the paint adheres to them.
Place the marbles on the paper, roll them around, and let everything dry—that’s it! You might end up with an unexpectedly masterpiece.
Making ladybugs with tissue paper

Let’s have fun tearing tissue paper to make ladybugs.
As prep, color in white round stickers with black.
Let the children tear red and yellow tissue paper however they like.
While saying “Put it away, put it away,” have them place the torn tissue into a small plastic bag.
Tape the bag’s opening, shape it into a circle, then have the children stick the black round stickers on top.
Be sure to watch so they don’t put the stickers in their mouths.
Finally, attach the face—and it’s done! Let’s make lots of cute ladybugs.
Drawing with colored ice

Here’s a drawing activity using colored ice that even a one-year-old can enjoy.
You’ll need red, yellow, and blue food coloring, water, wooden sticks, a white crayon, drawing paper, and an ice tray.
How to make it: First, use the white crayon to draw ocean-themed pictures—like fish and octopuses—on the paper.
Next, put food coloring and water into the ice tray.
Insert the wooden sticks and freeze.
Once the colored ice is frozen, draw on the paper by letting the ice melt little by little as you move it around.
The pictures you drew with the white crayon will appear as the color spreads, making it a fun activity to enjoy with children.