A collection of summer vacation craft ideas made with 100-yen shop materials


The 100-yen shops are incredibly convenient because they have a wide variety of items.
Nowadays, they don’t just offer low prices—there are plenty of high-quality products too.
Here, we introduce fun craft projects you can make for summer vacation assignments using materials you can get at 100-yen shops, as well as projects that are great to try when you have some extra time.
Many of these summer crafts can even be used as everyday household items.
Please use this as a reference and enjoy making them together with your children!
- Crafts you can make with 100-yen shop items! A collection of fun project ideas that elementary school kids will love
- [Summer Vacation Crafts] Stylish Ideas for Girls
- Simple yet amazing crafts: craft ideas that elementary school students will want to make
- For summer vacation homework! Simple and amazing crafts for elementary school students that you’ll want to make after seeing them
- [Easy and Simple] Popular DIY Ideas You Can Make with Materials from 100-Yen Shops
- [100-Yen Store Crafts] Handmade ideas that captivate adults too. Stylish DIY/handmade.
- Toys you can make from cardboard crafts! Authentic ideas you can build and play with
- [For Adults] Simple yet Impressive Crafts: A Stylish, Eye-Catching Collection
- Craft ideas using plastic bottle caps [for boys]
- Simple but awesome! Craft ideas for upper-grade girls
- Simple and cute summer project crafts! A collection of ideas for girls that will make you want to create
- [For Adults] Fun Craft Ideas Perfect for Killing Time
- Make it with everyday materials! A collection of fun summer vacation craft ideas
Summer Vacation Craft Ideas Made with 100-Yen Store Materials (61–70)
A one-of-a-kind toy clock in the world

The idea is to make a clock using a clock movement and a board, then attach various toys to it.
You can get a clock movement at a 100-yen shop or a handmade goods store, and you can buy the board for the clock face at a home improvement store.
First, draw diagonal lines on the board to find the center point, and mark where to drill the hole for the movement.
Next, use a protractor to decide where to place the numbers on the clock.
After drilling the hole and painting if you like, it’s time to decorate the face.
Use a hot glue gun to attach the toys however you like.
Finally, secure the clock movement in the hole, and you’re done.
Arrange your favorite toys with style and create a wonderful clock!
disposable chopstick coaster

Introducing a chopstick coaster that lets you feel the warmth of wood.
Gather disposable chopsticks, glue, sanding sealer, varnish, and a brush, and let’s get started.
Glue chopsticks around the base board.
If you score the chopsticks with a utility knife before splitting them, they’ll break cleanly.
Lightly sand the tips to round them off.
Continue gluing the chopsticks from the outside toward the inside.
Adjust the size of the chopsticks as you go, fitting them while slightly changing the angle.
Brush on varnish and let it dry, and you’re done.
Give it a try!
small accessory case
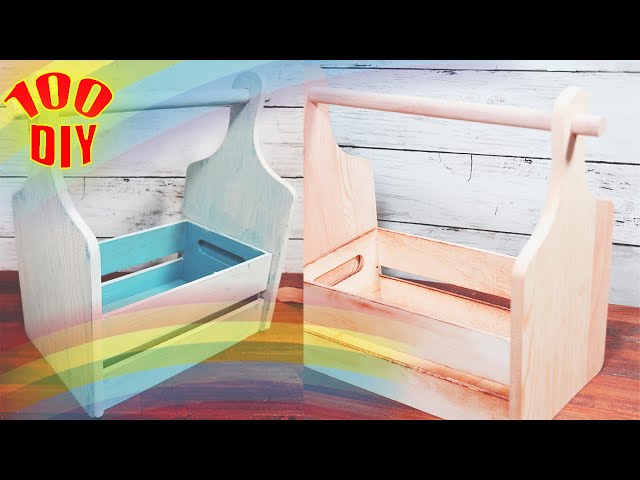
Let me introduce a cute and handy little storage container.
Get a wooden box, a cutting board, a round dowel, a hot glue gun, and a saw, and let’s get started.
Use the hot glue gun to attach the cutting board to the left and right sides of the wooden box.
Cut the round dowel to the appropriate length, sand the ends smooth, thread it through the holes, and secure it with the hot glue gun.
The process is simple and easy to make, so definitely give it a try.
It’s also recommended to paint it to add a personal touch.
Dinosaur Snow Globe

Many children love dinosaurs, don’t they? Some probably have lots of dinosaur merchandise, too.
So let’s make a summer vacation project using dinosaurs: a snow globe in a glass container filled with liquid laundry starch (or school glue) and purified water.
Use a hot glue gun to attach a dinosaur figurine to the inside of the glass lid.
Be careful when using the glue gun, as it gets very hot.
Pour the laundry starch (or glue) and purified water into the container, then tint it with paint in your favorite color.
If you add glitter, you’ll get a sparkly, authentic-looking snow globe.
Close the lid and turn it upside down, and you’ll have a beautiful snow globe with a dinosaur inside.
Handmade shaker coaster

Introducing original handmade “shaker” coasters that capture the feel of the seasons.
Gather styrofoam board, background design paper, a clear file, plastic sheet, double-sided tape, beads or seashells, and sand, and let’s get started.
First, decide what kind of coaster you want to make.
Cut the styrofoam board to create the coaster base.
Attach the base pieces together for the bottom section.
Apply masking tape around the edges, add seashells and sand inside, then seal it with the lid using double-sided tape—and you’re done! Give it a try!
Insect interior

This is an idea for turning insect specimens into stylish interior decor.
When you think of specimens, you might picture them in a box, but what we’re introducing here uses a jar.
You’ll need a jar with a cork lid, an acrylic sheet, and an insect specimen.
The process is simple: first, cut the acrylic sheet to a size that fits inside the jar.
Next, make a slit in the cork lid, insert the cut acrylic sheet, and secure it with adhesive.
Finally, attach the insect specimen to the acrylic sheet and close the lid to finish.
Using a clear acrylic sheet makes it look as if the insect is floating inside the jar, creating a very chic look.
stone art

Let’s make stone art using materials close at hand, like those from rivers and parks.
Start by collecting stones and twigs.
Choosing stones without sharp edges will help you create cute pieces.
Also, selecting twigs with branches is a key tip for making a lovely work.
Arrange the stones and twigs you found on a frame or cork board, which you can also buy at a 100-yen shop.
As children think, design, and create on their own, it boosts their imagination.
You can paint the pieces, and it’s also nice to add pinecones, leaves, and other items besides stones and twigs.