A collection of summer vacation craft ideas made with 100-yen shop materials


The 100-yen shops are incredibly convenient because they have a wide variety of items.
Nowadays, they don’t just offer low prices—there are plenty of high-quality products too.
Here, we introduce fun craft projects you can make for summer vacation assignments using materials you can get at 100-yen shops, as well as projects that are great to try when you have some extra time.
Many of these summer crafts can even be used as everyday household items.
Please use this as a reference and enjoy making them together with your children!
- Crafts you can make with 100-yen shop items! A collection of fun project ideas that elementary school kids will love
- [Summer Vacation Crafts] Stylish Ideas for Girls
- Simple yet amazing crafts: craft ideas that elementary school students will want to make
- For summer vacation homework! Simple and amazing crafts for elementary school students that you’ll want to make after seeing them
- [Easy and Simple] Popular DIY Ideas You Can Make with Materials from 100-Yen Shops
- [100-Yen Store Crafts] Handmade ideas that captivate adults too. Stylish DIY/handmade.
- Toys you can make from cardboard crafts! Authentic ideas you can build and play with
- [For Adults] Simple yet Impressive Crafts: A Stylish, Eye-Catching Collection
- Craft ideas using plastic bottle caps [for boys]
- Simple but awesome! Craft ideas for upper-grade girls
- Simple and cute summer project crafts! A collection of ideas for girls that will make you want to create
- [For Adults] Fun Craft Ideas Perfect for Killing Time
- Make it with everyday materials! A collection of fun summer vacation craft ideas
Summer Vacation Craft Ideas Made with 100-Yen Store Materials (21–30)
Combine a chopstick rubber-band gun with an origami throwing star!

Let’s try making a “shuriken gun” that combines a chopstick rubber band gun with paper shuriken.
It’s a lot of fun because the shuriken, which you’d normally throw by hand, comes out as the projectile instead.
You’ll need two pairs of disposable chopsticks, two sheets of origami paper, and some rubber bands.
Use one pair of chopsticks without splitting them; split the other pair.
Wedge the split sticks between the unbroken pair and fasten them with rubber bands.
Fold the paper shuriken, tuck it into the rubber bands, and launch it together.
It’s a unique twist on the classic chopstick gun—give it a try! You can probably launch things other than shuriken, too.
Easy handmade candle

If you have about half a day, “homemade candles” are a great option.
You’ll need candles, gel candle wax, crayons, an ice tray, paper cups, and a clear container.
First, cut the candles into small pieces and put them in a paper cup, add some crayon shavings, and melt the wax by placing the cup in hot water.
Adding a few drops of essential oil would be lovely, too.
Pour the melted wax into star- or heart-shaped ice trays and let it set in the refrigerator.
Once the shapes have hardened, arrange them in the clear container, fix a candle wick in place, and fill the gaps with the gel candle wax to finish.
Since you’ll be working with heat and flames, children who aren’t confident handling fire should make these together with an older sibling or an adult.
Diorama

Building dioramas is full of the fun of creating your own world.
By making the most of items from 100-yen shops, you can bring a variety of ideas to life.
First, prepare a clear plastic container and attach paper clay to create a base.
From there, you can make the sea or mountains, or even outer space—freely recreate places you want to visit, places you’ve been, or a fantastical world.
You can use stones or shells you’ve picked up, or characters you have at home.
Using your favorite figures makes it even more enjoyable, so it’s highly recommended!
lampshade

Here’s a lampshade idea that will stylishly brighten up your room.
A lampshade is what you’d call the “shade” for a light.
The materials you’ll need are a body towel, a balloon, and an LED bulb.
First, inflate the balloon.
Then cut the body towel and attach it so that it covers the balloon.
Be sure to leave the bottom part open.
After that, pop the balloon and you’re done.
When you place a light inside the dome-shaped body towel, it will illuminate your room with a dreamy, magical ambiance.
A three-step chopstick rubber-band gun

This is a chopstick rubber-band gun that you can make with a simple procedure: use chopsticks as the base and attach a clothespin with a rubber band.
Insert the metal part of the clothespin into the gap between the chopsticks, then secure the clothespin in that position with a rubber band.
After that, to keep the chopsticks from spreading apart, wrap a rubber band around the tips of the chopsticks, and it’s done.
The mechanism is that you launch a rubber band stretched from the tip by opening and closing the clothespin.
The appeal is that you can make a chopstick rubber-band gun easily with only a few materials.
A chopstick rubber-band gun modeled after a handgun

This rubber band gun, reminiscent of a handgun, looks impressively realistic and cool.
And it’s not just the appearance—its structure is quite complex, too.
It’s made by combining many parts, and the mechanism that moves the trigger in particular is remarkable.
At the same time, the process involves only cutting and shaving chopsticks and gluing them together, so with patience you should be able to complete it.
If you’re willing to put in a bit of effort to create a rubber band gun that looks great and is fun to play with, definitely give it a try.
Make it with disposable chopsticks! Sniper rifle
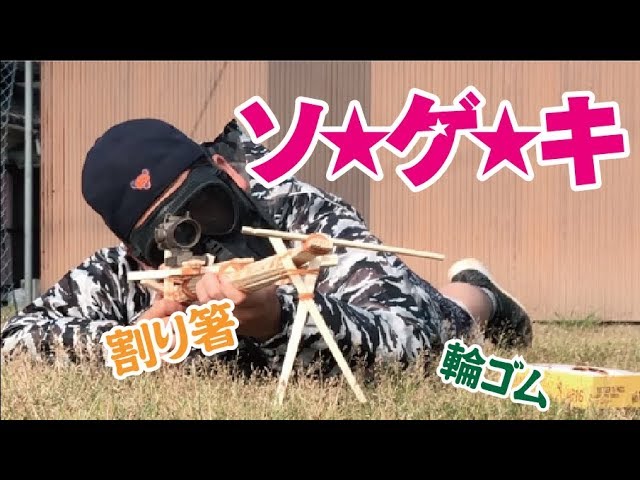
Simple yet profound, it features a mechanism as authentic as a sniper rifle! This is an idea for a cool chopstick rubber-band gun that you can make using just disposable chopsticks and rubber bands.
It’s so realistic to play with that adults are sure to get hooked.
It’s a craft that both adults and kids can enjoy, easy to make and fun to play with.
Create your own original toy gun and enjoy group battles together.
Be sure to prioritize safety, and you’ll love the excitement of both the crafting and the play.
Give it a try!