Ideas for Easy Winter Origami Crafts That Even 2-Year-Olds Will Love


Since it’s the cold season, how about enjoying some indoor origami play? Here, we’ll introduce simple winter origami ideas that you can do together with two-year-olds.
From Santa Claus and Christmas trees to snow bunnies, there are plenty of creations that capture the season! The activities also include elements that promote children’s fine motor development, such as aligning corners and using glue.
All of the projects feature simple steps, making them perfect for fun, hands-on creation in childcare settings—so give them a try.
Because the children’s work is regarded as “artworks,” we use the term “seisaku” (制作) in the text to refer to their creations.
Ideas for Easy Winter Origami Crafts That Even 2-Year-Olds Will Love (1–10)
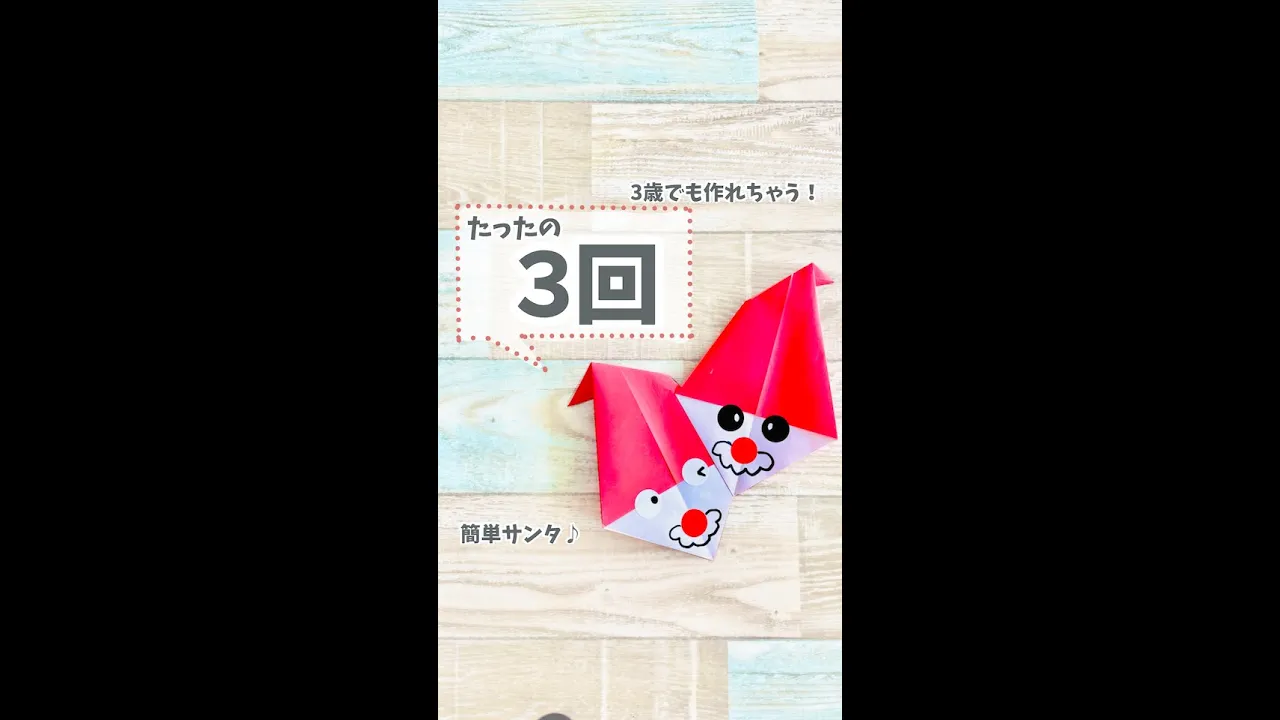
A Santa Claus made with just three folds

Here’s a way to fold a Santa Claus with just three folds of origami paper.
First, fold the paper in half into a triangle.
Open it once, then fold the left and right sides in toward the crease—and it’s already done.
The white section at the bottom, where the reverse side of the paper shows, is treated as Santa’s face, so you can draw his face with crayons or use round stickers to add eyes and a nose.
If you make a fourth fold by slightly bending the tip of the hat, Santa’s expression will look a little different.
Easy snowman made with three sheets of origami paper

Here’s an easy way to make a snowman using just three sheets of origami paper.
It’s perfect for cold winter days, at-home activities, or December events, and it’s great for crafts in kindergartens and preschools! Make the snowman’s head and body separately using two small sheets of origami paper, then glue them together.
Next, use a sheet that’s 1/16 the size of a regular origami paper to make the snowman’s hat.
For the eyes, color round stickers black and stick them on—this gives you neat, simple eyes.
If working with small origami paper is tricky, we recommend trying it with regular-size paper first!
A Christmas tree made with just four folds

How about making a Christmas tree out of origami? It only takes four folds to complete, so even 2-year-olds can enjoy making it.
If you use colorful origami paper, you’ll have a one-of-a-kind tree.
Let the kids decorate it using their own imagination! They can stick on sparkly stickers, draw with crayons—whatever they like.
Once the tree is finished, you can display it in the room to boost the Christmas spirit.
If everyone makes one together, lining up lots of trees will look really lovely!
Origami snow rabbit

If you’re looking for an easy winter craft, here’s an origami snow rabbit you can start right away! It’s designed for two-year-olds, so there are very few folds, making it easy to create with a teacher’s help.
To make it, fold a sheet of origami paper into a triangle, then fold three corners—the left, right, and top—triangularly inward.
The key is to make the left triangle fold a bit larger! Flip it over, then finish by adding the rabbit’s ears, eyes, nose, and mouth.
You can also make the ears by folding a smaller piece of origami paper.
Mt. Fuji made with three folds
https://www.tiktok.com/@mimiorigami122/video/7348421784091380993Perfect for toddlers folding origami for the first time! Here’s how to make Mount Fuji in just three folds.
It also makes a great New Year’s decoration.
All you need is one sheet of light blue or blue origami paper.
First, place the paper colored side down and fold it into a triangle.
Next, fold down just a little bit of the top layer’s tip.
Then fold that folded tip back up so its edge lines up with the side—done! It’s also great practice for making straight folds, so try it together with your kids.
You can glue it onto construction paper and draw the first sunrise of the year with crayons around it for a cute touch—have fun getting creative!
Stylish Christmas tree
https://www.instagram.com/p/ClIv3EypD4I/Here’s a stylish Christmas tree idea that lets you enjoy an art-like finish.
Why not make a festive item that also works as a wall decoration? Prepare origami paper in lots of colors and patterns, then cut it into long, thin strips.
The length doesn’t have to be fixed, so it’s fun to let kids tear the paper themselves.
Glue the strips onto a tree base made from construction paper, then add a star and a trunk.
Finally, use a cotton swab dipped in white paint to stamp on “snow,” and your Christmas tree is complete.
This origami idea also supports early learning by encouraging free hand movement and fine motor skills.
Santa Claus with a tingling beard
https://www.instagram.com/p/ClgEJgyPmuD/Here’s an origami idea you can enjoy with a one-year-old, letting them have fun with the ripping sensation of tearing paper.
Let’s make a winter origami craft featuring Santa, who visits at Christmas! Create Santa’s hat and face parts from construction paper, and apply double-sided tape to the face in advance.
Then, with the children, tear copy paper into small pieces to make Santa’s white beard.
If you make small cuts in the paper beforehand, it will tear more easily—highly recommended.
Finally, stick the hat and beard onto the face, add eye stickers, and you’re done.