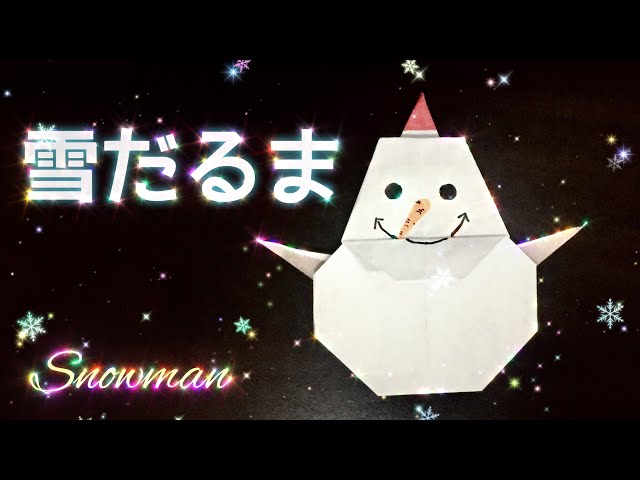
![[For 3-year-olds] Easy snowman origami (how to make)](https://i.ytimg.com/vi_webp/HLsARkpMxJw/maxresdefault.webp)
[For 3-year-olds] Easy snowman origami (how to make)

When it gets cold, kids spend more time playing indoors, don’t they?
Playing house or reading picture books is fun, but how about enjoying origami with the children?
In this article, we’re introducing a snowman origami design that’s perfect for three-year-olds.
Once they learn it, there are plenty of steps they can do on their own, so be sure to try making it together.
Make the scarf and hat colorful, give the snowmen different expressions, and display them around the room—they’ll look super cute!
Since they’re three years old, it’s okay if the folds aren’t perfectly precise.
Let’s value their sense of satisfaction and accomplishment from folding it themselves.
[Age 3] Easy Origami Snowman: Steps 1–10
snowman with a hat

How about folding a snowman with a cute hat using just one sheet of origami paper? Prepare one sheet of origami in your favorite color.
First, with the colored side facing up, fold it in half into a square and then into a triangle to make crease lines.
Fold one corner about 7 mm, unfold it, then fold about 2 mm and fold it down along the crease.
Fold the right corner toward the center line three times, then roll it twice at one-third width.
Fold the right side in along the center line, and fold the top edge forward along the crease.
Next, fold the bottom edge up in half, then fold the upper-left corner down to meet the lower-right corner.
Turn it over, and fold the three layers on both sides in to meet the center line.
Open the side with two layers into a triangle, and fold the single layer on the opposite side to match its shape.
Finally, round and adjust the corners to form the snowman, draw the face with a pen, and you’re done!
Snowman’s face

You can make it with just one sheet of origami! Here’s a cute snowman folding method recommended for 3-year-olds.
Fold a white sheet of origami paper in half into a triangle twice to make crease lines, then fold it using the “zabuton” (cushion) base.
Next, fold both corners on one side toward the center line, then fold the opposite edge up to the center.
Fold the two raised corners toward the center line, and round off the remaining three corners by folding them.
Finally, add eyes, mouth, and nose with round stickers or draw them with a pen, and you’re done! You can also fold another one the same way to make the body—it looks adorable, so give it a try!
Snowman with pockets

You can put letters or candies in the tummy pocket! Here’s how to fold a snowman pocket.
First, fold the snowman.
Place the origami paper with the white side up, then fold it into a square twice to make crease lines.
Fold it in half, and make a crease by folding the closed-edge side to the center.
Lift one layer on the other side and fold along the topmost crease.
Turn it over, and fold the left and right corners to meet the bottommost crease.
Then fold the left and right corners to meet the vertical crease.
Open both corners and squash-fold them.
Fold both corners toward the center point, then slightly fold the tips to round them, and the snowman is done! Finally, fold a hat and a ribbon from origami paper, glue them onto the snowman, and draw the face with a pen to finish.
Snowman made with two sheets of origami paper
https://www.tiktok.com/@poyomi_art/video/7321694435836808449Let’s make it with two sheets of origami! Here’s a snowman folding method recommended for 3-year-olds.
First, take the first sheet, fold it in half twice to make a square, then fold all four corners toward the center.
Next, slightly fold the corners again to round them.
For the second sheet, fold it using the kite/base (tako) fold, then fold the white part up along the edge.
Fold the opposite corner up to the edge, aligning it with the center line.
Slightly fold the corners to shape the body.
Finally, glue or tape the first and second pieces together and draw the face with a pen to finish!
Snowman made from a single sheet of origami paper

Recommended for 3-year-olds! Here’s how to make a cute snowman using just one sheet of origami paper.
First, fold it into a triangle twice to make crease lines.
Fold the bottom corner up to the center twice to create creases, then fold it up along the front crease line two more times.
Flip it over, and fold both sides of the folded section in to meet the center line.
Fold the bottom corner up to the edge of the white section.
Next, with the white side facing front, fold it down along the center line, then fold a small part back up.
Shape the back to look like a snowman, and slightly fold back the hat area.
Finally, draw a face with a pen, and you’re done!
pointy snowman
The pointed shape is so cute! Here’s how to fold a stand-up snowman you can display.
First, fold into a triangle twice to make crease lines.
Fold the bottom corner up to the center to crease, then roll it up twice, matching the corner to the front crease each time.
Flip it over and fold the top corner down to the bottom edge, then crease by folding the left and right edges to align with the triangle’s edges.
Flip it back, unfold the colored section once, and fold the left and right corners up diagonally so they meet the ends of the front crease.
Fold the bottom section up along the front line, flip it over, and alternately fold the top and bottom corners to match the slanted lines on the left and right.
Flip it over and draw the snowman’s face and scarf on the center triangular area.
Finally, tuck the two bottom corners into the triangular creases, and you’re done!
A cute-shaped snowman
Fun for 3-year-olds too! Here’s an origami snowman that’s perfect for winter.
You can make it with just one sheet of origami paper.
First, fold the paper into a square base.
After making three crease lines, open it up and squash-fold it into a diamond shape.
Next, align the inner bottom edges to the center and squash-fold as you fold upward.
Slightly fold the left, right, and bottom corners to give it a snowman-like shape.
Fold the top corner down, then fold it back to its original direction and flip it over.
Fold the center corner down and tuck the tip inside.
Finally, draw a face with a pen, and you’re done!