Origami Penguins for Ages 3 and Up: A Parent-Child Folding Guide


Here are some simple penguin origami projects you’ll want to try together with your three-year-old.
They’re all designed with easy steps so kids can enjoy making them.
Among them, the especially cute penguins with little flippers sticking out to the sides, and the round, chubby penguins will warm your heart just by looking at them.
You can paste the penguins you make onto construction paper with drawings of ice and the ocean, or display them as a parent-and-child set alongside smaller penguins.
There are lots of ways to enjoy them depending on your ideas.
Please use this as a reference and have fun!
[For ages 3 and up] Penguin Origami! A Parent-Child Friendly Folding Guide (1–10)
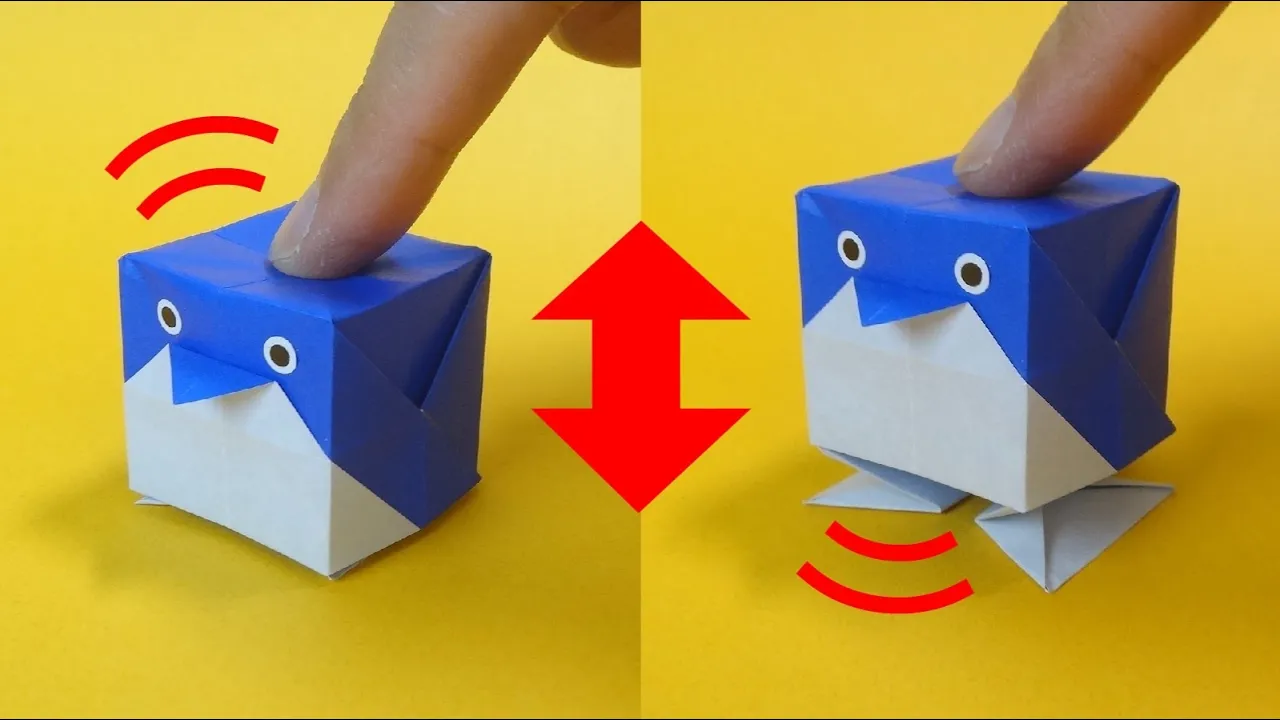
Dancing Penguin

Here is how to fold a dancing penguin origami that lets you enjoy a variety of movements.
Prepare one sheet of origami paper and some colored pens, and let’s get started.
First, make creases as you fold.
Fold the full open corners.
Using the head area as the center, shape the whole model into a box-like form, aligning it with the creases you made at the beginning.
By carefully making inside and outside reverse folds, you’ll end up with a sturdy final model.
The feet also act like springs, so fold them firmly.
Once it’s finished, draw the penguin’s face and try playing with it together with the kids.
A cute penguin you can make with a single sheet of origami paper

Here’s a cute penguin you can make with just one sheet of origami paper—perfect for three-year-olds.
Prepare one sheet of origami paper and fold it into a triangle to make a crease.
Fold the corners along the center line; you’ll be flipping the paper over to fold on both the front and back.
Next, fold the left and right sides toward the central vertical line to form the base of the penguin’s wings.
To give the wings movement and a three-dimensional look, make sure to crease firmly.
After checking that both sides are balanced, fold the tip to round out the overall shape of the penguin, and you’re done.
It might also be fun to make them in different colors and give each penguin a name.
Penguin from Sumikko Gurashi

Here’s how to fold a loose and cute Sumikko Gurashi-style penguin.
Prepare one sheet of origami paper, some colored pens, and scissors.
Start by folding the origami paper into a square.
Open it once, then fold the left and right sides toward the center crease.
After making firm creases, hold the center down and fold both sides into triangles, puffing them up slightly as you go.
The key is to keep both sides symmetrical.
Make small cuts on the two layers at one tip on one side, then fold them inward.
Shape the figure, folding while letting the corners peek out a bit, and you’re done.
Use felt-tip pens to draw the face and other details—have fun creating your penguin!
A penguin that’s perfect for decorations

Let’s make a penguin out of origami—perfect as a seasonal decoration for fans or other ornaments.
Fold the paper into a triangle twice, then gently squash-fold it by inserting your finger into the pocket and pressing down softly from the top to puff it open.
Keep folding along the creases to form the penguin’s shape.
Be careful when using scissors to make the cuts—don’t cut the wrong spots.
As you continue, the paper will get thicker, but sharpening your creases will make it easier to proceed.
Once you fold the wings and feet while checking the balance, you’re done.
Give it a try!
Perfect for summer! A penguin folded with two sheets

Here’s a penguin you can make from two sheets of origami paper, featuring an adorable plump shape.
Prepare one large sheet, one smaller sheet, scissors, and glue.
First, use the smaller sheet to make the penguin’s face.
After creasing along the diagonal, fold the left and right sides in along the vertical line.
Open it up once, then fold the corners along the crease lines.
When the overall shape is folded, round the corners to finish.
Use colored pens to draw the facial expression.
For the body, fold the large sheet into a triangle, then fold the base of the body along the center crease.
When making the wings, snip slits with scissors and fold along the crease lines.
The key is to leave a wide area for the belly.
Finally, glue the face and body together to complete your penguin.
Penguin finger puppet

Here’s how to make a 3D penguin finger puppet you can wear on your finger.
Prepare one sheet of origami paper and start by folding it into a triangle to make a crease.
Keep making creases by aligning the corners with each other.
Fold up so that the corner sticks out slightly beyond the edge, and the key is to keep folding so that the corners meet at the intersection points.
By making firm creases, you’ll give the beak and face a three-dimensional look that really brings out the penguin feel.
Finally, tuck the body area inward to puff it out slightly, and your penguin finger puppet is complete.
It can be fun to make them in different colors and play with them like a penguin family.
How to make a penguin bookmark
https://www.tiktok.com/@tatsukuriorigami/video/7469992540717042951Here’s how to make a penguin bookmark that makes reading even more fun.
Get one sheet of origami paper and some colored pens, and let’s get started.
As you make the creases, you’ll form the part that slips onto the page.
When shaping the beak and wings, firmly crease the folds so the bookmark keeps a stable shape.
Color the beak and draw the face with your pens, and you’re done.
It could also make a cute little gift!