Origami Penguins for Ages 3 and Up: A Parent-Child Folding Guide


Here are some simple penguin origami projects you’ll want to try together with your three-year-old.
They’re all designed with easy steps so kids can enjoy making them.
Among them, the especially cute penguins with little flippers sticking out to the sides, and the round, chubby penguins will warm your heart just by looking at them.
You can paste the penguins you make onto construction paper with drawings of ice and the ocean, or display them as a parent-and-child set alongside smaller penguins.
There are lots of ways to enjoy them depending on your ideas.
Please use this as a reference and have fun!
- [Childcare] Cute Penguin Craft Ideas | Introduced by Age Group
- [Childcare] Recommended for 3-year-olds! Origami ideas with a winter theme
- [For 3-year-olds] Easy snowman origami (how to make)
- [For 3-year-olds] Easy-to-make origami rabbit ideas collection
- Simple origami for kids: cute, playable origami ideas
- For Age 3: Have Fun Making with Your Child! A Collection of Easy Dinosaur Origami Ideas
- [For Preschoolers] Let’s Make It Together with the Kids! Origami Ideas for February
- Perfect for first-timers! A collection of origami that’s super popular with kids as young as three!
- [For 3-year-olds] Let’s make strawberries with origami! A collection of easy strawberry folding ideas
- [For 3-year-olds] Let's make it with origami! A collection of easy mushroom folds
- [For Preschoolers] Fold with Fun! January Origami Ideas for Little Ones
- [For 4-5-year-olds] Folding is fun! A collection of January origami ideas to enjoy with preschoolers
- For older kindergarteners: Let’s make it! A collection of recommended origami ideas for February
[For ages 3 and up] Penguin Origami! A Parent-Child Friendly Folding Guide (1–10)
Easy penguin
Here’s a cute penguin with a simple folding method that’s recommended even for three-year-olds.
Prepare one sheet of origami paper, fold it into a triangle, and make a crease.
Flip it over front and back as you go, folding the corners so they meet at the center crease.
After folding the left and right sides toward the center, fold the wing sections into triangles and puff them out a bit to add dimension.
Fold the beak so that both sides are even, then round off the corners overall with small folds to finish.
It’s also fun to try making them with different colors of origami paper.
penguin ornament
Let me introduce a cute penguin ornament that looks adorable wherever you place it.
Prepare one sheet of origami paper, a felt-tip pen, and glue, and let’s get started.
We’ll fold it using the basic crane method, but for the parts where you puff up the paper, it’s best to go slowly and provide support while folding.
Open up the origami, and while puffing it along the crease lines, tuck it in to form the penguin’s body.
Folding this section evenly will make the ornament stable when displayed.
Finish by making the wings, beak, and feet.
Even just lining them up and looking at them makes for charming penguin ornaments.
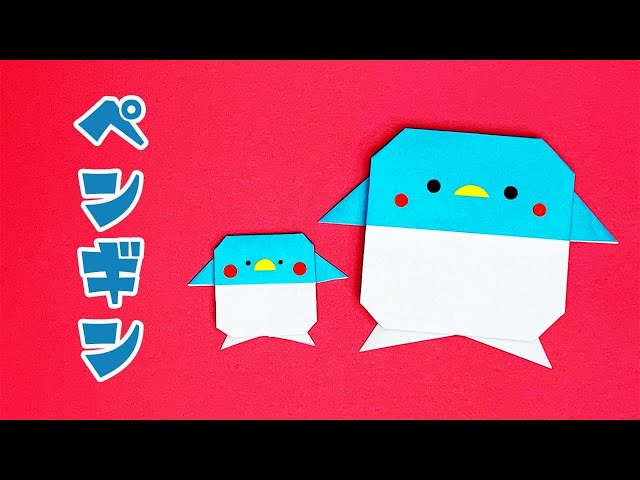
Cute and easy penguin
Let me introduce an origami penguin with an adorable round shape.
After making a triangular crease, fold so that both ends become parallel.
Turn the paper over, fold the corners halfway toward the center, then fold them in half once more.
Fold both ends diagonally to form the penguin’s wings and body.
Adjust the shape, draw the penguin’s facial expression, and it’s complete.
By drawing varied expressions, you can create many different penguins.
Give it a try and have fun making them!
Origami Penguins for Ages 3 and Up! A Parent-Child Folding Guide (11–20)
Penguin money envelope

This is a cute penguin folding method that’s perfect for New Year’s gift envelopes.
First, place the origami colored side up, fold it into a triangle twice, then open it once.
Fold both layers of the top corner down to meet the bottom edge to make creases.
Make another crease by folding only the top layer of the top corner down so it sticks out slightly past the bottom center.
Fold only the top layer of the top corner down to align with the bottom crease.
Next, fold along the upper crease, then fold the tip upward so it peeks out a little.
Fold back the part sticking out at the top.
Turn it over and fold both corners toward the center so the tips overlap.
Tuck one corner into the other.
Finally, draw the face with a pen, and you’re done!
Cozy Penguin

Here’s how to fold an origami penguin that can also wear a hat and scarf.
First, fold it into a triangle twice, then open it once.
With a corner pointing down, fold up the top layer so about 2 centimeters stick out, then fold it down along the edge.
Fold the edge you just made in half to make a crease, then fold the bottom corner up to that crease to set a guideline.
Next, fold the other corner up toward the front crease.
Fold the tip of the corner down just a little.
Fold up along the crease you made earlier, align the edges, and fold the whole piece in half.
Finally, adjust the shape to look like a penguin and draw the eyes with a pen to finish.
Try making a hat and scarf for it, too!
Peekaboo Penguin

Here’s a super cute way to fold a penguin that’s perfect to attach to letters or cards! First, place the origami paper with the back side facing up and fold it into a triangle twice to make crease lines.
Lift one corner up to just slightly before the center line, then fold both edges of the lifted section upward at a slight diagonal.
Fold both corners of that folded section inward.
Turn it over so the white side is facing you, and fold along the center line twice to shape the face.
Next, use a 2.5 cm piece of origami paper to make the hands.
Start with a basic “zabuton” fold, then fold both corners diagonally to shape the hands.
Make two of these.
Finally, glue the hands on, and add eyes and a mouth with round stickers or similar—done!
a round and laid-back penguin
This is an easy and cute penguin origami.
First, flip the paper to the back and make two creases by folding it into a square twice.
Fold one side down to align with the center line.
Turn it over and fold the left and right edges to the center line.
Open the colored corner and squash-fold it.
Fold the bottom edge up to the center to make a crease, then unfold once and tuck the bottom center inward.
Fold the corners to form the feet.
Fold the protruding colored corner to look like hands.
Finally, round the colored corner with a fold to finish! Decorate it cutely with round stickers or a pen.