![[Childcare] Recommended in March! A collection of craft ideas for 2-year-olds](https://i.ytimg.com/vi_webp/iuvFSul4Ios/maxresdefault.webp)
[Childcare] Recommended in March! A collection of craft ideas for 2-year-olds

March is the season when we feel the arrival of spring.How about incorporating seasonal crafts even in the class for 2-year-olds?Tearing with little fingers, gluing with paste, and dabbing paint like stamps.Just watching them move their hands with total focus as they explore different materials is heartwarming, isn’t it?Here, we’ve gathered ideas perfect for March crafts.While valuing the children’s “I want to try!” spirit, enjoy creating spring-themed projects together with them.Note: Since the children’s creations are treated as works of art here, we use the term “seisaku (制作)” in the text.
[Childcare] Recommended for March! Craft Ideas for 2-Year-Olds (1–10)
Two easy and cute spring wall decorations
Here are two quick and easy tulip crafts perfect for when you’re short on time.
The first is an origami tulip.
Start with the back side of the origami paper facing up, fold it into a triangle twice, then open it once.
Using the center line of the edge as an axis, fold up the left and right corners diagonally to suggest the shape of a tulip.
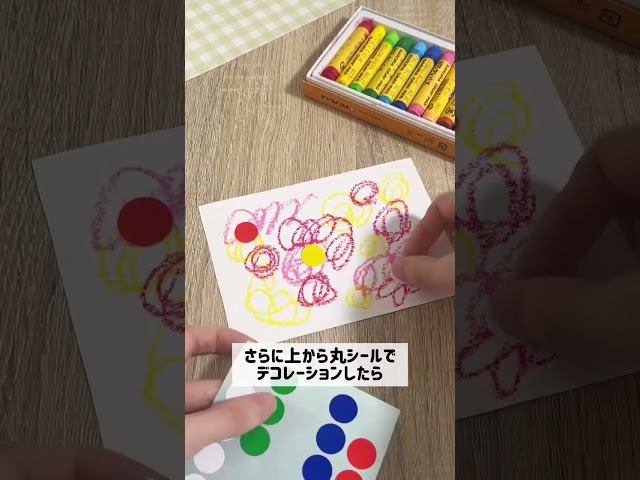
Glue it in place and you’re done! The second uses a sheet of drawing paper in a size that’s easy for kids to draw on.
Let them freely add color with crayons.
Then decorate with round stickers and the like, have an adult cut it into a tulip shape, and paste it onto a backing sheet.
Finally, draw the stem and leaves with crayons to finish.
It’s fun to play with all kinds of colors, so be sure to give it a try.
Drawing is fun! A mobile of little birds
https://www.instagram.com/reels/DIBlGkYza9D/This is an easy paper-dyeing technique.
Draw patterns on aluminum foil with water-based pens, then mist it with water and place a lace paper doily on top.
Once it’s thoroughly dry, cut the lace paper in half and accordion-fold it.
Next, cut a circle from construction paper and fold it in half.
Attach the lace paper wings and a face, and you’re done! The blurred colors are beautiful, creating a soft, gentle butterfly.
If you thread it and make a mobile, it sways cutely and is lovely as a decoration—highly recommended!
Fun with tissue paper! Crinkle-crinkle play
https://www.instagram.com/reels/DSTP6VCk_tc/This is a dynamic, fun activity using colorful tissue paper.
Just crumpling or rolling the tissue paper lets you enjoy its soft texture.
If you spray it with water, the colors bleed onto your hands so you can play with color as if it were paint! Press your colored hands onto drawing paper to make lovely patterns.
The accidental colors and shapes are fascinating, and kids will be completely absorbed.
It’s a perfect spring activity full of excitement, letting children freely express themselves while enjoying the sensations and changes in color.
Stamps are fun! Cherry blossom tree
https://www.instagram.com/reels/DHkqO4oRleC/This craft is perfect for spring: making a cherry blossom tree.
Inflate a plastic bag with air, dab it with paint, and stamp it onto drawing paper.
Because the shape changes a little with each stamp, kids can enjoy the excitement of wondering, “What kind of cherry blossoms will bloom?” It requires no complicated prep and easily captivates children.
Use each child’s handprint to create the tree trunk.
While feeling the arrival of spring, why not have everyone joyfully make cherry blossoms together? It also makes a lovely seasonal wall decoration.
It will spread that happy “I did it!” feeling among the children.
Perfect for walls! A butterfly craft that makes paint play fun
https://www.instagram.com/reels/DVUbcWwk2yl/Cut an A4 sheet of drawing paper into the shape of a butterfly, then apply paint on just one side.
Once you’re ready, fold it in half and lift the wing—your design will have transferred beautifully to the other side! You can also enjoy the excitement of seeing what pattern appears the moment you open it.
After that, attach the wings to another A4 sheet for the background, and stick a photo of your child in the center.
You’ll have a one-of-a-kind, adorable butterfly! It will look very spring-like on a wall display and become a wonderful, memorable piece.
Easy tulips you can enjoy by sticking them on
https://www.tiktok.com/@hoiku.labo/video/7347560033112067346Here’s a gentle and fun craft that lets you enjoy a springlike atmosphere.
Cut construction paper into the shape of a tulip to make a base.
Next, prepare felt in your favorite colors and cut it into circles, squares, or any sizes and shapes you like.
Once you’re ready, stick the felt pieces onto the tulip base to decorate.
If you start with the larger felt pieces, it’s easier to keep things balanced and to place them.
By decorating freely, you’ll create a colorful and cute tulip.
Finally, glue on a stem and leaves made from construction paper to finish.
Quick and easy with bubble wrap stamps! Cute beehive

This is a fun stamping activity to make a cute honeycomb using bubble wrap.
Roll the bubble wrap to create a stamp, dab it in paint, and pop-pop it onto construction paper to easily make a honeycomb-like pattern.
Using two colors of paint lets you enjoy the contrast and looks very pretty.
Once the pattern is done, make bees and other parts and glue them on.
Since it’s just stamping, even young children can enjoy it and get absorbed in the activity.
After you attach the parts at the end, your adorable honeycomb artwork is complete!