Origami perfect for April! A collection of ideas recommended for preschoolers (around age 4–5)

When April comes, you can’t help but want to bring spring-themed activities into daycare and kindergarten, right? In the class for four-year-olds, children’s fine motor skills gradually improve, and the range of things they can express with origami expands dramatically.
Springtime motifs like tulips, butterflies, and ladybugs are sure to make their eyes sparkle! In this article, we’ve gathered a wide variety of origami ideas perfect for April.
They’re all activities that four-year-olds can enjoy tackling, so be sure to check them out!
Origami perfect for April! A collection of recommended ideas for preschoolers (ages 4–5) (1–10)
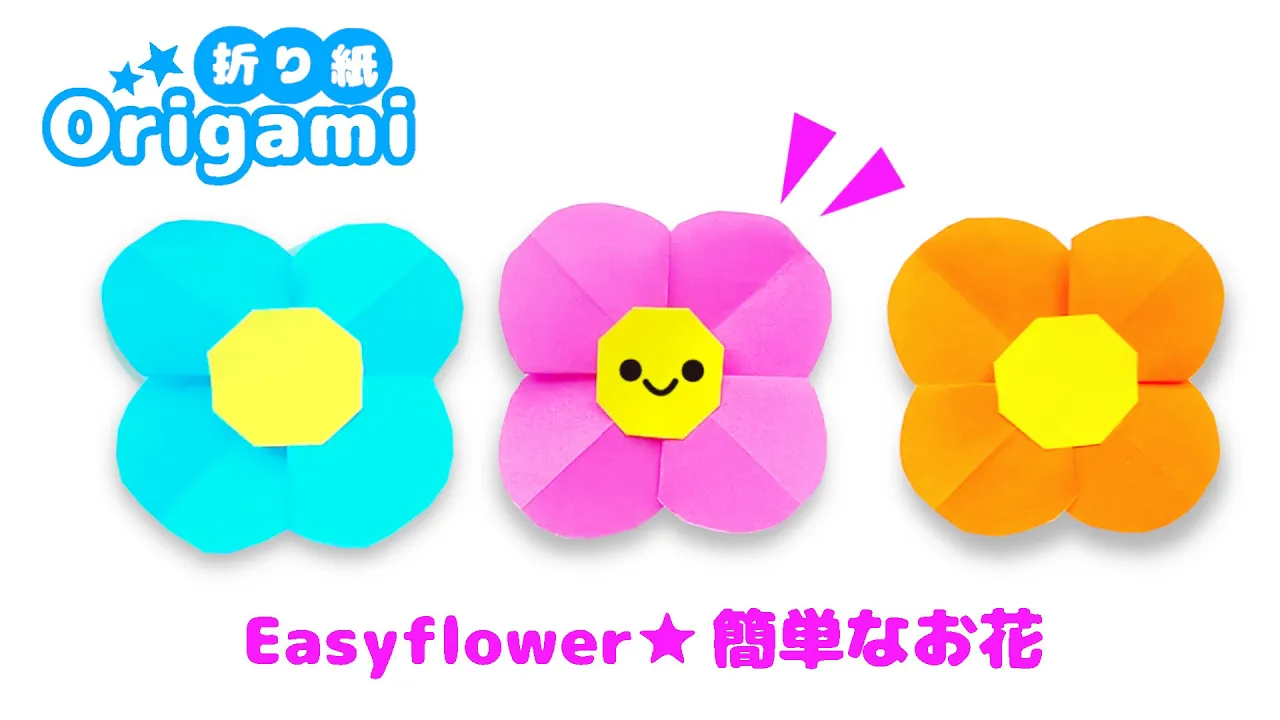
Decorate a lot—so cute! How to fold flowers

Having floral decorations really brightens up a room, doesn’t it? In April, when many flowers come into bloom, try making colorful flowers out of origami to enjoy the arrival of spring.
Prepare 7.5 cm-square and 2.5 cm-square origami paper.
Fold the larger one into a triangle twice, then open the pocket and flatten it.
Fold it into a triangle again and trim along a curved line from the top edge.
It helps to cut with flower petals in mind.
Make a small fold at the bottom, then open each petal one by one to shape the flower.
Create the center of the flower with the smaller piece of origami and attach it to finish.
Easy! Four-leaf clover

Clovers that appear in parks and along roadsides in spring are a favorite plant among children.
Four-leaf clovers in particular are said to bring good luck, and you may see kids searching for them.
Here is how to fold a four-leaf clover.
Fold a 7.5 cm square of origami paper in half horizontally, then fold the top and bottom along the crease.
Rotate it, fold in half again, and fold the top and bottom along the crease.
Open the pocketed sections; once it’s divided into four pockets, make small cuts, adjust the shape, and it’s done.
It’s also cute to add a ladybug made from a red round sticker.
How to fold a cute strawberry

Here’s a cute way to fold a strawberry that even small children can make.
First, the strawberry: Place the origami paper color-side up and fold it in half into a triangle twice.
Make a crease down the center, then fold the corners in to meet that crease.
Slightly fold down the tips you just folded.
Next, make the calyx (leafy top).
Make a crease at the bottom, then fold diagonally so that three little peaks (mountains) appear.
Fold the parts you just made back, attach them to the strawberry with glue, and you’re done! Finally, we recommend decorating it cutely with round stickers or pens as you like.
A ladybug with origami!

April brings a string of warm days, and it’s the season when little insects become active.
How about incorporating ladybugs into your April origami crafts? These small, cute ladybugs are popular even with preschoolers, so making them is sure to bring smiles.
Fold the origami paper into a triangle twice, and after making the crease, fold both sides along the crease.
Fold the top back in small folds twice to form the head.
Make small folds at the bottom and on both sides to refine the shape, then use crayons to draw the face and the wing patterns.
Ladybug origami brightens up any room—try making them in colorful shades like yellow or red and decorating the whole space.
Easy and cute origami honeybee

Here’s an easy and cute way to fold a bee.
First, let’s make the face.
Fold the face piece using the “zabuton” (cushion) fold, then fold each of the four corners in just a little.
Next is the body.
Fold it the same way with a zabuton fold, then fold two places toward the center.
Fold the corners to line up with the center crease, then fold the tip down so it sticks out slightly.
For the wings: fold the paper in half into a triangle, then insert your fingers and open it up.
Flip it over and fold each of the four corners in just a little.
Finally, make the antennae and attach them with glue or similar.
Finish by decorating the face cutely, and you’re done!
How to fold a cute tulip

When it comes to spring flowers, tulips are known for blooming in a variety of colorful shades.
Why not try making an origami version you can enjoy indoors? Take a 7.5 cm square sheet of origami paper, fold it into a triangle twice, then bring the left and right corners up toward the top.
At this point, make sure to offset the folds from the center crease.
Flip it over, then slightly fold back the bottom and the sides to refine the shape.
Make a stem and leaves with green origami paper, combine them with the flower, and you’re done.
Adding a little face makes it extra cute, too.
Create tulips in many colors and brighten up your room with a cheerful atmosphere!
Tulip wreath

How about a beautiful wreath adorned with colorful tulips? It may look difficult, but each individual part is easy to fold, so let’s work together to make it! Prepare 8 sheets of origami for the wreath’s leaf section, and for the flowers, use paper that’s one-quarter the size of the wreath pieces—three sheets per flower, for a total of 8 flowers.
Crease firmly as you fold, and use the larger origami to create the wreath components.
Once you’ve made all 8, assemble them to form a circular wreath.
Next, make 8 flowers using 3 small sheets each, and attach them along the wreath’s stem area.
Combine all the parts everyone made and complete a lovely wreath.