Perfect for children in the middle year of kindergarten in September! A collection of origami ideas recommended for autumn

In September, nurseries and kindergartens enjoy origami that captures the colors of autumn.
Here, we’ll introduce fall-themed origami perfect for pre-K children to enjoy in September.
With motifs inspired by nature—such as cosmos flowers, grapes, and ginkgo leaves—children can nurture their imagination while sensing the changing seasons.
There are also pieces related to seasonal events, like portrait origami for Respect-for-the-Aged Day and rabbits for the moon-viewing festival.
Create special autumn memories through origami time with the children!
Perfect for September preschoolers! A collection of recommended autumn origami ideas (1–10)
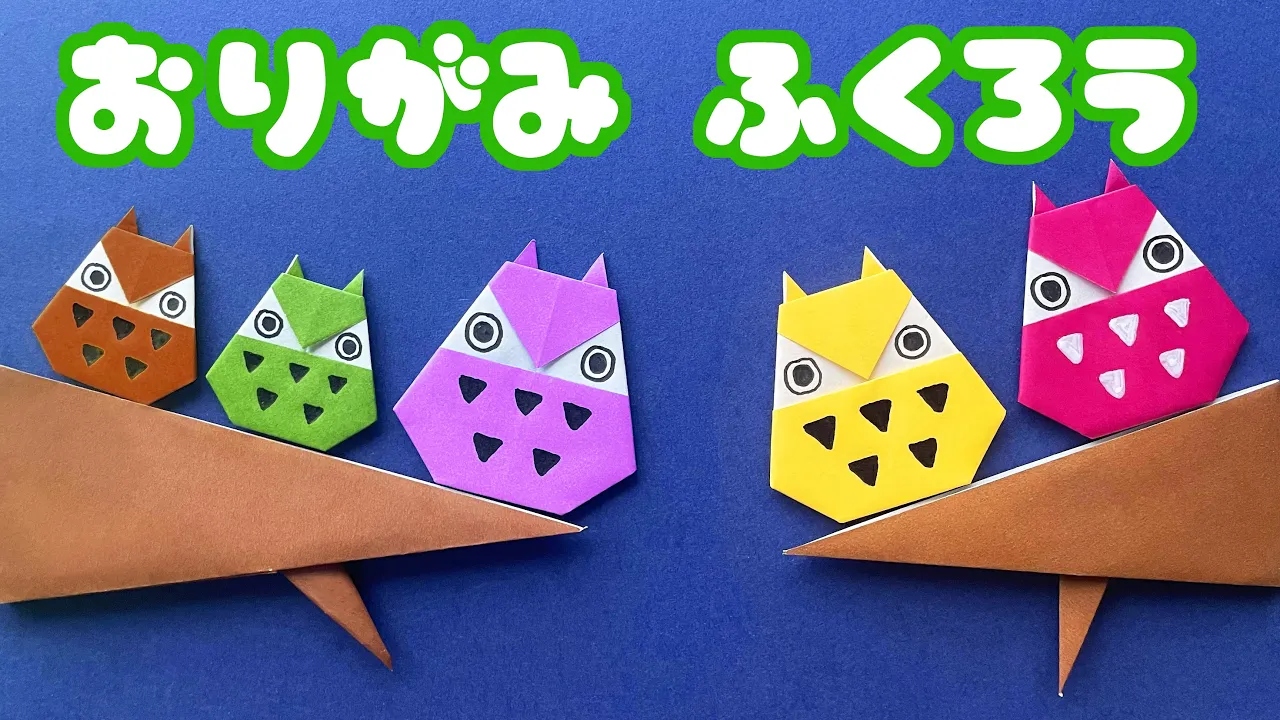
cute owl

Owls are known as lucky charms, and they’re often used in preschools as a classic autumn theme.
The origami owl we’re introducing starts by folding the paper into a triangle, then aligning the corners toward the center line.
Use the crease lines to form the owl’s body.
Next, fold the top corner down toward the center of the color-change area to make the owl’s face.
Fold the left and right sides toward the center to shape the owl.
The key is to fold while adding a gentle roundness to the form.
Squirrel folded from two sheets of origami paper

Let’s make a cute squirrel using two sheets of origami paper.
First, fold the first sheet in half into a triangle and open it.
Fold the corners slightly along the crease.
Turn it over and fold up the opposite corner as well.
Fold both side corners up toward the center.
Fold both top corners inward toward the center to form the ears, and round off the folds for the face and mouth to shape the head—now the face is complete.
Next, take the second sheet, fold it in half into a triangle, then open it and fold both side corners inward toward the center crease.
Fold the two bottom corners toward the center as well.
Offset it slightly and fold in half, then tuck in the bottom corners to round the overall body—this completes the body.
Finally, glue the face and body together and draw the squirrel’s face to finish!
Acorn in origami

Acorns are one of the familiar parts of autumn nature for children—they find them among fallen leaves, collect lots of them, and use them for pretend play.
Let’s try expressing the autumn mood by making acorns with origami.
First, fold the origami paper in half into a square, then open it and fold the bottom edge up toward the crease.
Flip it over, fold it in half, and open it, then fold both sides in toward the crease.
Finally, fold in the four corners to resemble an acorn shape, and you’re done.
Make lots and decorate your room with them!
Perfect for decorations! How to fold a dragonfly

When it comes to symbols of autumn in Japan, dragonflies come to mind, don’t they? This time, let’s introduce a dragonfly made of origami that’s perfect for autumn crafts.
Prepare two sheets of origami paper, some eyes, and a felt-tip pen, and let’s get started.
For the dragonfly’s body, make creases vertically and horizontally, then fold toward the center line to form a square shape.
When puffing up and shaping parts of the origami, the key is to use your fingertips as you fold.
Next, prepare the remaining sheet of origami to make the wings.
For the sections where you open the paper outward while folding it down, take your time and fold carefully.
Glue the body and wings together, then adjust the body’s shape at the end.
Attach the eyes, and it’s complete.
A chestnut that breaks on the eighth fold

When September comes, it’s the season when chestnuts are delicious.
Let’s fold autumn’s seasonal chestnuts with origami.
After folding the paper in half, fold the left and right corners toward the center line.
Flip the paper over and fold the bottom part of the chestnut toward the center line.
Finally, adjust the shape into a chestnut and you’re done.
You can enjoy different sizes of chestnuts by changing the size of the origami paper.
Also, by folding the corners to create roundness, the chestnut gains a three-dimensional look, resulting in a tasty-looking chestnut perfect for autumn.
Give it a try!
Easy and cute pampas grass origami method

The Japanese pampas grass that signals the arrival of autumn in Japan has a deep charm, doesn’t it? Let’s try making pampas grass with origami.
First, cut your origami paper into a quarter-sized rectangle, fold it in half twice to make a long, narrow shape, then fold it in half once more.
Open it back up to the state where it has been folded in half once from the original.
Along that center crease you just made, use scissors to cut a slit up to the middle.
Fold it in half again, and then, starting from the slitted section, offset each layer sideways as you fold them one by one.
Finally, adjust the shape so the white and colored sections alternate when viewed, and you’re done.
Please use this as a guide and display it next to your moon-viewing dumplings!
Easy maple leaf origami instructions
We’ll show you how to fold a simple, irresistibly touchable, cute maple leaf.
Start by folding into a triangle and creasing, then fold both sides of the paper toward the center line to form the base of the maple leaf.
The key is to tuck the paper in so that it puffs up slightly.
As you fold, match the height of the maple leaf’s lobes, keeping the left-right balance in mind.
Since some parts will get thicker as layers overlap, fold those sections slowly and carefully.
You might also enjoy gluing the finished maple leaves onto poster board to create a maple tree!