

Fun and cute butterflies that make you feel the arrival of spring.
Here, we’ll introduce simple butterfly origami that 3-year-olds can enjoy!
There are a few different ways to fold them, including ones with fewer steps, plus ideas for freely decorating your finished butterflies.
Get some colorful origami paper and markers ready, and let the kids use their imagination to fold their very own original butterflies.
Fold lots of butterflies and let’s all enjoy the cheerful feeling of spring together!
- [Origami] Simple Origami Ideas to Feel the Spring with 3-Year-Olds
- Perfect for first-timers! A collection of origami that’s super popular with kids as young as three!
- [For 4-year-olds] A collection of April craft ideas that capture spring, such as Easter and cherry blossoms
- [Origami] Try it with your 2-year-old! Easy spring origami ideas
- [For 4–5 year olds] A collection of recommended origami ideas for March—featuring seasonal events and natural motifs
- [For 3-year-olds] Let’s make strawberries with origami! A collection of easy strawberry folding ideas
- [Origami] Simple Origami Folding Ideas to Savor Spring with 5-Year-Olds
- Origami Penguins for Ages 3 and Up: A Parent-Child Folding Guide
- [For Preschoolers] Fold with Fun! January Origami Ideas for Little Ones
- [For Preschoolers] Let’s Make It Together with the Kids! Origami Ideas for February
- [For 4-year-olds] Let's fold! A collection of simple rabbit origami ideas
- [For 3-year-olds] A fun collection of easy origami fish to make!
- [For 3-year-olds] Let's make it with origami! A collection of easy mushroom folds
[For Ages 3] Easy Origami Butterfly Ideas (1–10)
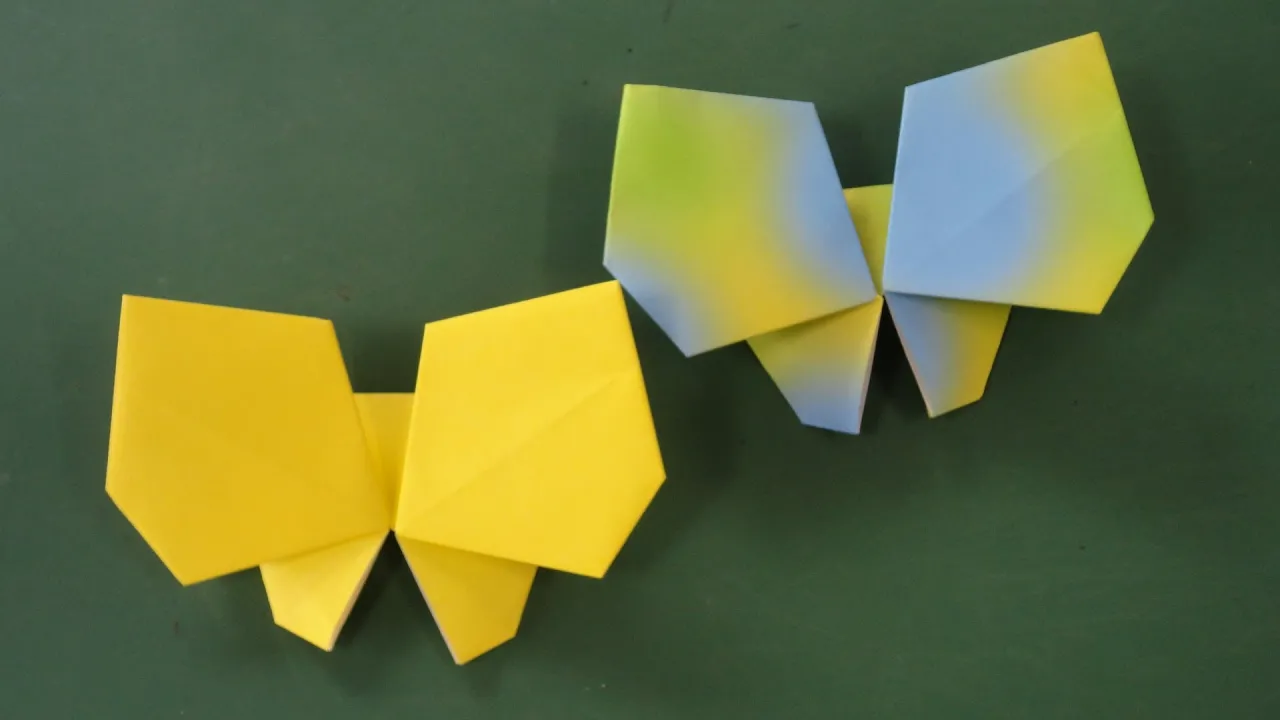
A butterfly made from two sheets of origami paper

The large upper wings make a big impact! Fold two identical parts in the same way, but for the step where you fold the last corner diagonally downward, fold it in the opposite direction on one of the parts.
Insert the tip of one finished part into the pocket at the tip of the other part, and you’ll get a butterfly with its wings spread wide to the sides! Fold the bottom tip back slightly to the reverse side to round it off, and you’ve completed a butterfly with characteristically broad, outspread wings.
It’s also fun to make the parts from different colors of origami paper to create a butterfly with different colors or patterns on each side.
A butterfly you can make with just two folds

Just two folds! Place the origami paper so the corners are at the top, bottom, left, and right, then fold it in half by bringing the left and right corners together.
Fold the bottom corner diagonally upward so it sticks out past the upper-right edge, and in no time you’ll have a butterfly.
It’s okay if the corners don’t line up perfectly! Offsetting them a little gives the wings a sense of motion, so there’s no need to stress about folding it perfectly.
Use patterned origami paper or add designs with pens or crayons to create a butterfly full of personality.
3D butterfly

You can make a 3D butterfly that looks like it might flutter away any moment just by tweaking the folding a little! Fold the origami paper in half, then fold the left and right edges to meet the center crease.
From there, fold it in half again, and fold the opposite edges to meet along the crease.
After adding diagonal creases, open it like a roof, fold one side downward, flip it over, fold along the center, and turn it back to the front.
Finally, keep folding so that the center becomes three-dimensional, and you’re done.
The steps from the middle can be a bit tricky, so try making it with teachers providing support, or have the children do the simpler initial steps.
a patterned butterfly

Let’s add some patterns to a cute, rounded origami butterfly! The base butterfly is three-dimensional.
By folding the center into a triangle, you’ll give it a dynamic shape.
If you fold down all the corners slightly, it will turn into a cute butterfly with soft, rounded edges.
Once the butterfly base is complete, finish it off by adding stickers or drawing patterns with pens to make a colorful, adorable butterfly! Some steps are a bit complex, so it might be a good idea for the teacher to make the butterfly base and have the children decorate the wings with patterns.
A fluttering butterfly

It’s great to fold and display your creations as artwork, but using what you make to play is also one of the joys of origami.
With this method, which adds a handheld section on the back center of the butterfly that moves in sync with the wings, you can flap the wings of the butterfly you made and have fun! Because of the mechanism, there are inevitably some complex and delicate steps, but the initial parts—like making diagonal and cross creases or folding into triangles—are plenty enjoyable for children! Be sure to have the kids and the teacher work together and finish it as a team.
A twirling butterfly toy you can toss and play with

It’s so fun to make and play! Here’s an idea for a spinning butterfly you can throw and play with.
For children, it’s exciting to play with something they made themselves using origami! By folding paper, kids can experience the joy of shapes changing and feel a sense of accomplishment with the finished piece.
It’s a great idea for creative playtime, so highly recommended.
All you need is one sheet of origami paper.
The steps are simple and easy to follow, so try making it together with teachers or friends while having fun.
Make it with hanshi paper! How to make colorful butterflies
https://www.tiktok.com/@job_it/video/7072329343774641409Here’s an idea for making butterflies using calligraphy paper, paint, and pipe cleaners.
Prepare two sheets of calligraphy paper and paint each with your favorite colors.
Using several spring colors will make it nice and colorful.
Once the paint is dry, cut the paper into circles.
These will become the butterfly wings, so cut them to whatever size you like.
Lightly accordion-fold the center of each circular sheet, then place the two together and tie them with a pipe cleaner.
Leave the ends of the pipe cleaner long, and curl the tips to create the antennae.