
Why not try folding a rhinoceros beetle with origami?With its glossy body and impressive horn, the rhinoceros beetle is something kids admire.Here, we introduce an origami beetle idea you can enjoy with simple steps.By adjusting how you fold it, you can change the shape of the horn and the size of the body, creating your very own original beetle.Once finished, you can line them up for display or use them for pretend play—there are many ways to enjoy them.Be sure to have fun with origami time together with the kids!
- Kids will love it! Easy origami ideas—great as gifts too!
- Irresistibly fun to make! Simple mushroom origami ideas you can enjoy with kids
- Let's make dinosaurs with origami! Easy ideas kids can make
- Easy with origami! A collection of cute unicorn ideas that kids and adults will love
- Cute origami ideas
- Origami ideas boys will want to make!
- Let's make it with origami! Ideas for simple 3D creations
- Origami Pokémon! A collection of simple and cute character ideas
- Parents and kids will be hooked! Easy pumpkin origami ideas—perfect for Halloween crafts.
- Moving origami is fascinating! A collection of easy ideas that both kids and adults can enjoy
- Let’s make cosmos flowers with origami! A collection of simple ideas that both kids and adults can enjoy
- Easy Anpanman Origami! A Collection of Ideas That Both Kids and Adults Can Enjoy
- [Origami Horse] A Collection of Folding Ideas to Enjoy with Elementary School Children
Let's make a rhinoceros beetle with origami! A collection of simple folding ideas (1–10) that both kids and adults can enjoy
Realistic male and female rhinoceros beetles

Do you know the difference between male and female rhinoceros beetles? The biggest difference is that males have impressive horns, while females don’t.
It can be fun to explore these differences while making male and female beetles.
Let’s try making the male’s horn and the female’s face using rectangular pieces of origami paper.
It’s also nice to craft together with your child while talking about how males and females differ.
Besides the horn and face, you can twist origami to make legs and focus on the finer details, allowing you to create a rhinoceros beetle that looks just like the real thing.
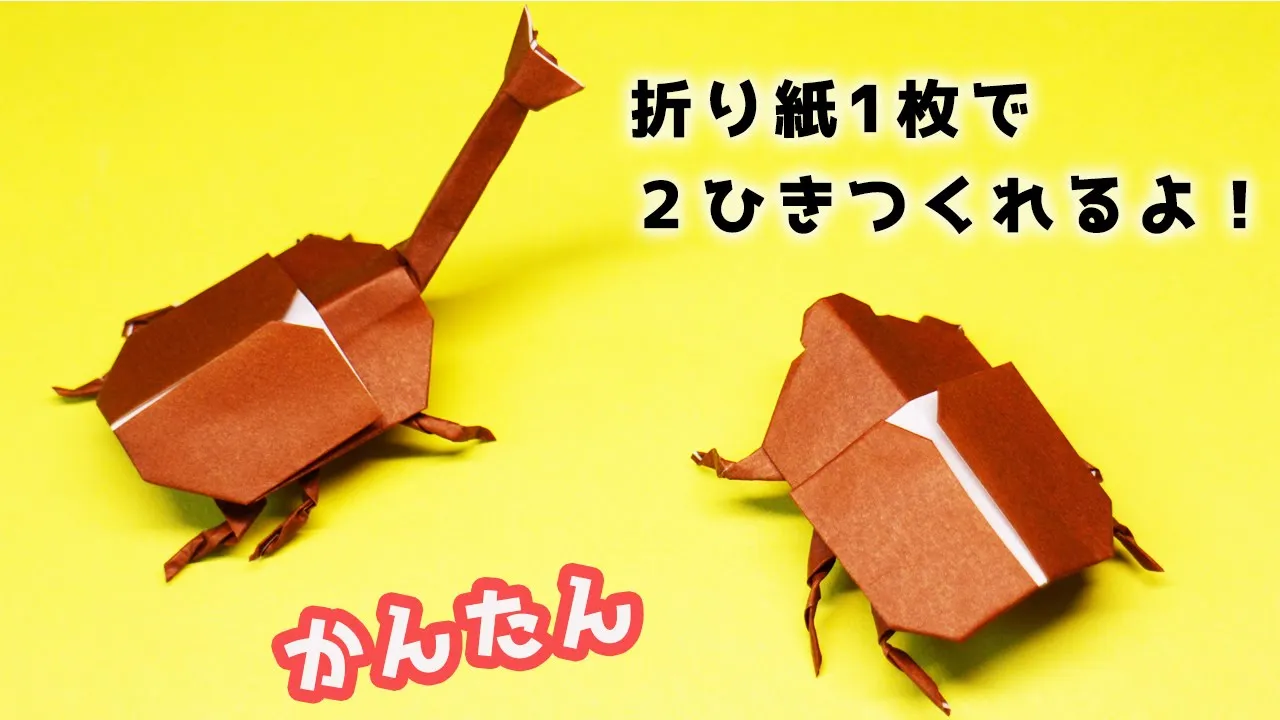
An easy origami rhinoceros beetle

You can easily make a rhinoceros beetle with just one sheet of origami paper.
Fold it into a triangle and open it to create a crease.
Then fold along the crease.
If you make a step fold where the body will be, it will look like a real beetle.
For the horn, use scissors to make a small slit at the tip of a corner, then fold it so it splits into two.
Besides brown or black origami paper, wood-grain patterned brown paper also gives a nice finish.
Try different types of paper and enjoy customizing your design.
Cool! 3D rhinoceros beetle

When you look at a rhinoceros beetle, it looks cool and even exudes a sense of dignity.
Don’t you get that image of a real beetle from a three-dimensional origami rhinoceros beetle? By making the body and legs separately and assembling them, you can create a solid, three-dimensional piece.
Use one sheet of origami for the right legs and one for the left legs, folding each so it becomes three legs.
There’s a place in the belly part of the body to insert the legs, so tuck them in there.
Carefully fold each leg one by one to finish.
You’ll have a rhinoceros beetle that looks like it could start moving at any moment.
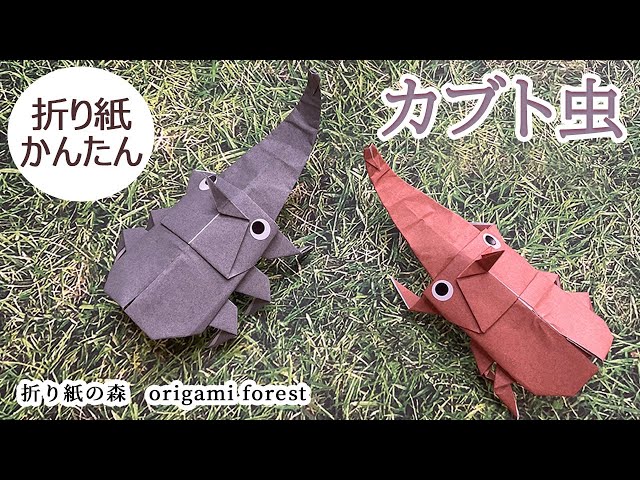
Cute rhinoceros beetle origami

Attach round stickers to your origami rhinoceros beetle to turn it into a cute beetle.
Fold the rhinoceros beetle with origami.
If you make the body and legs as separate beetles, you can create a three-dimensional piece.
Prepare white round stickers and smaller black round stickers than the white ones.
Combine these two stickers to make the eyes.
Attach the sticker eyes to the finished origami beetle.
Then you’ll have a very cute origami beetle.
How about displaying beetles made from black, brown, or gold origami with the eye stickers attached?
Perfect for summer! Origami rhinoceros beetle

This rhinoceros beetle project is great to make with parents and kids during summer vacation or other long breaks.
Let’s use two sheets of origami paper to fold a magnificent beetle.
There are some detailed folds, so it could be fun for the whole family to work together.
These days, it’s become rarer to see rhinoceros beetles outdoors, hasn’t it? Children may also have fewer chances to see real ones.
While making an origami beetle, why not chat with the kids about summer insects and fun facts about rhinoceros beetles?
Summer Origami! How to Fold a Rhinoceros Beetle

Origami rhinoceros beetle creations have a cute, round, chubby shape.
Because the design is rounded, there are some parts where you need to make fine folds.
Still, carefully folding each step will give you a satisfying sense of accomplishment when the beetle takes shape.
Adding sticker-made eyes to the finished beetle or attaching legs folded from origami can change the overall style.
Trying different arrangements can be fun, don’t you think? Once it’s done, you can mount it on a backing sheet to display, or place it on a shelf to bring a seasonal touch to your room.
Flat 3D is cute! How to fold a rhinoceros beetle
Compared to other beetle origami, this one is a bit simpler and less difficult.
The leg parts are made separately and attached later.
If you’re doing this with a child, it might go smoothly if the child makes the body and the adult makes the legs.
First, fold the paper diagonally, then fold both sides along the center line.
Flip it over and fold so that the tips overlap.
You’ll start to see something like a beetle’s horn appear, and at this point it’s sure to get everyone excited and shouting, “A beetle!”