For Seniors: Simple and Lovely Crafts – A Collection of Take-Home Project Ideas for Day Service


If you can take home the pieces made at day service centers and other senior facilities, you can display or use them at home, adding a little extra enjoyment to everyday life.
Many older adults also enjoy focusing on the act of making things.
So this time, we’ve gathered ideas for projects you can take home.
We’ve included practical items you can use at home, like small organizers and photo frames, as well as pieces you can simply display and enjoy!
The materials are easy to prepare, and we also make use of recyclables like empty jars.
Crafting involves using your fingertips, which can stimulate the brain and help prevent cognitive decline, while also providing a sense of accomplishment and fulfillment from creating something.
Please have fun making these projects!
- [For Seniors] Simple Handicrafts Recommended for Finger Exercise
- [For Seniors] Introducing Fun Crafts Made with Plastic Bottle Caps
- [For Seniors] Practical Crafts to Make in Day-Service Recreation: Idea Roundup
- [For Seniors] Recommended for day services! Simple and cute small craft ideas
- [For Seniors] Crafts to Enjoy with Yakult Containers: Ideas for Ornaments and Toys
- [For Seniors] Perfect for winter events! Easy craft ideas
- [For Seniors] Small craft ideas: for yourself and as gifts!
- [For Senior Daycare Centers] Ideas for Summer Take-Home Crafts
- [Day Service] Handmade Autumn Crafts: Take-Home Project Ideas
- [For Seniors] Easy and Fun! Tsumami Zaiku Craft Ideas
- Simple, Recommended Autumn Crafts for Seniors
- [Day Service] Spring Take-Home Crafts: Ideas to Warmly Brighten Your Room
- [For Seniors] Have Fun Making Things Based on Today’s Mood! Today’s Recommended Craft
[For Seniors] Simple and Lovely Crafts: Day Service Take-Home Project Ideas (371–380)
kaleidoscope

A kaleidoscope offers a magical experience where a glittering, beautiful world keeps changing just by peering into a tube.
You can actually make one with a paper cup.
Here’s an easy kaleidoscope idea.
First, cut out the bottom of a paper cup and apply double-sided tape around the top rim.
Stick pieces of cellophane in various colors onto the tape.
Replace the cut-out bottom with tracing paper.
Then point the cellophane side toward a light source like a fluorescent lamp, and—like magic!—you’ll see a lovely world where beautiful lights blend together.
Give it a try!
Gogatsu Ningyo (Boys’ Day dolls)
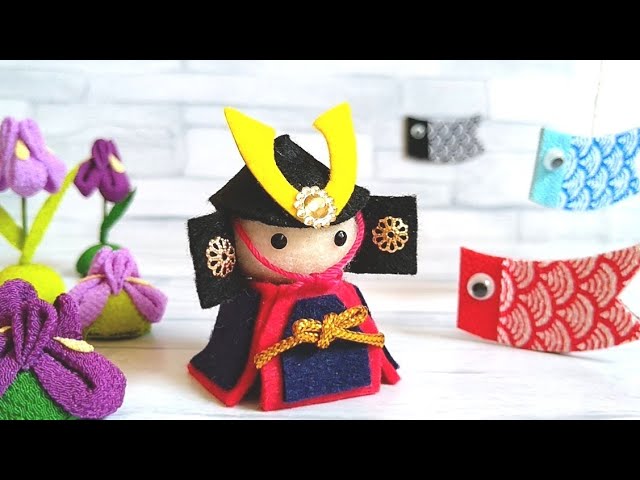
Let’s make a cute Boys’ Day doll out of felt without any sewing.
Use decorative balls—so-called pom-poms—from the 100-yen shop and stick on the armor and other parts.
Use a pom-pom for the face as well, and place a helmet on it.
If cutting small parts seems difficult, you can prepare just the parts in advance and simply have them assembled.
It’s fun because the finished dolls have a variety of expressions depending on the maker.
Please give it a try!
For Seniors: Simple and Lovely Crafts. Day Service Take-Home Project Ideas (381–390)
Embroidery kit

These days, 100-yen shops sell all kinds of things.
They even have craft sections, so you can easily get started without going to a dedicated craft store.
This time, I’d like to introduce embroidery kits from 100-yen shops.
They come with fabric printed with embroidery patterns and a set of instructions describing the stitches and steps.
The designs include flowers, alphabets, and more, so pick your favorite and give it a try.
You can also find suitable threads and embroidery hoops in the craft section at 100-yen shops.
Older adults, too, can enjoy quietly stitching their projects while having lively conversations with those around them.
Animal Magnets

Let me introduce some cute animal magnets you can make using plastic bottle caps.
Wrap twine around the bottle cap and secure it with glue.
Next, place some stuffing in the center of a round piece of fabric and wrap it up.
Attach the wrapped fabric to the bottle cap so the stuffing doesn’t show, then add felt ears, a face, and hands.
Finally, place a magnet between the twine you wrapped earlier and the bottle cap, secure it, and you’re done.
You can make all kinds of animals, so it would be fun to create them with friends and show them to each other.
Give it a try!
Mini bag made of faux leather

Faux leather for crafts, which is also sold at 100-yen shops.
Unlike fabric, faux leather doesn’t fray at the edges, so you don’t even need to sew it.
It’s a perfect material for crafts aimed at seniors that don’t use needles.
Prepare a mini-bag pattern in advance, trace it onto the faux leather, and draw your guidelines.
Cut along the lines and assemble.
You can also add plates or ribbons if you like.
It will look nice displayed in a senior’s room, and it would also make a delightful gift for family.
Japanese-style cherry blossom wall decoration

Let’s make a cherry blossom wall decoration that captures the charm of traditional Japanese style using disposable chopsticks.
Cover the chopsticks with vinyl tape and assemble them to create a frame.
On the base of the frame made from a milk carton, arrange cherry blossoms.
To give it a more traditional look, be sure to add a paper fan made from construction paper.
Making the cherry blossoms with washi-patterned origami paper will also result in a beautiful finish.
Because this piece includes a frame, you can take it home.
It might also be nice to display in a senior’s room.
Since you can make it with familiar, everyday materials, be sure to try it as a spring craft.
Japanese-style rhombus pen holder

This pen holder has a mysterious shape that makes you wonder, “How do you make it? Isn’t it difficult?” But you can make it with just one milk carton and some origami paper—and by using your favorite origami or chiyogami, you can enjoy different looks.
For the spout section of the milk carton, cut slits at the four corners, mark a point 10 cm from there, and cut off the bottom portion.
The part with the slits will become the base, so cut off the spout area, then draw diagonal lines across the main body to form an X.
Score along the lines with scissors or a hard tool like a ballpoint pen to make folding easier.
Cover the surface with origami from the top, and for the indented diamond sections, apply a different piece of origami to finish.