[For Seniors] Recommended for Christmas! Handmade Hanging Ornament Ideas

Aren’t there probably many seniors who are looking forward to Christmas?
You’ll want to welcome them with decorations that enhance the festive atmosphere.
So this time, we’re introducing origami hanging ornaments that bring a glamorous touch to Christmas.
We’ve also gathered ideas that can be adapted into hanging decorations perfect for the holiday season!
We’ve selected many easy, handmade projects, so they can be used as craft activities for seniors as well.
Spending Christmas at a facility decorated with ornaments you made yourself is sure to become a memorable event!
Enjoy a fun Christmas in a room adorned with handmade hanging decorations.
- [For Seniors] Recommended for Christmas Crafts! Simple Handmade Project Ideas
- [For Seniors] Lovely Christmas Crafts: Easy Ideas Using Recycled Materials and 100-Yen Shop Supplies
- [For Seniors] Easy Origami Recommended for Winter
- [Care Facilities] Popular Christmas Decorations: Handmade Ideas to Brighten Up Indoor Spaces
- [For Seniors] Try Making a Handmade Christmas Wreath! A Collection of Ideas Using Everyday Materials
- [Simple & Cute] Let's make a handmade Christmas wreath with a paper plate!
- [For Seniors] Brighten Up December Walls! Christmas Decoration Ideas
- [For Seniors] Wall decorations to fully enjoy the seasonal atmosphere: Fun Christmas decoration ideas
- [For Seniors] Let’s Make New Year Decorations by Hand! A Collection of Easy Ideas Using Everyday Materials
- [Handmade] Cute Christmas Decoration Ideas Collection
- For seniors: Introducing handmade decoration ideas to welcome a wonderful Christmas
- For Seniors: Brighten Up the Nursing Home with Festive Christmas Decorations!
- [For Seniors] Ideas for Winter Wall Decorations and Hanging Ornaments: Introducing Projects That Are Easy to Try
[For Seniors] Recommended for Christmas! Handmade Hanging Ornament Ideas (11–20)
Double heart hanging ornament

A glamorous and cute double-heart origami decoration.
First, divide a 15 cm square sheet of origami paper into eight vertical strips to make long, thin bands.
One double heart can be made from four bands.
Fold one band in half with the colored side facing out, and another band in half with the white side facing out.
Sandwich the colored-side-out band between two full-length bands, then place the white-side-out band on top and staple them together.
Starting from the outer parts, curl each piece inward and down, staple to secure, punch a hole, and hang with thread—and it’s done.
It’s nice that the steps are so simple!
windsock-style decoration

A beautiful hanging decoration that can be made using the traditional origami crane base.
First, fold the paper in half into a square by matching the top and bottom corners, then unfold it and fold it in half on the other side.
Next, fold the side with the open edges toward the center line to form a triangle.
Flip it over and do the same on the other side, folding the loose flaps toward the center.
At this point, if you firmly fold the top corner downward, you’ll get a neat crane base.
Hold the wing sections with both hands and snap them open to finish.
Connect several of them together to make a tree ornament as well.
Snowman made with rings

A classic for birthday decorations! This is a snowman craft made with paper chains.
Make a loop by gluing a strip of construction paper into a ring, thread another strip through it, then glue it into another ring to create a chain.
Use colored paper for the top ring, as it will be the bucket hat.
The second ring is the face, and the ones below form the body—decorate them with stickers and ribbons.
Attach arms made from brown construction paper and a hanging ribbon to the head, and it’s complete.
Hang it on the wall or ceiling to bring a wintry vibe.
You can use this idea to make Santa Claus, too.
Christmas Decorations with Paper Ring Garlands

This is about making a chain garland by turning long, thin strips of paper into loops and linking them together, giving it a Christmas feel.
Imagine connecting large loops with thin loops, arranging it so that only one side of each large loop is visible.
The motifs to create include Santa Claus, reindeer, and snowmen.
Each motif is completed in two segments—one for the face and one for the body—and then connected together.
Since you’ll make several long garlands, it’s recommended to vary the positions of the motifs on each one to achieve a more luxurious look.
A Christmas garland that also works as a sun catcher
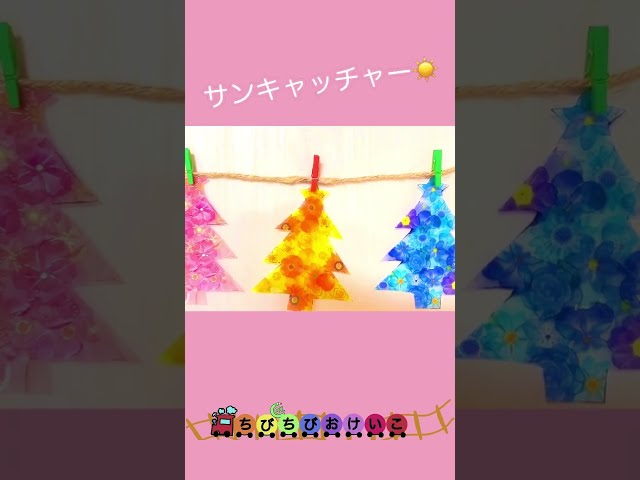
Recommended for anyone looking for an easy-to-make garland! First, draw a tree on a clear file folder and fill in the inside with your favorite stickers.
If you’d like to use it as a sun catcher, use translucent stickers.
Once the stickers are in place, cut it out in the shape of a tree and clip it together to complete your garland.
Using the same design with stickers in different colors can give you both a unified look and a festive touch.
It might also look cute to decorate the edge of the clear file with sparkly pipe cleaners.
Angel hanging ornaments
@charmytoko Angel decoration made from a paper plate 👼໒꒱ This is a craft where you can make an angel using a single paper plate. If you attach a thread, you can hang it from above to make it look like it’s floating in the sky. It’s cute, like a mobile 🎈 You can also make it with lace paper, but because it’s thin, the wings won’t stand up well 💦 Layering a few sheets might work, but it feels a bit wasteful... It’s simple, so please give it a try. Materials: • 1 paper plate (15–18 cm) • Optional: stickers and pens This time, I finished it using beige masking tape for the hair, round stickers for the cheeks, and a glitter pen for the pattern on the clothes.paper plate#HandmadeToysscrap materialCrafts with scrap materials#ScrapMaterialToys#AtHomePlayEarly childhood education materialsNursery teacher / Childcare worker#toddleractivities#recycleandplayMobileChristmas PartyChristmas craftsChristmas craftsChristmas decorationsChristmas decoration#christmas2022#christmascrafts#christmascraftideas#christmascraft
♬ I’M FEELING LUCKY – Ellen Once Again
How about making an angel hanging ornament out of a paper plate to decorate your room, with its gentle vibe soothing your heart? Amazingly, you can make this with just a single paper plate! The method is very simple: when you roll the paper plate into a cone, make cuts so that the angel’s wings and face sections pop up.
Then just trim the wings into shape with scissors, draw the face, make a halo with a pipe cleaner, and decorate freely to finish! The key point is how you make the cuts in the paper plate, so please refer to the video while you make it.
[For Seniors] Recommended for Christmas! Handmade Hanging Ornament Ideas (21–30)
ball ornament

Here’s an introduction to making a cute spherical ornament out of felt.
First, create a circular template and use it to cut out circles from felt.
Cut five pieces each in two colors, such as red and green, then cut them in half and glue them together with a hot glue gun.
Be careful not to burn yourself, as the glue gun gets very hot.
After making two half-spheres, attach a bell with a thread to the bottom, and a ribbon with a pearl bead to the top.
That’s it! Simply by changing the colors, you can create ornaments with either a Western or Japanese feel—aren’t they lovely?