[For Seniors] Simple and Fun: Craft Ideas You Can Make with Everyday Items


What we introduce here are easy craft ideas for older adults.
They’re all easy to incorporate into recreational activities at senior facilities such as day service centers.
Using familiar, everyday materials, these crafts are simple to make, making it easy for seniors to give them a try.
We hope you’ll use craft-making to help stimulate both mind and body.
Since it involves using the hands, it also serves as brain training and can help prevent dementia.
Be sure to read this article and use it as a reference for craft activities.
- [For Seniors] A Collection of Craft Ideas Using Paper Cups
- [For Seniors] Recommended for day services! Simple and cute small craft ideas
- For Seniors: Simple and Lovely Crafts – A Collection of Take-Home Project Ideas for Day Service
- [For Seniors] Simple Handicrafts Recommended for Finger Exercise
- [For Seniors] Lovely Crafts Made with Tissue Paper: Ideas Collection
- [For Seniors] Have Fun Making Things Based on Today’s Mood! Today’s Recommended Craft
- [For Seniors] DIY Rehabilitation Aids: A Collection of Easy-to-Make Ideas
- [For Seniors] Easy and Fun! Tsumami Zaiku Craft Ideas
- Simple, Recommended Autumn Crafts for Seniors
- [For Seniors] Easy Construction Paper Crafts Activity
- [For Seniors] Day-service activities also recommended! Craft ideas for November
- [For Seniors] Practical Crafts to Make in Day-Service Recreation: Idea Roundup
- [For Seniors] Fun to Make, Soothing to Display! Snowman Craft Ideas
[For Seniors] Easy and Fun: Craft Ideas You Can Make with Everyday Items (51–60)
Cushions woven from cardboard
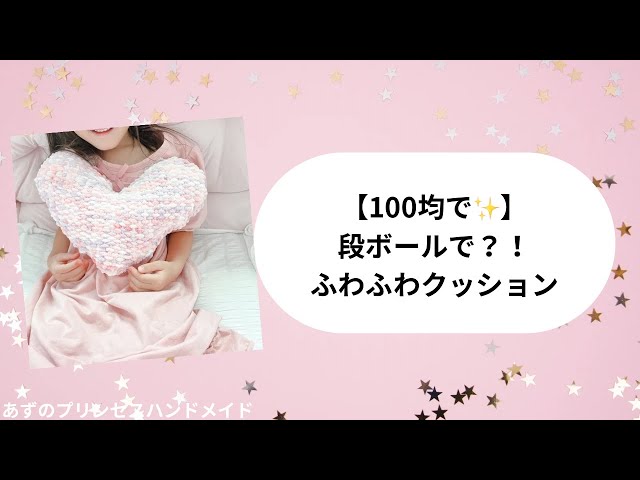
A cute cushion woven with cardboard feels nice to the touch and can be easily made with everyday materials.
Get your yarn, cardboard, chopsticks, and a comb ready.
Trace a heart shape made from construction paper onto the cardboard and cut it out.
Make small, frequent slits around the heart with scissors and hook the yarn onto them.
Next, use the chopsticks to weave the yarn so it goes over and under alternately; using a comb as you work will help the process go smoothly.
Tie off the yarn, trim it, and remove the piece from the cardboard.
Make a second heart of the same shape, stack the two together, and stitch around the edges with yarn.
Stuff generously with filling, and you’re done.
It’s a great project for parents and kids to enjoy together, so give it a try!
A placemat woven from cardboard

Add color to your table with a placemat you make yourself.
Create an easy yarn placemat using a cardboard loom.
Tape the edges of the cardboard with duct tape, cut small slits along the edge, then thread yarn into the slits.
The duct tape reinforces the cardboard when you cut it and when you thread the yarn.
After threading the yarn through the slits and wrapping it around, begin weaving.
When weaving, pass the yarn through a dedicated shuttle or a piece of cardboard.
Try changing the yarn color partway through to give it a different look.
When you finish weaving, tie the yarn at both ends to complete your placemat.
A mat woven with anti-slip sheets

Many people use non-slip mats to prevent shifting at the entrance or in the bathroom.
If you use a non-slip sheet with small holes, you can make a knitted mat by taking advantage of those holes.
Thread yarn through the holes in the sheet and keep knitting.
Layer another non-slip sheet on top and crochet the edging around both sheets together.
Add a frill to complete a cute, furry-looking mat.
Since the steps aren’t too complicated, it seems like something you could make with your child.
The frilled design also gives it a princess-like feel, so children who love princesses are likely to enjoy it.
A scarf woven from milk cartons

With an empty milk carton and some disposable chopsticks, you can make a knitted scarf.
Cut several chopsticks in half and attach them to the milk carton.
Now you’ve got a simple loom.
You can also use thin black bobby pins instead of chopsticks, but the chopsticks are easier to knit with.
By threading the yarn through the chopsticks in sequence, you can knit, so even young children can make a project.
As the knitting progresses and the scarf grows longer and longer, kids will probably get excited watching it.
When you’re finished, add yarn pom-poms to complete a cute scarf.
[For Seniors] Simple and Fun: Craft Ideas You Can Make with Everyday Items (61–70)
Weaving a coaster with a paper plate
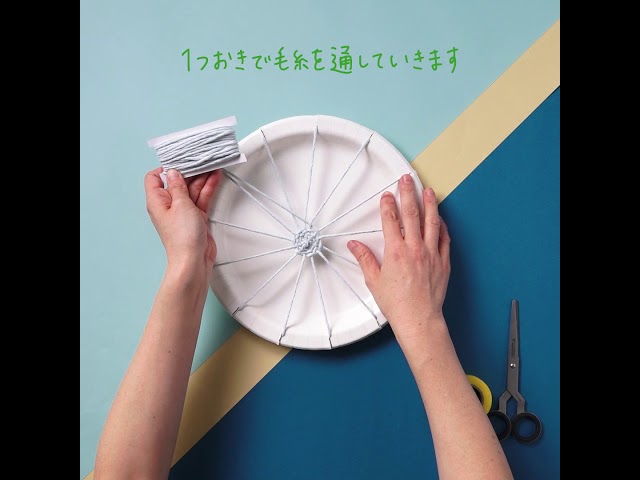
Let’s make round yarn coasters that take advantage of a paper plate’s circular shape.
Cut slits around the rim of the paper plate.
The key is to make sure the number of slits is odd.
Thread yarn from the back of the plate through a slit, then across to the slit on the opposite side.
Continue threading the yarn through all the slits, and then start weaving from the center of the plate.
With this method, you can easily make a circular coaster.
Switching yarn colors partway through will create a cute design.
Both paper plates and yarn are sold at 100-yen shops, so it’s easy to gather the materials.
It also sounds fun to make matching coasters together with your child.
A magnet that looks like a cake

Introducing a magnet that looks just like a cake, made from felt and a plastic bottle cap.
First, cut the felt into a circle to match the size of the cap.
Also cut a long, narrow strip, checking the size so it can wrap around the cap.
Apply glue inside the cap, insert air-dry clay and a magnet, and secure them in place.
Then cover the magnet with masking tape as a protective layer.
Attach the pre-cut felt, wrapping it around the outside.
Adding lace around the side gives it a cute finish.
Finally, decorate the felt “lid” as you like, and it’s complete.
Since there are no difficult steps, this craft can also be used for finger rehabilitation or occupational therapy.
stained glass

You might strongly associate it with hands-on crafting experiences, but there’s actually an easy idea you can make! First, get a transparent clear file folder and cut it to your preferred size while keeping the binding edge intact.
Open it up and decorate the inside by sticking on small glass counters (ohajiki), and you’re done in no time.
All the materials are everyday items, so it comes together in a flash!