![[For Seniors] Handmade gifts they’ll love: a roundup of simple ideas](https://i.ytimg.com/vi/7Jab3er9mJA/sddefault.jpg)
[For Seniors] Handmade gifts they’ll love: a roundup of simple ideas


Gifts given at senior facilities for events like birthday parties and Respect for the Aged Day celebrations.
Seeing the delighted faces of seniors holding their gifts makes everyone around them happy too, doesn’t it?
That said, coming up with gift ideas can be tough, and it’s easy to end up giving the same kinds of items over and over.
This time, we’ll introduce handmade gift ideas that seniors will love.
We’ve gathered items that are easy for busy staff to make and highly practical, among others.
When a gift is filled with the maker’s care, it can bring even greater joy to the seniors who receive it.
[For Seniors] Handmade Gifts They’ll Love: A Roundup of Simple Ideas (1–10)
drawstring pouch
A practical drawstring pouch that can store small items like handkerchiefs and accessories makes the perfect gift for seniors who tend to misplace things.
It helps prevent small items from scattering at the bottom of a bag, and it’s also handy as a container for regular medications.
While a square drawstring pouch is easy to make, if you want to finish it with a cute touch as a slightly special present, we recommend giving it a rounded shape and making the drawstring section with a different fabric.
If the recipient enjoys sewing, they might find it so adorable that they’ll say, “Teach me how to make it!”
amulet
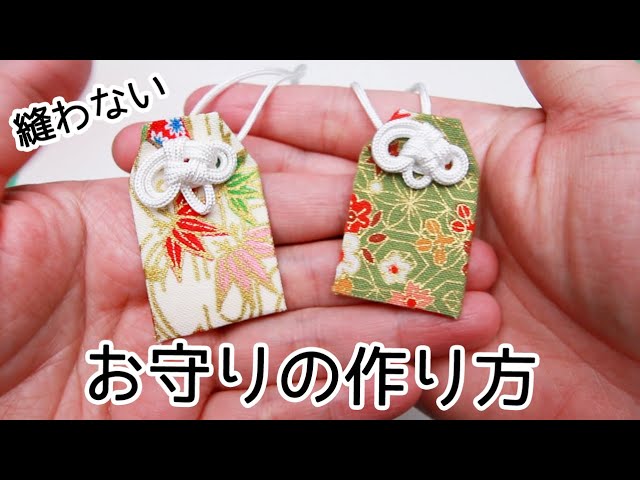
Try giving a handmade charm as a gift to express the wish, “May you stay healthy forever.” It’s great to sew together fabric with traditional Japanese patterns or add embroidery to make an authentic charm, but if you’re not confident in your sewing skills, printed fabric tape sold at 100-yen shops is highly recommended.
With it, you can create a polished charm without any sewing.
The most important thing with handmade gifts is putting your heart into them.
If you make a charm while thinking of the recipient, they’re sure to be delighted.
balloon bouquet
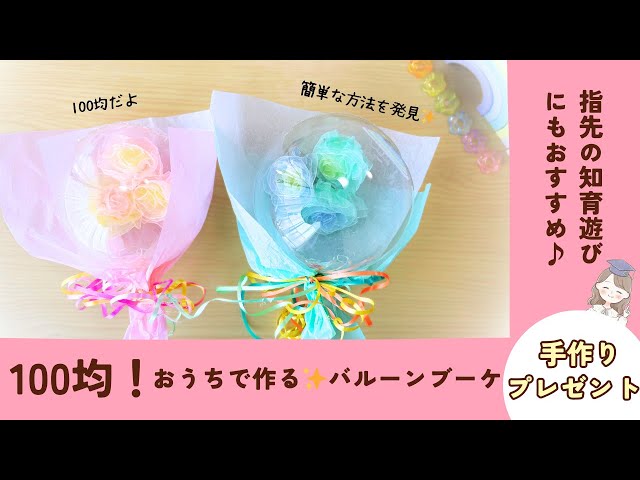
A balloon bouquet that never withers and needs no care is a perfect gift for seniors.
Apply strong double-sided tape to 10 cm and 20 cm tulle ribbons, then roll them up to create cute flowers.
Insert the flowers through the opening of the special clear balloon.
If the opening is small and hard to use, make a small slit with scissors and open it up.
Inflate the balloon, add wrapping, tie a ribbon, and it’s done.
Give it a try!
Heart wreathNEW!

You can easily make a wreath using paper plates sold at 100-yen shops.
Paper plates are lightweight, making them easy for older adults to handle and work with.
Fold a paper plate in half and cut it so that it forms a heart shape.
Then, attach flowers made from tissue paper that’s been bundled and accordion-folded onto the heart-shaped paper plate.
You’ll have an adorable heart-shaped floral wreath.
Hanging a wreath in your room will elevate the decor.
For older adults, having a room decorated with something they made themselves can also bring a sense of accomplishment.
A caricature as a present

No matter how old you are, it’s always nice when someone draws a portrait of you, isn’t it? It’s sure to be a hit as a surprise for birthdays, Respect-for-the-Aged Day, or any kind of event! It’s great if a staff member who’s good at drawing does it, or you could have all the participants draw portraits for one person.
Even if you’re not good at drawing, a portrait made with love will get the message across.
Add decorations and messages to make it even more festive!
Skeleton Bouquet

A lovely skeleton bouquet with a beautiful translucent look.
It doesn’t take up much space, is easy to display, and blends nicely with your interior—those are the key selling points.
Place your photo on a laminating film and rub over it with a ruler from the top.
Soak it in lukewarm water for about 5 minutes, rub off the photo portion, and once it’s dry, apply the film.
Cut it into your preferred shapes and stick them onto a photo frame.
After adding transparent flower stickers, use a pen to draw stems and write a message.
Decorate with ribbons and pearls to complete a one-of-a-kind bouquet! This photoframe looks so refined you wouldn’t believe it’s handmade—perfect as a gift, don’t you think?
Hydrangeas at the mall

It’s a very rewarding project because you’ll make lots of flowers.
But the method is simple! First, wrap a chenille stem (pipe cleaner) around a pen 5–6 times to make a coil, slide it off, shape each resulting loop, and attach a bead or other decoration in the center.
Prepare as many of these as needed to match the size of the hydrangea you want to make.
Attach a piece of wire to each one as a stem substitute, combine several into small bundles, make a few of those bundles, and then bring the bundles together to finish the hydrangea.
If you want a larger bloom, keep at it and make lots of little flowers.