For Seniors: Wall Decorations to Brighten Up February — Festive Ideas for Setsubun, Valentine’s Day, Plum Blossoms, and More


February wall decorations are a hands-on way to feel close to seasonal events like Setsubun and Valentine’s Day.
You can roll paper to make an ogre’s hair, or use a bamboo mat to craft realistic ehomaki sushi decorations.
As your hands are busy, the moments when lively conversations blossom about fun memories from February will surely be the most heartwarming of all.
This time, we’re sharing ideas for February-specific creations—from cute wreaths to Japanese-style ornaments.
Enjoy the fun of making and the joy of displaying while engaging your fingertips to stimulate the brain.
How about brightening up a senior facility or your home with wall art that evokes the coming of spring?
- [For Seniors] February Wall Decorations: Setsubun-Themed! Fun Ideas with Oni Demons and Ehomaki Sushi Rolls
- [For Seniors] Fun February Crafts: Ideas Inspired by Setsubun, Valentine’s Day, and Other Events
- [For Day Service Centers] February Craft Ideas: Decorations for Setsubun, Valentine’s Day, and the Feeling of Spring
- [For Seniors] Spring Wall Decorations: A Collection of Ideas to Brighten Up Your Room
- [For Seniors] Ideas for decorating February walls with oni (demons). Unique personalities shine through with oni showing various expressions.
- [For seniors] A handmade calendar you’ll want to make in February
- [For Seniors] Heartwarming and Cozy: Perfect Wall Decoration Ideas for Winter in Care Facilities
- [For Seniors] Liven Up Setsubun Crafts! Handmade Ideas Using a Variety of Materials
- For Seniors: Recommended Wall Decoration Ideas for March
- For Seniors: Fun Activities in February — Celebrate Setsubun, Valentine’s Day, and Snow
- [Day Service] Setsubun decorations that bring smiles. Ideas for enjoying them with a variety of materials.
- [For Seniors] Recommended Wall Decorations and Crafts for January
- [For Seniors] Decorate your January wall with rabbits! Packed with ideas like snowball fights, New Year’s festivities, and rice cake pounding
[For Seniors] Wall Decorations to Color February: Festive Ideas for Setsubun, Valentine’s Day, Plum Blossoms, and More (41–50)
Plum blossom mobile
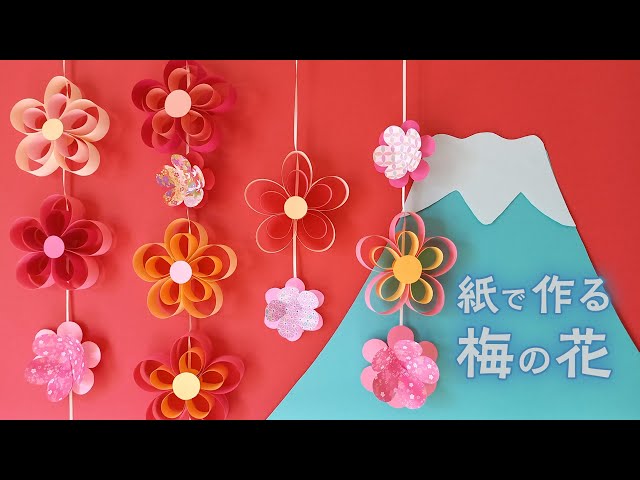
Plum blossoms are well known as flowers that herald early spring.
Even in the cold season, they bear small, delicate blooms.
Why not make a wall decoration so you can enjoy plum blossoms indoors? By combining two types of long, narrow paper strips cut to different lengths, you can easily create plum flowers.
You can also cut paper into circles to form petal shapes, and by layering two of them, you’ll get plum blossoms with a different feel! If you’re decorating a wall, we recommend making lots of these and turning them into a mobile.
Of course, they also look great on their own, so feel free to get creative.
[For Seniors] Wall Decorations to Brighten February: Festive Ideas for Setsubun, Valentine’s Day, Plum Blossoms, and More (51–60)
A demon made by winding yarn
Here’s a simple craft idea for making an oni (ogre) decoration.
Cut cardboard into a square and create the oni’s face.
Wrap the cut cardboard with yarn in colors you like, such as blue or red.
Attach the facial features, and your oni is complete.
You can display it on a decorative fan base for a festive look, or mount it on construction paper or colored paper for a lovely finish.
To give it a Setsubun feel, arrange holly leaves or plum blossoms around the oni to create a lively atmosphere.
It’s also fun to make several Setsubun-themed parts together with older adults.
You can prepare the parts in advance, let the seniors choose the pieces, and have them finish the work in their preferred style.
Mini shikishi decorations for Setsubun from the 100-yen shop

This is a wall decoration themed on oni (demons) that appear during Setsubun, one of Japan’s traditionally beloved seasonal events.
Why not create a seasonal decoration using items you can buy at 100-yen shops? Make the oni’s facial parts from construction paper, assemble them, and attach a soft cord to both sides.
After sticking paper that represents beans (like Lezac cardstock or colored construction paper) onto small square cards, decorate them with the oni parts using double-sided tape.
Scatter beans and other elements used in the oni-banishing scene across the cards, attach a ribbon at the top, and it’s complete.
Working on these detailed steps also serves as finger-movement training.
Cute heart wreath

This is a cute wreath with a row of heart motifs inside the ring, perfect for a Valentine’s Day vibe.
Use two sheets of origami with different colors on the front and back, cut each into four to make eight pieces in total, then assemble the parts into a wreath.
Fold each piece in half with the color you want for the hearts on the inside, then fold in half again into a triangle.
Insert the pieces into each other in order and form a circle.
Finally, open the inner sections of the ring to reveal the heart shapes, and it’s complete.
For a bolder look, make sure the color contrast is clear so the hearts stand out.
Recommended for class activities! Draw your favorite demon

When you think of events in February, Setsubun probably comes to mind.
And when you think of Setsubun, you think of oni (ogres).
How about making unique oni crafts as a recreation activity? Staff can prepare the base parts in advance, such as the oni’s face, horns, and hair.
The rest can be drawn or decorated by the seniors, resulting in oni full of each person’s creativity.
Oni with one or two horns, or even a one-eyed oni—each one uniquely made by the participants.
When these oni are displayed on the facility walls and brighten up the rooms, some seniors may feel the season and grow fond of them.
It’s a project that enhances the Setsubun spirit and brings enjoyment.
Heart-shaped flower made of origami

Cute heart flowers made with paper cutting are an easy idea for winter wall decorations! Just a small display can create a Valentine’s Day atmosphere, so why not try using them in senior care facilities and other settings? To make them, simply fold origami paper, sketch the design, and cut with scissors.
You can create two types: one with space in the center for a message, and another with a design that extends all the way to the center.
Give them a try! They’re great not only as wall decorations but also for attaching to cards—so feel free to make them and enjoy the Valentine’s mood.
Origami holly and sardine

The classic Setsubun decoration that combines a sardine head with holly leaves is best known not so much for its talismanic power to ward off evil, but for its curious appearance.
Let’s make this “holly-sardine” using chopsticks and origami.
For the sardine head, use radial creases as a guide to fold it into a diamond shape, then tidy both ends to create a sharp, fish-like form.
Leaving a small gap at the tip is key—insert a chopstick there, and it will look as if the head is stuck onto a holly branch.
For the holly leaves, fold green origami into long, narrow strips, shape leaf tips at both ends, then attach them by wrapping them around the chopstick to complete the whole piece.