![[Crafts] Perfect for birthdays! A collection of DIY Minecraft decoration ideas](https://i.ytimg.com/vi_webp/v3p3wlxbUAA/maxresdefault.webp)

As of 2024, Minecraft is known as the best-selling game in the world.
It’s a highly flexible sandbox game where you can use blocks to build whatever you imagine and explore vast worlds.
There are probably many families with children who are hooked on it—or even playing together as a whole family.
In this article, we’ll introduce handmade Minecraft decoration ideas that are perfect for brightening up a birthday.
You’ll find plenty of wonderful decorations that both kids and adults will enjoy!
Be sure to use these as inspiration!
- Origami ideas boys will want to make!
- [For Kids] Today’s Handmade Craft Ideas
- [Indoor Activities] A Collection of Craft Ideas Recommended for Elementary School Students
- [Craft] Handmade Ideas for The Game of Life [DIY]
- Kids will love it! Easy origami ideas—great as gifts too!
- [Birthday] Handmade decoration ideas using construction paper
- Handmade toys with magnets! A collection of fun, playable ideas
- Christmas crafts for adults: stylish project ideas you'll want to display
- [Elementary School] Treasure Discovered! A Collection of DIY Puzzle Treasure Hunt Ideas
- Handmade birthday plate ideas: make birthdays extra special!
- Made of paper! A fun collection of DIY toy ideas you can play with
- A handmade collection of Anpanman ideas to enjoy
- [100-Yen Store Crafts] Handmade ideas that captivate adults too. Stylish DIY/handmade.
[Crafts] Perfect for birthdays! A collection of handmade Minecraft decoration ideas (1–10)
paper chest

Here’s an idea for a paper-crafted chest! In the world of Minecraft, you can make a chest out of wood to store materials you can’t carry around.
If you play the game, you’ll probably make this chest early on.
So for a birthday, how about making a paper chest as a gift? You can download the template, cut it out with a craft knife, and assemble it according to the instructions.
If you print it larger and use thick paper or cardstock, it could work as a small storage box!
Bowing Steve

Here’s an idea for a bowing Steve that will melt your heart with its cuteness.
Steve is attached to the end of two overlapping ice cream sticks, and when you slide one of the sticks, it triggers a mechanism that makes him bow.
First, download the template available online.
If you load your skin data at this stage, you can finish it with any look you like.
Next, print it on thick paper and cut and fold according to the instructions.
Finally, combine it with the ice cream sticks that serve as the handle, and it’s complete.
You’ll want to make enough for everyone and play together.
Walking Creeper

A three-dimensional Creeper made from papercraft—what’s fun is that when you place it on a slope, it starts toddling along.
The grid for the face and other details uses printed parts, so it’s an easy process of just cutting out the template and assembling it.
The key is the structure of the hind legs: they’re intentionally designed to wobble, connected via an axle that runs through the body, which creates the walking motion.
It also sounds fun to experiment by changing the weight and the slope angle to see what makes it walk faster.
Enchanted Sword made of color board
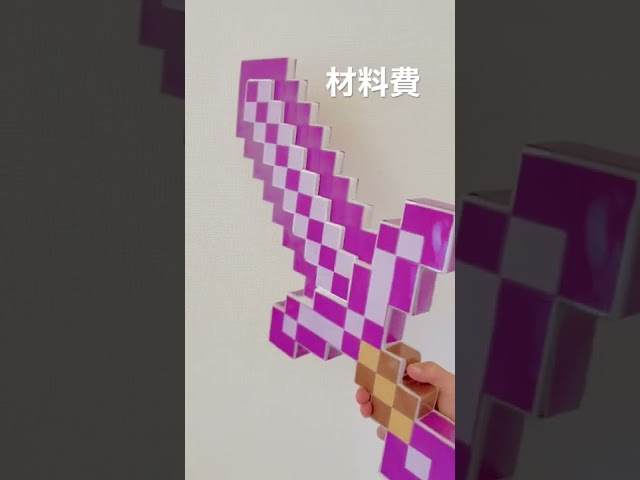
It’s a three-dimensional craft where you cut color board into the shape of an enchanted sword; the more steps and fine layers you add, the larger it tends to become.
If you choose color board with a grid, you can use it as a guide to draw your design, so that’s recommended.
Once you’ve finished cutting according to the design, add color with construction paper.
Again, use the grid as a guide and be mindful of filling the blank spaces.
It’s a three-dimensional craft that takes advantage of the thickness of the color board to create a festive, celebratory look.
Thick paperboard diamond sword

Let’s make a diamond sword—the weapon you can obtain in Minecraft—by combining colored paper and cardstock.
The key to conveying that it’s from Minecraft is the arrangement of continuous squares.
First, crease the colored paper into an even grid, then use those creases as guides to draw your design.
Once you’ve drawn the design on the colored paper, glue it onto the cardstock and cut it out.
Attach decorative parts made with a different color, and one side of the design is complete.
Next, make the same piece again and glue it to the back.
Then, to both emphasize that it’s a block and hide the exposed edges of the cardstock, apply colored paper to the sides as well.
If you finish it with a thickness about the same as the grid squares, it should give a solid three-dimensional effect.
Styrofoam Nether Gate
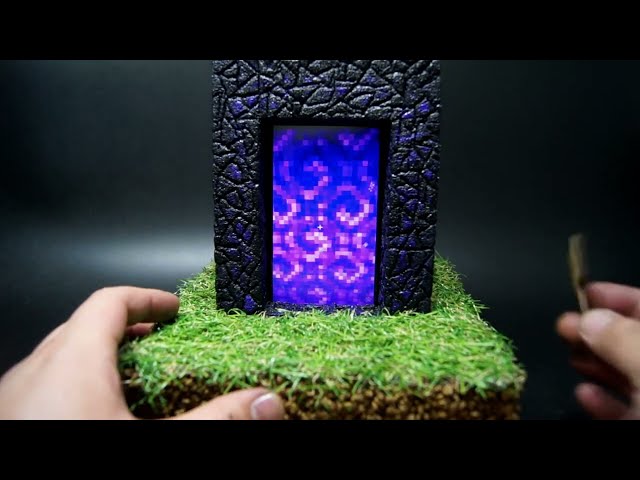
This is a Nether portal made by cutting polystyrene foam.
Because it’s a simple build that only involves making the frame, it’s especially important to measure the block sizes accurately and to replicate the fine details of the patterns.
The obsidian blocks used for the Nether portal have a distinctive jagged texture, so use a cutter to carve those lines.
Once you’ve etched the pattern across the whole surface, paint it with an emphasis on gloss and an eerie feel.
Attach the ominous destination visible through the frame, and it’s complete.
Microbead Minecraft ornament
This is an easy-to-follow guide for making Minecraft characters with Perler beads.
Since you arrange beads on a pegboard using the grid as a guide, it’s also easy to create Minecraft’s symmetry.
While flat designs are the standard for Perler beads, it’s also recommended to make the sides and back in the same size and combine them to form a 3D piece.
Think of each bead as one block, and build up the design just like in Minecraft.