![[Craft] Handmade Planetarium Idea Book](https://i.ytimg.com/vi_webp/PX5JzY5Kerg/maxresdefault.webp)

A sky full of twinkling stars… Doesn’t just imagining it fill your heart with romance?
Light traveling from far, far away gathers to create a beautiful carpet of stars.
Here’s a suggestion: why not enjoy that breathtaking scene to your heart’s content right at home?
What we’re introducing today is a collection of DIY planetarium ideas!
Everything can be made with materials you can find at local shops, so anyone can give it a try with ease!
- [School Culture Festival] Handmade Planetarium Ideas
- [Craft] Sparkling! A Collection of Handmade Kaleidoscope Ideas
- Simple yet amazing crafts: craft ideas that elementary school students will want to make
- [For Girls] Make It with Everyday Items! Easy but Super Cute Craft Ideas
- Handmade snow globe ideas: simple yet cute crafts
- A collection of DIY ideas for lanterns and lamps made from milk cartons
- Handmade lampshade ideas. Let’s create a stylish interior!
- Adults will be hooked! A collection of craft ideas using toilet paper rolls
- [For Adults] Recommended Craft Kits
- Easy handmade Christmas crafts: ideas you'll want to display
- Christmas crafts for adults: stylish project ideas you'll want to display
- For summer vacation homework! Simple and amazing crafts for elementary school students that you’ll want to make after seeing them
- Make it with everyday materials! A collection of fun summer vacation craft ideas
[Craft] Handmade Planetarium Ideas (1–10)
A planetarium you can make with items from a 100-yen shop!NEW!
@yume…mirai I tried making a “planetarium” using items from DAISO 🌠 It’s a great recommendation for spending time at home during summer vacation 🥰#daisoDaiso#daiso purchases#DaisoPurchases#Summer VacationSummer Vacation CraftworkIndependent Research#Production VideoParent-child timeHow to spend a day off
Starlight Parade – SEKAI NO OWARI
You can easily make this using only materials from a 100-yen shop! On the black construction paper, make a mark about 5 cm up from the bottom edge near the center, stick the compass point there, and draw a circle.
Cut along that line, then connect the first mark to one end of the bottom edge and cut to form a triangle.
On the remaining circular piece of construction paper, create designs by drawing with dots and punching holes.
Attach transparent colored origami paper of your choice over the holes, then assemble it into a cone shape to finish! If you place a small round light at the base, beautiful stars will appear in the dark.
Stylish planetarium cafeNEW!
@hzk9016 Planetarium Café 💫⭐︎ Our last high school culture festival was a huge success 🩷ྀིCultural Festival#ljkPlanetariumcafe
♬ Always Be My Baby – Mariah Carey
How about creating a stylish café that projects a planetarium-like starry sky indoors? Point a projector at the ceiling or walls and display photos or videos of stars to make countless stars appear throughout the room.
You can also decorate the interior with star-themed ornaments and LED lights.
To keep the room completely dark, use blackout curtains and similar materials.
For the café menu, we recommend items inspired by stars and celestial bodies.
Since the interior will always be dark, please operate with safety in mind!
Easy! A Construction Paper PlanetariumNEW!
@atsumichan774 At night, turn off all the lights in your room… and play with a homemade planetarium! Hello! I’m Atsumi, a nursery teacher! Today I made a planetarium using colored cellophane, construction paper, and a smartphone! Use a craft knife to cut holes in the black construction paper in any shapes you like—stars, triangles, squares… making lots of different shapes is really fun. Once you tape the paper into a cone shape, shine your phone’s light from the inside and play! It looks seriously beautiful and it’s so much fun! ● Materials Construction paper Colored cellophane Clear tape Smartphone Atsumi-sensei’s Craft Channel Atsumi-sensei’s Nursery Diary Sound effects: Maou DamashiiPlanetariumHandmadework#Nursery schoolSummerArtNight sky#HandmadeToysShooting starColor cellophaneDaisoProduction ideasAugust
♬ sweet dreams – Chaba no Gika
This is a simple planetarium you can make with construction paper and colored cellophane.
Cut a large semicircle out of black construction paper.
Draw small stars and patterns like circles, triangles, and squares on it, and cut them out according to their shapes.
On the cutout areas, randomly stick small pieces of colored cellophane in various colors.
Finally, roll the construction paper into a cone shape to finish.
If you shine a smartphone light at the base, the stars in the shapes you cut will be projected!
Origami PlanetariumNEW!

You can make a cool-looking planetarium out of origami! First, use dark-colored origami paper, such as purple or black, to make pentagons.
Make a total of 11 of these.
Create one unit combining 6 and another combining 5, then join those two units together.
Next, cover one entire face with silver origami paper.
On the face without the silver paper, use a needle or similar tool to poke lots of tiny holes.
Finally, shape it into a dodecahedron with one face left open—and you’re done! By placing a light inside the open part, countless small stars will appear in a dark room.
A starry stroll to enjoy in the cityNEW!

Let’s create a planetarium show that highlights stars you might be able to see from our own town.
If you pick stars that match the season when the school festival is held, you can encourage the audience by saying, “Tonight, try looking up at the sky to see if you can spot them.” For this season and this time of night, showcase which stars are visible by projecting clear, bright imagery or photos of the stars.
Be sure to include supplementary explanations, such as which direction to look, as you present.
A simple cardboard planetariumNEW!

You can make a planetarium using just a cardboard box and aluminum foil! Cut off all of one set of box flaps.
On the other set, cut them so that about 2 cm remains.
Fold the side with about 2 cm left as if closing the lid and secure it.
Place aluminum foil over that section and stick it on.
Use pens and needles of various thicknesses to make lots of holes.
Stretch the foil tightly and secure it, and you’re done.
Put a smartphone light or a small light inside while it’s on, turn off the room lights, and stars will spread across the room.
dome-shaped planetariumNEW!
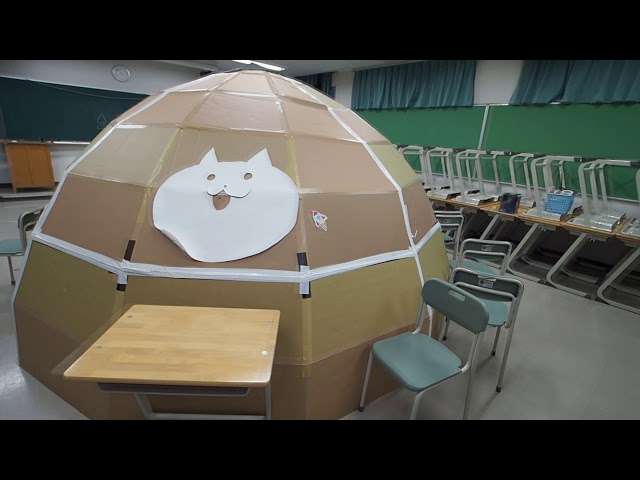
It’s a gentle, cardboard-made planetarium that can softly unfold a starry sky right inside the classroom.
First, create triangular and polygonal cardboard panels according to a blueprint, then connect them little by little and assemble them into a hemispherical dome.
The key is that by creating this rounded space, the sky looks more expansive.
Inside, place a light and sheets with star-shaped holes; when you turn off the lights, the stars gently float into view.
Going in with a small group will make for a special, secret-base-like memory!