Handmade accessory ideas that will delight the recipient! Easy DIY with everyday materials


“I want to give a handmade present, but what should I make?” If you’ve ever found yourself wondering that, you’re not alone.
The truth is, with simple materials and a bit of creativity, you can make charming handmade items that will warm the recipient’s heart.
In this article, we’ll share ideas for delightful handmade goods—from practical items you can use every day to interior decor that brightens up a room.
Even with simple methods, a piece made with care is sure to be appreciated.
Find the perfect idea to bring your kindness to life.
Ideas for handmade small gifts that will make anyone happy! Easy crafts using everyday materials (1–10)
macrame keyholder

How about making a stylish and cute macrame keychain? Macrame is a method of creating various patterns using different knots and weaving techniques.
Thread about three strands of your preferred macrame cord through the keychain hardware and start knotting.
After you’ve knotted a certain length, finish by cutting the cords to an appropriate length, then use a comb to loosen the unknotted ends to create a tassel-like look—highly recommended.
The appearance changes depending on the knotting style, so be sure to try different techniques!
zipper pouch

Let’s make a zippered pouch that can hold small cosmetics or snacks.
Prepare a fabric you like and cut it to the shape of the pouch you want to make.
Then sew the pieces together and attach a zipper to finish.
Don’t forget to add gussets so you can store plenty of small items.
You can also add tags or appliqués if you like.
Instead of using just one fabric, it’s also nice to combine two or three different fabrics.
Try gifting a lovely, original pouch full of personality!
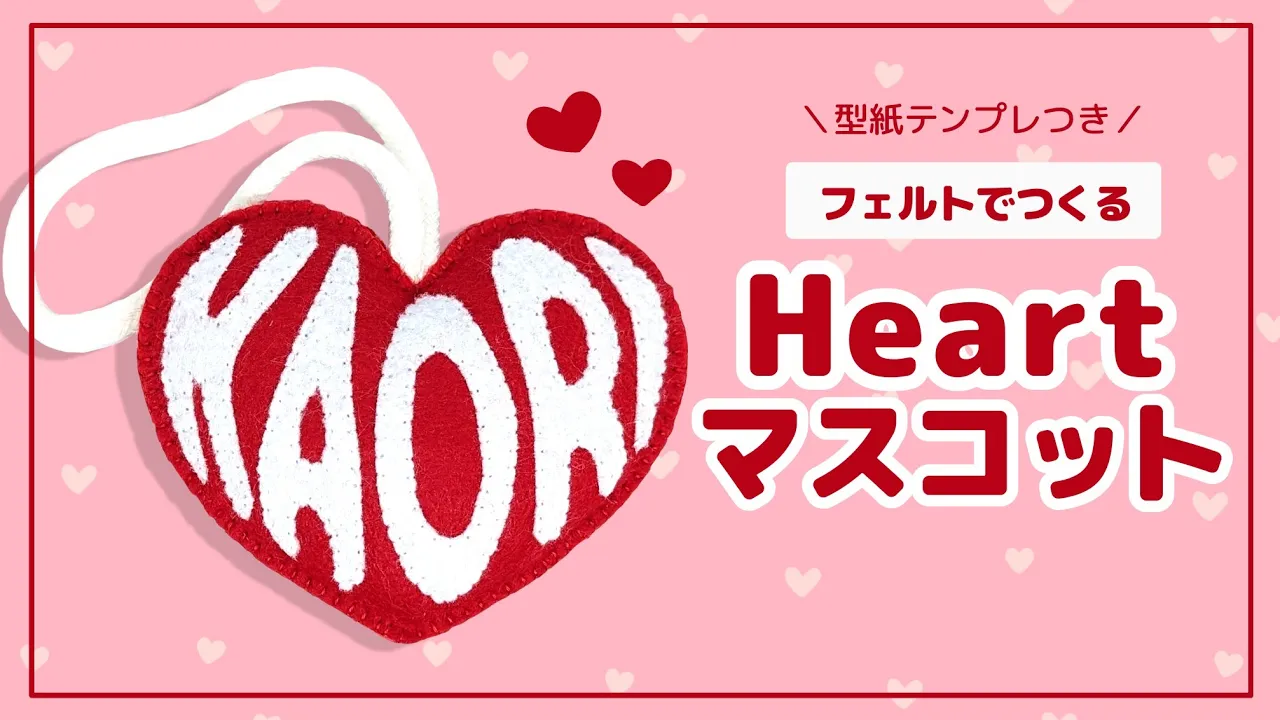
Heart MascotNEW!

Felt mascots that give off a warm, cozy vibe can make you feel all warm inside when you receive one, right? How about preparing heart-shaped mascots in various colors to express your gratitude to the many people who came? First, cut out two heart shapes from felt—front and back—as the base.
If you like, it’s also recommended to make and attach symbols or letters from felt.
You can easily create patterns using a drawing app! With a string sandwiched in between, sew the front and back together using a blanket stitch.
Leave a small opening at the end, stuff in some filling through the gap, then sew it closed to finish.
Try making them in different colors and patterns.
Button accessoriesNEW!
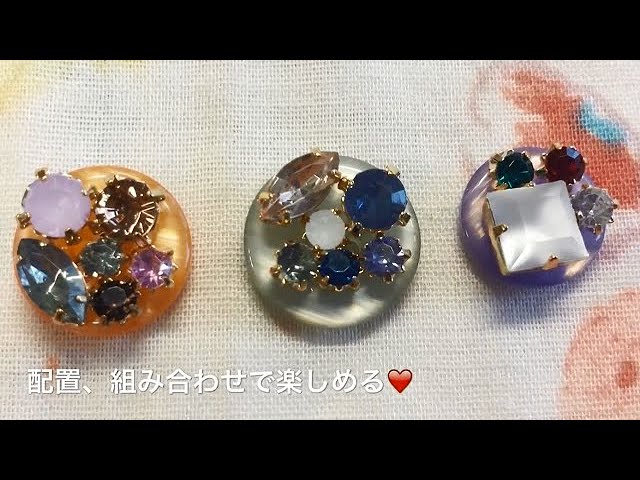
If you have some spare buttons at home, all you need to do is prepare some beads and you can make these easily! Just apply glue to the button and arrange the beads on top however you like, and you’re done.
Use a glue that dries clear.
Attach earring or brooch findings to the side opposite the beads to turn them into accessories.
They’re easy to mass-produce and anyone can make them, so try preparing a variety of accessories to attract lots of customers!
Handmade gemstone soapNEW!
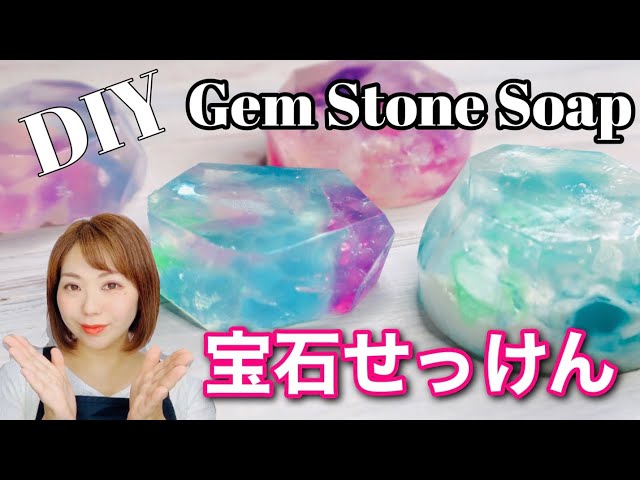
As the name suggests, it looks wonderfully colorful like a gemstone! First, cut the glycerin soap into suitable pieces, divide it among about three paper cups, and heat in the microwave to melt.
Add your preferred soap colorants and glitter to each, mix, and chill in the freezer for about 10 minutes to set.
Once set, cut them into small pieces, then place a mix of the different colors into a paper cup.
Pour in more melted glycerin soap, and set in the freezer for about another 10 minutes.
Once firm, cut into irregular, gem-like shapes—and you’re done! Enjoy the mysteriously beautiful look of mixed colors and glitter.
embroidered handkerchief

If you’re thinking of giving a handkerchief as a gift, how about adding a bit of embroidery to make it an original present? First, draw your favorite design on an embroidery backing sheet.
After sticking it onto the handkerchief, place the fabric in an embroidery hoop so that the design fits inside the frame.
Then just embroider along the shape of your design, and you’re done! There are many types of stitches, so choose them according to the picture you want to create.
A small touch can transform the overall look, so give it a try!
Translucent name tag
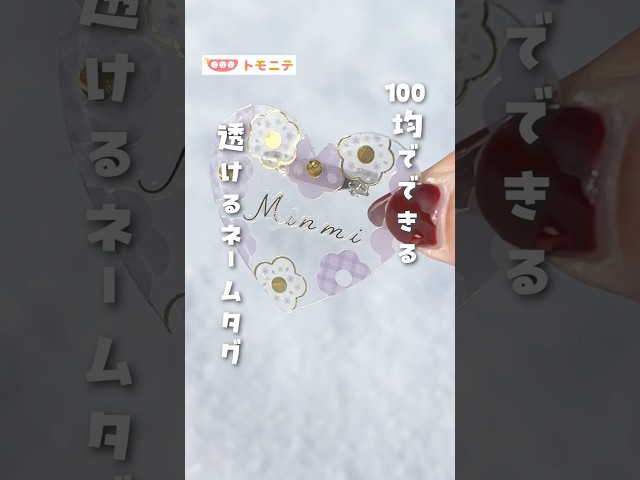
Name tags are handy for keeping track of your belongings while also letting you show off your name in a cute way.
This idea is about DIY-ing your own name tag using items from a 100-yen shop.
Write your name on a clear plate using alphabet stickers and decorate the edges with other stickers.
Once the overall design is complete, finish it with a protective film or top coat to prevent dirt and peeling.
You can add originality by choosing different decorations and pairing it with various types of rings.