Craft ideas perfect for June for 2-year-olds


June brings a lot of rain, and in daycare and kindergartens there are many days when children can’t play outside.
At times like that, how about enjoying some indoor craft activities? Craft time lets children feel a sense of “I did it!”, making it perfect for indoor play.
Here, we’ll introduce several craft ideas recommended for two-year-olds.
There are plenty of fun activities like touching with their hands and coloring.
Through making things, children’s creativity and sense of accomplishment are nurtured.
Let’s treasure what the children create as everyone’s artwork.
Since the things children make are treated as works (art pieces), we use the term “seisaku” (制作) in the text.
[For 2-year-olds] A roundup of craft ideas perfect for June (1–10)
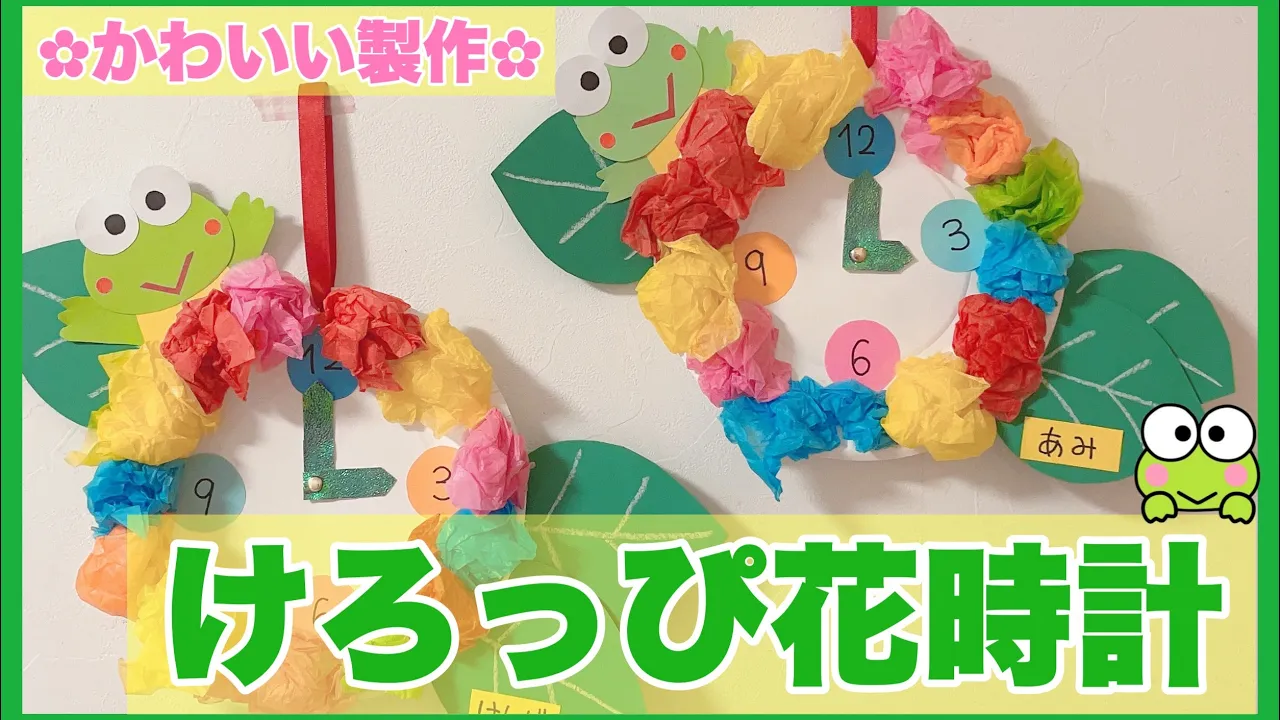
[Tissue Paper] Flower Clock
![[Tissue Paper] Flower Clock](https://i.ytimg.com/vi/m2ugru3nLKI/sddefault.jpg)
Since June 10 is Time Day in Japan, let’s try making a flower clock.
Punch a hole in the center of a paper plate and attach crumpled flower tissue paper around the rim.
Have the children crumple the tissue paper.
To make it stick just by placing it on, apply double-sided tape around the rim in advance.
After making a dial out of construction paper, glue it onto the plate, then fix clock hands made from thick cardstock to the center hole with a split pin, and it’s complete.
If you use purple, blue, and pink tissue paper and add leaves, it could also look like a hydrangea.
[Paper plate] Cute snail
![[Paper plate] Cute snail](https://i.ytimg.com/vi/yReMaf-mYdg/sddefault.jpg)
Let’s make a snail using construction paper and a paper plate.
First, decorate the paper plate.
You can decorate it any way you like! You can paint it, draw with crayons, or enjoy making a torn-paper collage.
Once you’ve finished decorating the plate, cut out the snail’s body and eye parts from construction paper and assemble them.
Finally, attach the paper plate as the shell, and you’re done.
This idea works great as a craft activity and also as a wall decoration.
Give it a try and use it as a reference!
[Tissue Paper] Fluffy Hydrangea
![[Tissue Paper] Fluffy Hydrangea](https://i.ytimg.com/vi/jlVfunATn3Q/sddefault.jpg)
Let’s try making “fluffy hydrangeas” using crumpled tissue paper.
The steps are simple: stick crumpled tissue paper onto a hydrangea base, then add leaves made from construction paper.
Have the children crumple the tissue paper tightly.
If you put double-sided tape on the base beforehand, the tissue paper will stick just by placing it on.
Prepare plenty of base colors and tissue paper so the children can choose—each child will likely create hydrangeas with different color schemes.
These are easy to put on walls, so they’re also great as wall decorations.
[Sponge Stamps] Hydrangea Craft
![[Sponge Stamps] Hydrangea Craft](https://i.ytimg.com/vi/sGAFsk-bRKo/sddefault.jpg)
Let’s make June’s flower, hydrangeas, using stamps.
Cut a sponge into a square and wrap two rubber bands around it in a cross.
Now the hydrangea stamp is ready.
Next, cut out the hydrangea base and leaves from construction paper.
For 2-year-olds, it’s better for an adult to do the cutting.
Have the children use the stamp to add patterns to the hydrangea.
Dip the stamp in paint and dab it on.
Finally, attach the leaves and it’s complete.
[Dyed Paper] Teru Teru Bozu
![[Dyed Paper] Teru Teru Bozu](https://i.ytimg.com/vi/7otbXlXT2-k/sddefault.jpg)
Let’s make a teru teru bozu—a charm hung to wish for clear skies—using a paper-dyeing technique.
First, crumple newspaper into a ball.
Place a sheet of washi (rice paper) over it and secure it with a rubber band.
Be sure to face the rough back side of the washi outward.
Dissolve watercolor paint in water and dip the hem (skirt) area of the teru teru bozu.
Once it’s dry, stick on eye, mouth, and nose stickers, and tie a ribbon around the neck to finish.
Attach a thread to the head so you can hang it—please display it by the window.
The facial expression will change depending on where you place each part.
Sparkling Beehive
https://www.tiktok.com/@hoiku_ratty/video/7476691502668745991Soothing like stained glass! Here’s a sparkling honeycomb craft idea.
Making real stained glass can be difficult when you think about the materials and steps involved.
That’s why we recommend this idea that lets you enjoy a stained-glass-like translucence! All you need are construction paper, parchment (baking) paper, clear tape, colored cellophane or transparent origami paper, and scissors.
It’s great because kids can freely choose their favorite colors and stick them on! Give it a try—fun to make and fun to look at! Try incorporating this craft into your activities.
A flower field made with fork stamping
https://www.instagram.com/p/C4Xxuwkp7MX/Let’s create using familiar utensils! Here are ideas for making a flower garden with fork stamps.
For children, utensils are important tools used for eating.
For example, they probably use spoons and forks every day, right? This time, let’s try making a craft using those utensils.
What you’ll need: disposable forks, tissue paper in colors like green and light green, glue, paint, and white drawing paper.
It’s a good idea to adjust the paint used for stamping by adding a bit of water!