Nursery/Early Childhood: Torn Paper Collages with Various Materials

Kids love ripping and tearing paper, don’t they?
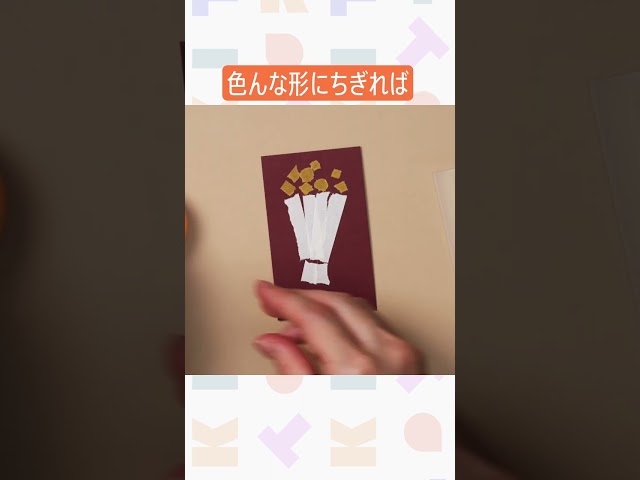
In this torn-paper collage activity, we’ve gathered lots of fun ideas you can use for making art after happily ripping and tearing paper.
Even babies around 0 years old can enjoy this technique once they start using their hands—just be sure to watch carefully so they don’t put the paper in their mouths!
For children who find it difficult to use glue, you can put double-sided tape on the construction paper beforehand.
That way, they can stick pieces wherever they like and feel a sense of accomplishment from making it themselves all the way to the end.
Try it out while keeping safety in mind and adjusting to the child’s age.
- Recommended for 1-year-olds! Craft play ideas and fun crafting techniques
- [Childcare] Recommended for 3-year-olds! Origami ideas with a winter theme
- Origami Fun in Winter for One-Year-Olds! Simple ideas for tearing and sticking, too
- For three-year-olds: A collection of craft ideas featuring spring events and creatures that you’ll want to make with your three-year-old
- [Preschool] Recommended for 3-year-olds! Easy-to-make fall origami craft ideas
- [For 5-year-olds] Let’s make origami! A collection of fun folding ideas
- Let’s make it at nursery school and kindergarten! A special collection of handmade New Year’s card ideas
- [Childcare] For 4-year-olds! Easy winter origami ideas
- Perfect for first-timers! A collection of origami that’s super popular with kids as young as three!
- [Early Childhood Education] Paper-Cutting Ideas
- [Childcare] Shaved Ice Craft Ideas by Age and Materials
- [Childcare] Let’s make things with various materials! A collection of recommended craft ideas for April
- [Childcare] Recommended for 3-year-olds! Craft activity ideas
[Childcare] Torn Paper Collage Using Various Materials (1–10)
Torn-paper collage using masking tape
Masking tape comes in a wide variety of colors and patterns and is sold everywhere.
Since you can easily pick it up at 100-yen shops and the like, it’s easy to incorporate into crafts and projects.
Here, we’re sharing ideas for torn-paper art using masking tape.
In early childhood settings, torn-paper art is often done with origami, but masking tape already has an adhesive side, so you can skip the gluing step.
On the other hand, children might find it a bit harder to tear, but try using wider masking tape and other tricks to make creating more manageable.
Using patterned masking tape gives the work a collage-like feel that’s different from typical torn-paper art!
Grapes made with origami

We’re introducing a fun torn-paper grape craft that looks so tasty you’ll want to eat it! Prepare white drawing paper, purple origami paper, felt-tip pens, glue, and crayons.
As a prep step, the teacher should use a pen to draw 6–10 large grape circles across the white paper.
Once finished, apply tape or glue to the areas where the torn grape pieces will be placed—after sticking it on, the prep is complete.
Have the children tear the purple origami paper.
Once they’ve torn it into shapes they like, they can stick the pieces onto the grapes.
Don’t worry about staying on the sketch lines when they’re sticking the paper.
Finally, use crayons to draw the leaves and the stem, and you’ve got a delicious-looking bunch of grapes! This can be made from around age one, so be sure to give it a try.
Hydrangeas made from newspaper

This time, we’ll introduce a hydrangea torn-paper collage using newspaper.
Please prepare newspaper, glue, drawing paper, felt-tip pens, and shoji paper.
First, draw the outlines of the hydrangea and leaves on the drawing paper.
Once the outlines are ready, tear the newspaper into squares.
Crease the square pieces to add dimension to the flowers, then glue them on.
For the center of the hydrangea, roll up small torn pieces of newspaper and glue them in place.
Tear the blank areas of the drawing paper around the hydrangea as well.
Next, tear newspaper for the leaves and glue it onto the leaf outlines.
Finally, attach the hydrangea and leaves to the shoji paper to complete the piece! Shoji paper is recommended because it lets you clearly see the hydrangea in full bloom.
[Childcare] Torn Paper Collage Made with Various Materials (11–20)
bagworm

Let’s make a cute bagworm with colorful clothes using torn-paper collage.
First, create the bagworm’s face and body with construction paper.
Depending on the children’s ages, you can have them cut along the lines for the face with scissors.
Once the face and body are ready, choose your favorite origami paper, tear it, and glue it on.
A single color is cute, but combining favorite colors to make it colorful or using patterned origami paper is also super cute.
It’s also wonderful to let kids freely decide the size of the torn pieces—this brings out their individuality!
ryu

Here’s an idea for a torn-paper dragon collage that you can make in any size or shape you like.
Since dragons are imaginary creatures, it’s fun to create them in any form, color, or size! First, spread glue evenly over a sheet of construction paper, then let the children freely tear pieces of origami paper and stick them on.
When they’re done, add eyes and a mouth with stickers or crayons to finish.
If you use double-sided tape instead of glue, even small children can make it—give it a try!
Christmas card

Let’s make a Christmas card to give to someone special.
Cut construction paper to create a folded card, then paste torn pieces of origami paper inside to build a Christmas cake.
Once you cut the front cover into the shape of a Christmas tree, it’s finished! The cover features a tree, but when you open the card, a cake appears—what a fun surprise that’s sure to delight the recipient.
You can also add a message and decorate it with stickers to make it even more festive.
Pineapple

Let’s make the king of tropical fruits—the pineapple—using torn-paper collage.
Cut construction paper into the shapes of the pineapple’s body and crown, then glue the two pieces together.
Next, tear and paste colored paper onto the body.
Brown and yellow are standard, but it’s also fun to prepare a variety of colors for a vibrant finish.
Finally, add facial features with stickers, pens, or crayons to complete a cute pineapple.
Since cutting the pieces requires scissors, it’s a good idea to prepare them in advance.