Nursery/Early Childhood: Torn Paper Collages with Various Materials

Kids love ripping and tearing paper, don’t they?
In this torn-paper collage activity, we’ve gathered lots of fun ideas you can use for making art after happily ripping and tearing paper.
Even babies around 0 years old can enjoy this technique once they start using their hands—just be sure to watch carefully so they don’t put the paper in their mouths!
For children who find it difficult to use glue, you can put double-sided tape on the construction paper beforehand.
That way, they can stick pieces wherever they like and feel a sense of accomplishment from making it themselves all the way to the end.
Try it out while keeping safety in mind and adjusting to the child’s age.
[Childcare] Torn Paper Collage Using Various Materials (1–10)
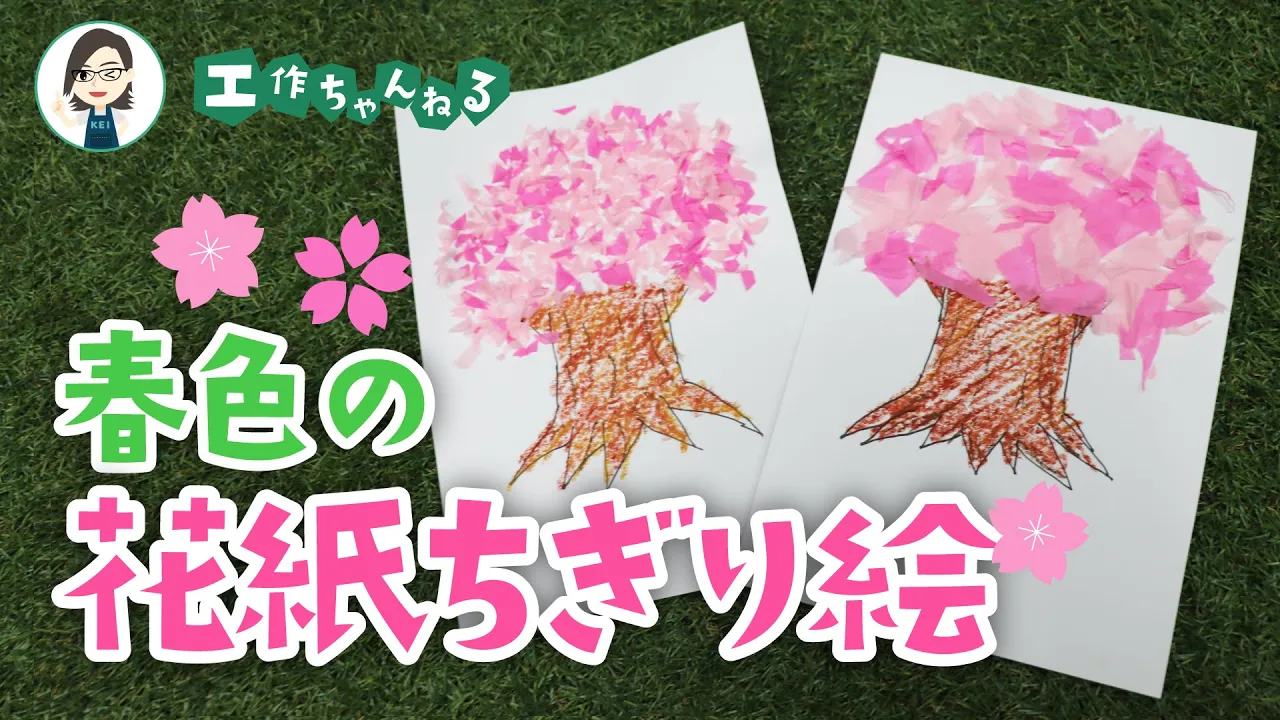
Cherry blossoms made with tissue paper

Here’s how to make a delicate, pastel torn-paper cherry blossom collage.
Prepare pink and light pink flower paper, white drawing paper, crayons, and glue.
Tear the flower paper into shapes you like and mix the pieces together.
Kids love the tearing activity, so they’ll likely be totally absorbed in it.
Next, use a crayon to draw the trunk of a cherry tree on the white paper, then apply glue wherever you want to place the torn flower paper.
Once the glue is on, stick down the torn pieces to create a beautiful tree in full bloom.
This craft can be incorporated into activities starting from infants (0-year-olds), so be sure to give it a try.
rainbow

Let’s try expressing an exciting, smile-inducing rainbow with torn-paper collage.
First, draw a picture under the rainbow on a sheet of white construction paper.
Once you’ve prepared origami paper in the colors you want for the rainbow, have the children tear it into pieces.
It might be a good idea to put the pieces into bags and sort them by color.
After the paper is torn, apply glue and stick the pieces onto the construction paper.
In Japan, a rainbow is said to have seven colors—red, orange, yellow, green, light blue, blue, and purple—but let the children freely choose the origami colors based on their own image.
Tingly Ghost

Here’s an idea I recommend for summer or Halloween crafts: the “Torn Paper Ghost.” Prepare thin white paper, like copier paper.
Let the children tear it freely.
Treat the torn pieces as sheet-ghosts, paste them onto a backing sheet, draw faces, and you’re done.
It’s a fun activity where kids imagine what kind of ghost each uniquely torn shape could become.
Make the most of their imagination and have them create all kinds of ghosts!
Wobbling Watermelon

Here’s an idea for a wobbly watermelon made with a paper plate.
Fold a paper plate in half and stick on torn pieces of origami paper to create a watermelon.
Prepare red and green origami paper and have the kids tear it into pieces.
Glue the green pieces along the rim of the plate and the red pieces on the inside, then draw the seeds with a black pen.
Place the plate with the rounded edge down and gently tap the ends—it will wobble like a cute watermelon.
It might also be adorable to make children or animals out of construction paper as if they’re eating the watermelon and stick them on!
Oni Mask

Would you like to make an ogre mask you can use on Setsubun? The main material is construction paper, but we’ll use torn-paper collage to create the ogre’s hair.
First, cut out the ogre’s face and hair base, facial features, and horns from the construction paper.
After you glue the parts together to form the ogre, tear up some origami paper to use for the hair.
Any color is fine, so let the children choose the origami they like.
Glue the torn pieces onto the hair base, and finally attach a headband loop to wear it on the head—and you’re done!
Christmas tree made with colored cellophane

Let’s make an essential Christmas item—a Christmas tree—using torn-paper art.
Please prepare scissors, laminating sheets, cellophane tape, and colored cellophane.
Cut two laminating sheets into triangles to form the base of the tree, then cut the colored cellophane into any shapes you like.
Stick the cut pieces of colored cellophane randomly onto the laminating sheets.
Finally, cover everything with cellophane tape.
Cut slits in the two trees and interlock them, and your sparkling tree is complete! It’s also fun to make using torn washi paper.
Try incorporating this seasonal craft with children who love tearing and playing with paper.
Hydrangeas drawn with crayons

Here’s how to make a beautiful torn-paper hydrangea collage.
Prepare purple and light blue construction paper, green origami paper, double-sided tape or glue, scissors, crayons, and a craft knife.
Cut the light blue construction paper into eighths, then cut one of those pieces in half.
Use about four crayon colors to add color to the piece you just cut.
Cover the entire back with double-sided tape, then cut the paper into thin strips with scissors and further cut them into random shapes.
Fold the purple construction paper in half, trim one side to about 20–25 cm, and cut out a cloud shape.
Peel the backing from the randomly cut pieces and stick them on.
Accordion-fold the green origami paper, cut out leaf shapes, and attach the leaves and hydrangea to the light blue base sheet to finish!