Preschool: Lantern craft ideas to make in summer!


Lantern crafts perfect for Tanabata and summer festivals.
Making them with children is fun, but it can end up being the same method every year, or sometimes the process feels difficult.
So here, we introduce lantern-making ideas you can enjoy with kids.
From simple to slightly challenging, there are various materials and techniques.
You might find options suited to the children’s ages.
By creating while having fun, you can spend time that becomes a lasting memory.
子どもたちと一緒に、すてきなランタン作りをぜひ楽しんでください!注:子どもたちが作ったものは作品として扱われるため、本文では「制作」と表記しています。
- [Childcare] A roundup of summer craft ideas to enjoy with 2-year-olds
- [Childcare] August Crafts: Cute Ideas to Make in Summer
- [Nursery/Daycare] Recommended for Summer Festivals! A Collection of DIY Game Ideas
- [For 5-year-olds] Crafts to try in July! Ideas that capture the season
- [For 5-year-olds] Let’s enjoy summer! Summer craft ideas for 5-year-olds
- Perfect Summer Craft Ideas to Try in July for 4-Year-Olds
- [Childcare] Butterfly craft ideas
- [Childcare] Fun craft ideas and craft activities perfect for summer
- [Childcare] Craft ideas perfect for June
- [Jūgoya] Craft ideas you’ll want to incorporate into childcare, plus introductory activities
- Fun to make in childcare! A collection of easy origami ideas recommended for July
- [Childcare] Summer wall display ideas: fun summer craft activities
- [For 3-year-olds] A roundup of craft ideas to enjoy in summer! Introducing various motifs and techniques
[Childcare] Lantern craft ideas to make in summer! (11–20)
Cute origami lantern

Mini-sized and perfect for decorating anywhere! Here are some cute origami lantern ideas.
When you think of making lanterns, many people probably picture using construction paper.
This time, let’s try making lanterns with origami paper, which comes in a wide range of colors.
You’ll need origami paper, pipe cleaners, scissors, glue, and clear tape.
Plain origami works well, but using Japanese patterns or washi-style paper can create a lovely atmosphere—give it a try!
paper lantern

Many children are probably looking forward to the summer festival.
As an idea to boost the festive mood, I’d like to introduce lantern origami.
In this project, you make the lantern part by shaping your favorite color of origami paper into a circle and then recreate the look by combining it with a frame made from black origami paper.
It looks lovely as is, but you can also write characters on the lantern and use it as a wall decoration for events.
You can draw illustrations to make it cute, or draw a face and turn it into a lantern ghost, too.
[Age 5] Milk carton lantern
![[Age 5] Milk carton lantern](https://i.ytimg.com/vi/MTlDs4Tuv0Q/sddefault.jpg)
Why not try making a slightly elaborate lantern using an easy-to-find milk carton? Use a milk carton that’s been cut open and flattened.
As preparation, the teacher should cut off any unnecessary parts.
After drawing freely with a pen, fold it in half and make slits with scissors, leaving the top edge uncut.
Try to keep the spacing even.
Open the milk carton and staple the top and bottom, then crease outward along the fold line.
Finally, punch a hole with a hole punch, thread a string through, and you’re done!
[Ages 0 and up] Skeleton Lantern
This is a skeleton lantern that’s easy even for infants to make.
First, prepare two clear cups and stuff colored paper inside.
Tissue paper or colored cellophane is easy for children to handle and looks beautifully translucent from the outside.
Once they’ve packed in their favorite colors, align the cup rims and tape them together.
Next, decorate the outside of the cups with stickers or tape.
Larger stickers are easier for infants to handle, so keep that in mind when preparing materials.
Finally, use glue to attach black construction paper bands to the top and bottom, and your cute lantern is complete.
lantern garland
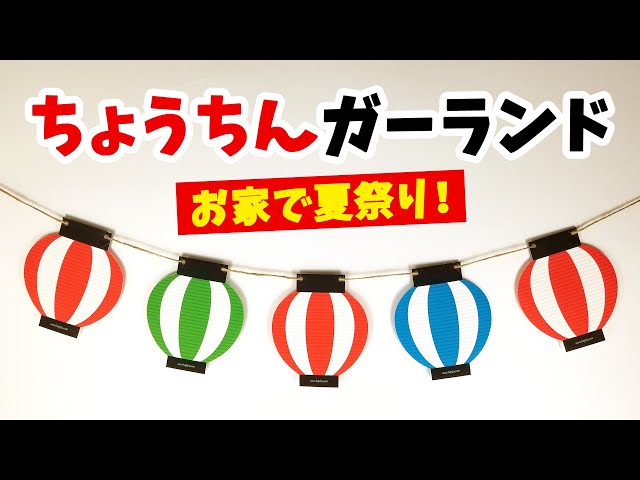
How about a lantern garland that’s perfect for summer festival decorations? First, prepare as many sheets of construction paper as you need with printed lantern illustrations.
Using two or three colors will give it a festive and cohesive look.
Next, cut out the lantern shapes.
If children are using scissors, please have the teacher assist with the finer parts.
Punch two holes in the band section of each cut-out lantern.
Thread a string through the holes to connect the lanterns, and you’re done! It’s a perfect lantern decoration for indoor displays.
[Construction Paper] Foldable Lantern
![[Construction Paper] Foldable Lantern](https://i.ytimg.com/vi/mxy4lIhw90g/sddefault.jpg)
Let’s make a collapsible paper lantern and enjoy the mechanism.
First, cut the construction paper to the specified size.
If you prepare two colors for the outer paper, the lantern will look beautifully colorful.
Fold the black construction paper for the band in half, and fold the inner paper into 5 cm widths.
If you draw the fold lines in advance, even children can work smoothly.
Cut the outer paper diagonally at the 2 cm mark.
The teacher should prepare this cutting beforehand.
Attach the band and the outer paper to the inner paper, and it’s done! Because the outer paper slides in to connect, you can remove it and fold the lantern flat.
Try making it while chatting with the children—“How does this work?”—to spark their curiosity.
[Childcare] Lantern craft ideas to make in summer! (21–30)
A lantern made from construction paper with slits

Let’s make a lantern with a striking shape using drawing paper and a milk carton.
First, cut off the top of the milk carton, then attach drawing paper to all four sides of the carton using double-sided tape.
Decorate it cutely by adding stickers or washi tape on top.
Next, take a slightly longer sheet of colored paper, cut vertical slits into it, and wrap and attach it over the decorated carton.
Punch holes and thread chenille stems (pipe cleaners) through to finish.
You can also add patterns to the colored paper you put on top.
Give it a try!