![[Childcare] Butterfly craft ideas](https://i.ytimg.com/vi_webp/kSX1hih8xKk/maxresdefault.webp)
[Childcare] Butterfly craft ideas

When spring arrives and many flowers bloom, we often see butterflies fluttering from flower to flower.
They make you want to chase after them, or gaze intently as they rest—butterflies are fascinating insects for children, too.
Here, we’ve gathered craft ideas all about butterflies.
From classics like origami to projects using various materials such as tissue paper and colored cellophane, and even fun techniques like footprint art and cardboard stamping—these ideas are sure to spark children’s curiosity!
Let kids freely express their favorite colors and patterns to create colorful, adorable butterflies!
[Early Childhood Education] Butterfly Craft Ideas (1–10)
Cute and fun to play with! Flapping butterfly

You can wear it on your finger and play with it! Let me introduce the Flappy Butterfly.
Prepare a sheet of construction paper cut into a rectangle, origami paper or stickers for the wing patterns, and antenna parts.
First, fold the rectangular construction paper in half to make a mountain fold crease.
Then, leaving about 1 cm of space, add valley fold creases on both sides.
After folding along the creases, draw half of a butterfly shape and cut it out with scissors.
Also make two evenly spaced slits along the folded section.
If you reverse the creases at both ends of the fold that’s now divided into three sections by the slits, you’ll create openings for your fingers.
Attach the wing patterns and the antennae, and you’re done!
Make and play! Fun little butterflies

By attaching a straw as a handle, this is a craft idea that lets you make a butterfly you can flap and play with.
First, we’ll make the butterfly: draw a butterfly on construction paper.
An adult can draw the outline, and let the children enjoy drawing the patterns.
Once the drawing is finished, cut away the excess with scissors and fold the butterfly in half.
Then fold it again 1.5 cm from the crease, open the butterfly back up, and turn it over.
Slip a straw into the section with the creases and secure it, and you’re done!
Flying butterfly toy

How about making a flying butterfly craft that’s fun both to create and to play with afterward? You can just picture the children gleefully jumping around as they watch it move up and down.
Prepare thick paper or cardboard, cut it into a butterfly shape, then glue on colored paper, add patterns, and attach a pipe cleaner to finish the butterfly.
On the back, glue two small pieces of straw and thread twine through them.
Tie straws to both ends of the twine, and you’re done.
Hook the twine that comes out from the top of the butterfly onto a pushpin or similar, and when you move both ends of the twine… the butterfly starts to move! It’s a perfect craft for spring—give it a try.
Cute and easy! 4 butterfly picks
Here’s how to make butterflies in four different, fun ways.
The first is to draw swirling patterns with crayons on construction paper.
The second is torn-paper art: glue small pieces of origami paper onto construction paper.
The third is to color aluminum foil with color markers, spray it with water, and then transfer the color onto construction paper.
The last idea uses cooking parchment: attach pieces of colored cellophane to it.
Each method is lovely and results in a uniquely personal piece.
Finish by attaching pipe-cleaner antennae and gluing on the body with a drawn face.
Tear-and-enjoy! Butterfly decorations

Let’s try making a cute butterfly decoration.
First, cut paper into the shape of a butterfly and paste it onto a backing sheet.
Then tear pieces of paper and stick them onto the wings to decorate.
Finally, attach the parts for the butterfly’s body and face, and you’re done.
It sounds fun to imagine what kinds of paper to tear, and the very sensation of tearing will be interesting too.
Once finished, it can also be used as a wall decoration.
Your room will be filled with a springtime atmosphere.
Let’s play with decalcomania!

Decalcomania, which means transfer, is a technique of expression often used in early childhood education.
Basically, you put paint on one side of a sheet of drawing paper that has a crease down the center, fold it in half, and transfer the paint to the other side to create the image.
The key is to thin the paint with plenty of water! That way, the colors blend and you can enjoy the accidental patterns that emerge.
This introduces two ideas: one is to make a butterfly with decalcomania and then cut it out with scissors, and the other is to use drawing paper pre-cut into a cherry blossom shape to add patterns.
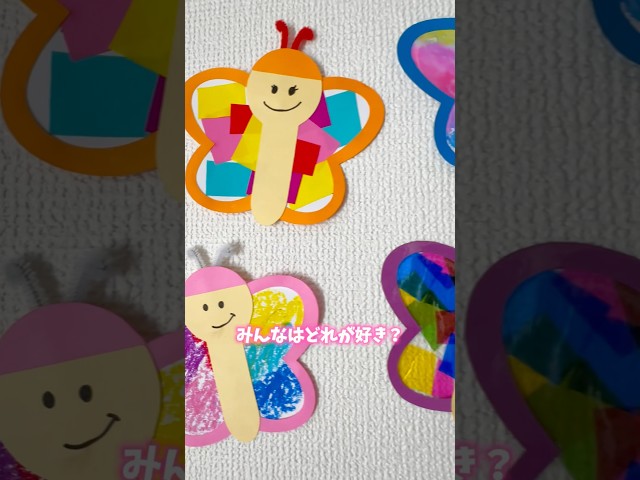
Cute butterflies made from construction paper

Here’s how to make colorful butterflies that are perfect for sticker play.
Fold a small piece of construction paper in half, draw one wing, and cut along the outline.
Next, prepare a circle cut from construction paper and cut only one half of it in two.
Glue these onto the wings.
Stick round stickers in your favorite colors on the wings.
Cut a chenille stem to about 5 cm, then curl the ends into small circles.
Tape the chenille stem to the back with clear tape.
Draw a face with a pen or similar, and you’re done.
It also looks cute if you draw your favorite designs on the wings with crayons.