![[Childcare] Decorate in April! Butterfly Wall Display Ideas](https://i.ytimg.com/vi_webp/JpybVCMSsyM/maxresdefault.webp)
[Childcare] Decorate in April! Butterfly Wall Display Ideas


In this article, I’ll introduce wall decoration ideas that are perfect for April.
This time, we’re focusing especially on butterflies and have selected a variety of ideas.
In addition to classic ideas that involve cutting and pasting construction paper, we’ll also share plenty of fun new ideas to display—so please use them for inspiration.
These are craft ideas that children can enjoy making, so teachers, be sure to have fun creating butterflies together with your students.
Now, let’s dive right in and take a look at butterfly wall decoration ideas that are perfect for April!
[Childcare] Decorate in April! Butterfly Wall Display Ideas (1–10)
3D Easy Origami ButterflyNEW!

Let’s try making an origami butterfly that signals the arrival of spring.
There’s a squash fold step, but basically you just fold along the creases and edges and you’ll be done! First, crease the paper so that triangles form on both sides by folding it diagonally.
Then fold both corners on one side up to meet the top corner.
Once folded, fold back along the creases you just made.
Flip the paper over, fold the top corner down to meet the bottom edge, and then fold it in half left to right.
Next, fold so that the crease from the earlier fold-back step lines up with the crease from the halving step.
You should now have a butterfly shape, so squash-fold the tips of the wings to round them, and you’re done.
Add antennae to finish it off.
Cute and easy! 4 butterfly picks
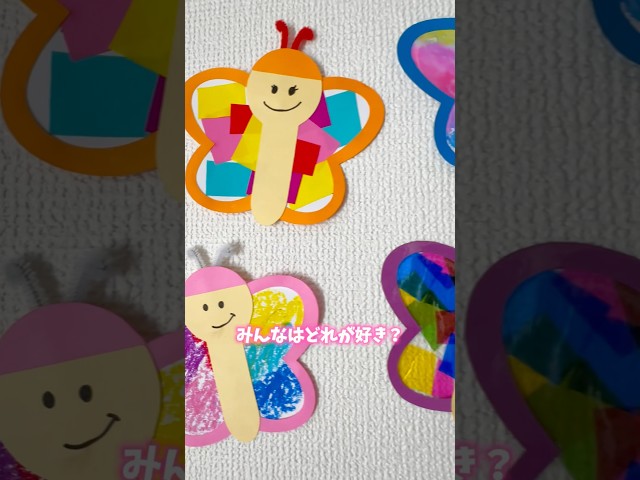
Here’s how to make butterflies in four different, fun ways.
The first is to draw swirling patterns with crayons on construction paper.
The second is torn-paper art: glue small pieces of origami paper onto construction paper.
The third is to color aluminum foil with color markers, spray it with water, and then transfer the color onto construction paper.
The last idea uses cooking parchment: attach pieces of colored cellophane to it.
Each method is lovely and results in a uniquely personal piece.
Finish by attaching pipe-cleaner antennae and gluing on the body with a drawn face.
Let’s make a butterfly with heart-shaped packing material
https://www.tiktok.com/@atsumichan774/video/7361910991757626625When you ask a 4-year-old, “What comes to mind when you think of spring?” they’ll likely say “butterflies”—a true symbol of the season.
How about making a butterfly using materials you can buy at a 100-yen shop? Combine two heart-shaped cushion pads with pipe cleaners or twist ties to form a butterfly.
The cushion material is soft, so it’s easy to thread the pipe cleaners through.
Use a pen to curl the ends for a rounded finish.
This cute, tiny butterfly craft is sure to delight your child.
Butterfly decoupage with paint
https://www.tiktok.com/@hoiku.labo/video/7213292554874342658Here’s an idea for making cute butterflies using the decalcomania technique.
Decalcomania is a painting method where you fold a sheet with paint on it in half to transfer the paint.
Put several colors of paint on construction paper and fold it in half.
Cut it into a butterfly shape and open it up to reveal a lovely pattern.
Attach facial parts made from construction paper and pipe cleaners, and you’re done.
It’ll be exciting if you spark imagination and think about how the paints blend as you work! Let your child choose their favorite paint colors and proceed with the craft together.
Make it with hanshi paper! How to make colorful butterflies
https://www.tiktok.com/@job_it/video/7072329343774641409Here’s an idea for making butterflies using calligraphy paper, paint, and pipe cleaners.
Prepare two sheets of calligraphy paper and paint each with your favorite colors.
Using several spring colors will make it nice and colorful.
Once the paint is dry, cut the paper into circles.
These will become the butterfly wings, so cut them to whatever size you like.
Lightly accordion-fold the center of each circular sheet, then place the two together and tie them with a pipe cleaner.
Leave the ends of the pipe cleaner long, and curl the tips to create the antennae.
Perfect for walls! A butterfly craft that makes paint play fun
https://www.instagram.com/reels/DVUbcWwk2yl/Cut an A4 sheet of drawing paper into the shape of a butterfly, then apply paint on just one side.
Once you’re ready, fold it in half and lift the wing—your design will have transferred beautifully to the other side! You can also enjoy the excitement of seeing what pattern appears the moment you open it.
After that, attach the wings to another A4 sheet for the background, and stick a photo of your child in the center.
You’ll have a one-of-a-kind, adorable butterfly! It will look very spring-like on a wall display and become a wonderful, memorable piece.
Butterflies made with round stickers

Here’s a spring-like butterfly you can make using round stickers.
Prepare in advance the round stickers, felt-tip pens, pipe cleaners, pre-cut butterfly wings, and pre-cut butterfly faces.
Start by decorating the butterfly wings with round stickers to create patterns.
It’s recommended to use a variety of colors for the stickers.
For the butterfly’s face, have them draw the eyes and mouth with felt-tip pens.
Attach a pipe cleaner to the butterfly’s head and curl the tips—that’s it! You’re done.
You might also like to stick them on the wall and add spring flowers around them for a soft, spring-themed display.