Recommended for graduation ceremonies! A collection of stylish wall decoration ideas


Wall decorations to stylishly brighten up the kindergarten graduation ceremony venue.
Are you wondering what design to choose? Because it’s a special day celebrating the children’s new beginning, you want to create a space that will be remembered.
Here, we’ll share handmade ideas full of charm—perfect for the March graduation season—such as cherry blossom motifs, vibrant flowers made from construction paper, and warm wall displays that incorporate the children’s own artwork.
You can source the materials easily from everyday items, so it’s manageable even during a busy time.
Welcome the graduation day with a wonderful wall display and lots of smiles!
Recommended for kindergarten graduation ceremonies! A collection of stylish wall decoration ideas (1–10)
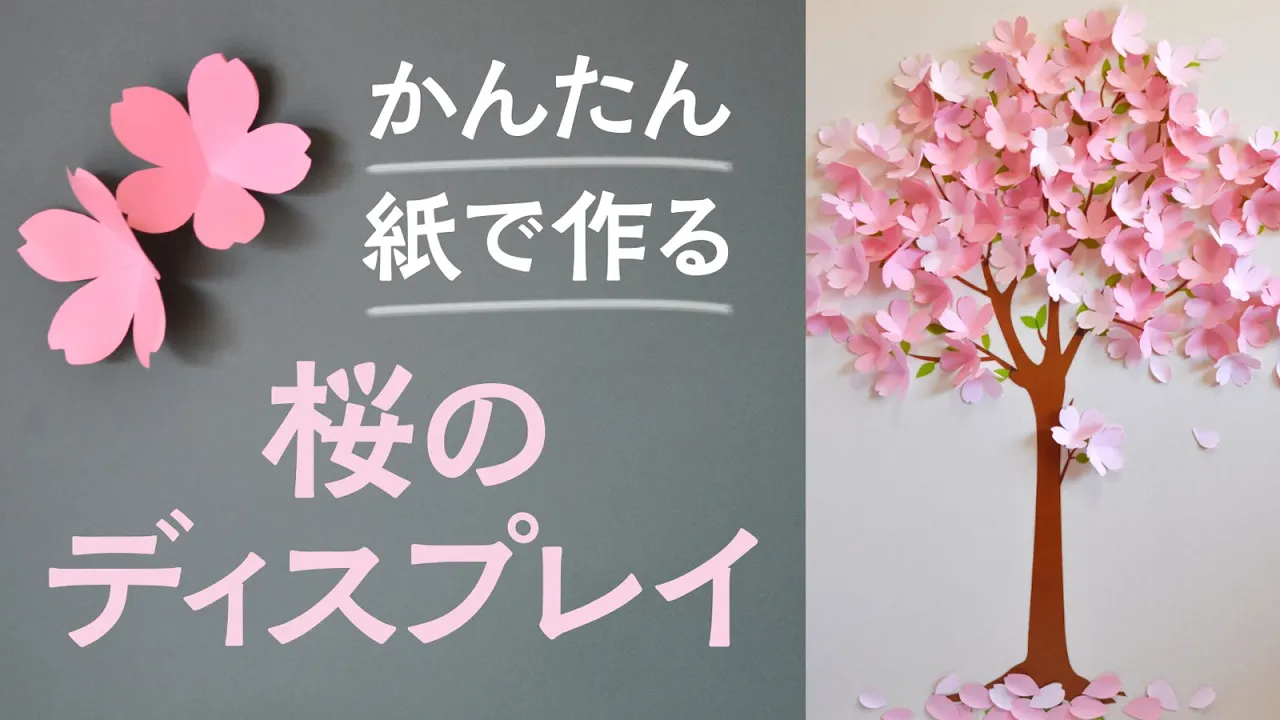
Cherry blossoms made with construction paper

Feel the spring indoors! Here are some cherry blossom craft ideas using construction paper.
You’ll need colored construction paper, a pencil, glue, scissors, a plate, and a round-tipped chopstick.
First, place the plate on the colored paper and trace a circle.
Next, cut the circle out and trim it into a cherry blossom shape.
Finally, use the round-tipped chopstick to curl the petals—and you’re done! Choose the plate size according to how big you want your blossoms to be.
These bright construction-paper cherry blossoms will bring a touch of spring to your home!
A rainbow hot-air balloon made of origami

Here’s a balloon craft idea using looped paper chains, a classic birthday decoration.
First, cut out the parts from construction paper to make the hot-air balloon.
Next, cut your favorite colors of origami paper into strips, glue the ends together to create paper chains, and then attach the chains diagonally across the balloon’s envelope.
That’s it! It also looks lovely with motifs other than balloons, and adding little birds or green leaves around it makes it extra cute.
If you make the chains in seven colors, you can represent a rainbow.
Celebratory roses made from construction paper

Let’s make a three-dimensional rose out of construction paper.
This idea comes with a downloadable template, so you can simply cut the paper to match, layer the pieces, and glue them together.
The key to making it look like a real rose is to curl both ends of each petal.
Curling them in opposite directions helps create a rose-like petal shape.
Similarly, use the template to cut out the leaves, score the veins as fold lines, and attach them to the base of the rose.
While cherry blossoms are often associated with graduation, roses are also a great motif—their colors can symbolize meanings like gratitude, bonds, and hope.
Butterflies made with tissue paper

At the graduation ceremony venue, why not let some butterflies flutter around small spaces or beside the flowers? Here’s an idea for making butterflies out of tissue paper.
Fold the tissue paper into an accordion and divide it into three equal sections, then fold it in half.
Fold it in half again, and starting from the folded edge, cut it with scissors into a butterfly shape.
When you open it up, you should have a symmetrical butterfly.
Paste one onto a sheet of copy paper and make a photocopy to create a template.
If you’re making a lot, use this template to produce the butterflies.
Layer two butterfly-shaped pieces of tissue paper, loosely tie the center with a pipe cleaner, and use the excess ends as antennae to finish.
They’re adorable butterflies that will make you want to let lots of them take flight.
Crepe roll wall decoration
https://www.tiktok.com/@irodoriyoshiten/video/7476800926360046855Here are some decoration ideas using crepe rolls—items made of crepe paper rolled up.
First, prepare crepe rolls in your favorite colors and cut them to a suitable length.
Fold back about 5 cm on one end and staple it.
Make several of these, then thread the folded ends onto a string, line them up horizontally, and hang them on the wall.
Add decorations on top, such as the letters for “Congratulations” or flower pieces.
Combining them with other paper items like garlands and paper fans will make the display even more festive.
Sakura curtain made with tissue paper

The gradient of the tissue paper is beautiful! Here’s how to make a cherry blossom curtain using tissue paper.
You’ll need four colors of tissue paper, scissors, glue, twine, and decorative stickers.
First, let’s make the cherry blossoms to decorate the top of the curtain with tissue paper.
Adding a decorative sticker to the center of each flower makes it look more festive.
Next, cut the four colors of tissue paper into petal shapes and thread them with a needle.
Finally, spread out the petals while checking the balance, and you’re done! To keep the petals from moving, you can glue them in place.
Give it a try!
Wall of colorful balloons
https://www.tiktok.com/@hoikushi_bank/video/7137991363836071170Would you like to make a hot-air balloon and rainbow wall decoration using colorful construction paper? First, cut your preferred colors—such as red, blue, yellow, green, and purple—into circles.
Fold each circle in half and glue the halves together to form a hemispherical shape.
Make the passenger basket from construction paper as well, then connect it to the hemispheres with three pieces of yarn to complete the balloon.
For the rainbow, cut circular paper pieces in half and layer the halves in an arch to form the rainbow.
Arrange the balloon and rainbow on a sky-blue background, and add white clouds to finish a bright and refreshing wall decoration!