Wall Decor: Celebrate April! A Special Feature on Cherry Blossom Wall Decoration Ideas


Let’s create a vibrant cherry blossom wall display to decorate in April.
May this cute cherry blossom wall become something that cheers on children as they begin their new lives.
We’ve gathered many ideas—from wall displays you can put up in classrooms and hallways to impressive designs perfect for bulletin boards in entrances and halls.
It would also be lovely to add your favorite motifs, such as spring animals or birds.
Please try making a cherry blossom wall display that will energize children, teachers, and parents alike.
Because items made by the children are treated as “artworks,” we refer to them in the text as seisaku (制作).
[Wall displays] Decorate in April! Special feature on cherry blossom wall display ideas (1–10)
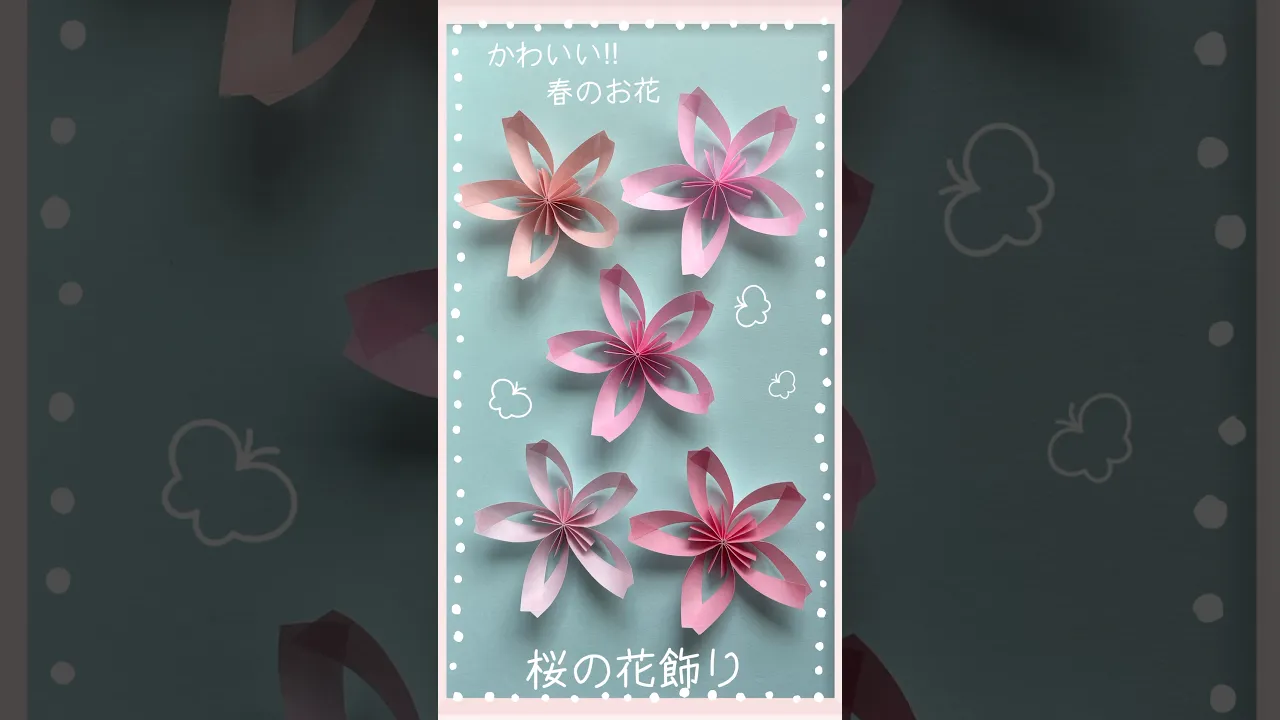
Cute cherry blossom origami on the wall as wellNEW!

Here’s an idea for making a cherry blossom by combining petal parts.
Use one strip of origami paper measuring 15 cm by 1 cm to make a single petal.
First, leaving 3 cm at each end, accordion-fold the paper at 1.5 cm intervals.
Once folded, glue both ends so that the mountain-folded sections face inward.
With one petal complete, make four more and attach them together to form a cherry blossom.
Use pink origami paper and place the colored side on the inside when making it.
cherry blossom arch window

Cherry blossoms made as papercut art from folded origami.
By changing where you use scissors or a craft knife, you can create cherry blossoms in many different designs.
Try displaying the cherry blossom papercuts in an arched window made from origami.
If you make the window with blue origami paper, it will look like cherry blossoms blooming under a blue sky.
The blue sky seems to bless the children’s upcoming life at the kindergarten.
If you also make cherry blossom petals from origami and decorate the wall, it will look even more beautiful.
This is a craft you can adapt to flowers of other seasons as well, not just cherry blossoms.
Cherry blossoms made with origami and a stapler

This project will make you want to create cherry blossoms in all sorts of colors and decorate with them.
First, fold a sheet of origami paper into an accordion and then fold it in half; staple it along the crease.
Fold it in half again at the stapled section and cut it into a shape like a cherry blossom petal.
Next, cut off one of the petals.
Then, open it up while shaping the remaining petals into a cherry blossom.
Slip a finger into the center and push outward as you open it to help the shape settle nicely.
Make lots of them and combine them with a tree trunk made from brown construction paper, then try decorating your wall.
A wall display of cherry blossoms that sway in paper cups

The key points are the calm atmosphere and the beautiful cherry blossom petals! Here’s an idea for a wall decoration with cherry blossoms that sway using paper cups.
Cherry blossoms are the symbol of spring, right? They also represent beauty and fleetingness, and this craft idea perfectly fits that image.
Try making it together with children.
You’ll need origami paper, tissue paper, thick paper, paper cups, chiyogami (patterned paper), paper tape, and so on.
Making lots of cherry blossoms will create a gorgeous finish, so it’s great if everyone can work together! Take this opportunity to give it a try.
Pop-up 3D cherry blossoms

Create an eye-catching wall with dynamic design! Here are ideas for pop-up 3D cherry blossoms.
While most wall displays are flat, three-dimensional ones make a strong impression and add a festive touch.
This time, let’s make pop-up 3D cherry blossoms that can be stored away after display.
Some steps are a bit complex, but by working together with teachers or guardians, you’ll be able to complete a beautiful piece.
Give it a try!
Cherry blossoms made with balloons

When it comes to flowers that represent April, cherry blossoms come to mind.
This time, we’ll introduce a wall decoration of cherry blossoms made with balloons.
Balloon art may seem difficult, but let’s check the tricks—how to twist the balloons and where to tuck them in—and give it a try.
If you also make the cherry tree branches with balloons and attach the blossoms, the result will look plumper and even more charming.
A classroom with three-dimensional cherry blossom balloon art looks absolutely adorable.
Children starting a new chapter in their lives are sure to feel excited and delighted when they see the cherry blossom balloon art.
Mechanical wall

Spin it with a twirl and cherry blossoms bloom! Here’s an idea for a mechanical (karakuri) wall display.
Adding a little mechanism to the wall will make kids even more excited to come to the daycare! Let’s create a karakuri wall perfect for spring.
You’ll need: base paper, thick paper, pens, scissors, a ruler, a compass, and a craft knife.
Making it together with the children is great too—it lets them experience a sense of accomplishment and togetherness.
Be sure to give it a try.
Let’s make the cherry blossoms burst into full bloom!