[Childcare] Summer wall display ideas: fun summer craft activities

When you think of summer, it’s the season packed with fun activities like summer festivals, swimming in the ocean, fireworks displays, and Tanabata.
You’ll want your wall displays to be wonderful, too, so they convey the joy of summer to the children.
In this article, we’ll share ideas for summer wall displays.
Alongside classics like the sea and fireworks, we’ll also introduce ideas that incorporate delicious summer foods and seasonal events.
There are ideas you can make together with the children, so they’re great to include as craft activities.
For older preschoolers, it might be nice to discuss last summer’s memories and choose a theme based on that.
- [Nursery/Daycare] Ocean wall display, summer sea, sea creatures
- [Childcare] Ideas for Fireworks Wall Decorations for August
- [Childcare] Fun craft ideas and craft activities perfect for summer
- [Childcare] August wall display ideas
- [Childcare] A collection of ideas you’ll want to use for July wall displays!
- Fun July Craft Ideas for 2-Year-Olds: Summer Wall Decorations
- Fun summer activities for kids: ideas you’ll want to try in childcare and at home
- [Childcare] August Crafts: Cute Ideas to Make in Summer
- [Childcare] June wall display ideas
- [Childcare] A roundup of summer craft ideas to enjoy with 2-year-olds
- Recommended for childcare! Game and activity ideas to liven up a summer festival
- [For 3-year-olds] A roundup of craft ideas to enjoy in summer! Introducing various motifs and techniques
- Childcare: Ideas for activities to enjoy in July
[Childcare] Summer wall display ideas: Fun summer craft activities (31–40)
Summer Sunflowers

Let’s make a summer sunflower.
Prepare by gluing yellow and orange origami paper together so that the colored sides face outward.
Fold the paper in half and crease firmly, then open it up and continue folding while aligning with the center.
Fold each corner inward, then fold the left and right sides along the center line of the folded section.
Open the folded section while lifting it up, and keep folding the tucked parts to form the sunflower shape.
Finish by fitting a piece of brown origami, folded for the center, into the middle of the completed sunflower.
Give this summer sunflower a try!
Sponge stamp ice cream
@hoiku.labo [Pom-Pom Fun!] Make a two-scoop ice cream with sponge stamping 🍨 Preschool craft | Childcare | Ideas for educators | Easy craft with kids | Stamping #IceCream #PreschoolTeacher
♪ Original Song – Hoiku Kyujin Labo – Hoiku Kyujin Labo | Nursery Teacher Job Changes and Helpful Information
Let’s make ice cream using sponge stamps! First, take a sheet of drawing paper and dab the paint-covered stamp to create patterns.
You can use any colors you like.
Once the paint is dry, cut the paper into the shape of ice cream.
Cut brown construction paper into a cone shape, draw the cone pattern, and paste it onto a backing sheet.
Then stick the stamped ice cream on top of the cone, add patterns in the empty spaces with crayons, and you’re done! You can make several scoops and stack them to create two- or three-scoop ice cream, too.
Collage Ice Cream
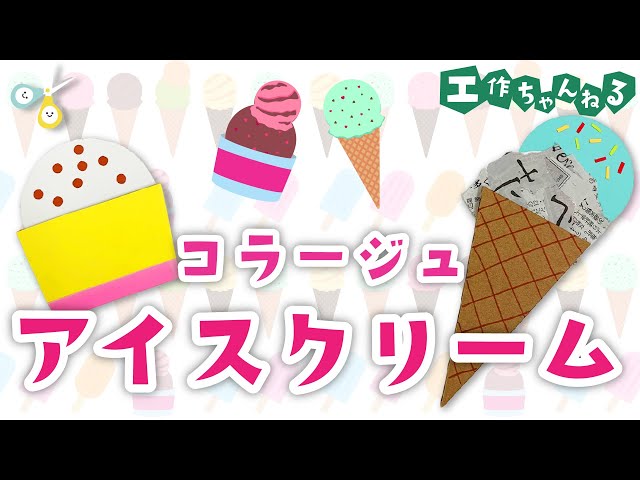
Here are some ice cream craft ideas that also let you enjoy making collages.
Cut the cup or cone bases out of cardboard, then decorate them by drawing patterns with pens or using colored paper.
For the ice cream scoops, basically cut circles out of construction paper, and have fun adding various toppings with small pieces of colored paper or stickers.
It’s also cute to make “collage ice cream” by gluing torn newspaper or flyers onto the round paper scoops.
Once your ice cream is done, attach it to the base to finish.
Easy way to fold a seashell (origami)

Let’s make colorful, eye-catching summer seashells.
Start by folding the origami paper into a triangle twice.
Fold the left and right corners down to meet at the center bottom.
Next, fold the two middle corners outward to meet the outer corners.
Fold the left and right edges in to align with the center crease, then fold down the small triangular flap.
Again, fold the lower left and right corners in along the crease.
Fold the top corner so both sides are the same height, then tuck the corners to refine the seashell shape—and you’re done.
Enjoy crafting as you work with your hands.
Using colored pens to add patterns to the shell gives it extra dimension and is highly recommended.
Sea creatures made with bubble wrap
@hekimen_25 Sea creatures made with bubble wrap 🐙 Enjoy the texture of the material and make the most of its qualities 🎨✨ It’s also great because you can have fun with paints!#Childcare CraftingNursery teacher / Childcare workerSummer CraftChildcare#NurseryTeacherDailyLifework #Puchipuchi
It's okay to at least dream in a dream... – San Usagi
Let’s have fun creating an ocean scene using bubble wrap as cushioning material.
First, cut the bubble wrap into circles and stick them onto construction paper.
Be sure to leave some gaps between them.
Once you’ve painted the bubble wrap with colors, imagine them as octopuses, turtles, or fish, and use paint to add legs or heads around the bubble wrap.
Finally, stick on googly-eye stickers to finish.
It’s also cute and recommended to draw seaweed in the empty spaces or use holographic round stickers to represent bubbles in the water.
[Childcare] Summer wall display ideas. Fun summer craft activities (41–50)
Let’s paint the ocean with PET bottle stamps
https://www.tiktok.com/@hoiku.labo/video/7384611565309316370Let’s have fun creating an ocean scene using a plastic bottle cap stamp that even young children can enjoy easily.
The materials are super simple! All you need is construction paper, a plastic bottle cap, paint, and a paper plate.
Squeeze your favorite paint colors onto the paper plate, dab the plastic bottle cap in the paint, and then stamp it onto the construction paper—that’s it! Using two or three colors like blue and light blue makes it look beautiful.
Finally, attach shell and fish shapes made from construction paper that you prepared in advance to complete the artwork.
It’s also lovely to add motifs you folded yourself with origami.
Give it a try for inspiration!
Making a tapestry of sea creatures
@nono.seisaku.book Lots more cute crafts too! 🐙 Pom it up with tissue paper! Under-the-sea creature tapestry 🐡🌊 You’ll love how they sway and swim ♡ A refreshingly cool craft, perfect for the end of the rainy season and the start of summer 🎐 Materials: • Clear pockets (Daiso is fine) • Tissue paper • Raffia/suzuran tape • Pipe cleaners • Double-sided tape • Round stickers • Straws • Twine Steps: 1) Cut the raffia to your preferred length, then use a straw and twine to make the tapestry base. 2) Rip and crumple tissue paper and put it into the clear pocket. 3) Cinch the opening closed with a pipe cleaner. 4) Neaten the four corners and shape it with double-sided or clear tape. 5) Add a face with round stickers to complete your sea friend! 6) Stick them onto the tapestry with double-sided tape and hang it up—done 👏✨ Tips: • Perfect for sensory play like “tearing” and “crumpling” tissue paper! • Lots of fine-motor skill steps like sticking eyes and hanging pieces! • Turn it into a tapestry and it’ll pop as a summery classroom wall display 🌴 Fun and easy even for little ones—recommended for infant through preschool classes 🫧 At @nono.seisaku.book: /Just copy and make!/ ✂️ Seasonal roundups of “cute” childcare crafts 📛 Tips for lesson plans you can easily propose at staff meetings 👍🏻 Follow to make craft prep easy and fun 🤍!#Childcare CraftsProduced in July#Summer Production#Nursery School CraftSea Creature CreationWall Surface IdeasInfant CraftToddler CraftsSensory playEasy creationSeasonal craftsFinger playProduction ideas#Nursery Teacher's Idea BookCute creation roundup
superstar – Sharou
Let’s make a summery “Sea Creatures Tapestry.” We’ll create three creatures: a fish, a jellyfish, and an octopus.
For the fish, put crumpled tissue paper into a clear plastic bag, tie it with a pipe cleaner, then secure the corners with tape.
For the jellyfish, stuff a clear plastic bag with tissue paper, shape it into a round form with tape, and attach shredded curling ribbon to make the tentacles.
Make the octopus the same way: put tissue paper in a bag and tie it with a pipe cleaner.
For the base, thread a string through a straw, wrap the straw with curling ribbon, and then attach the creatures to complete the tapestry.