Let's handcraft friendship bracelets! A collection of cute designs that will make you want to create them


Misanga bracelets are said to grant your wishes when you wear them.
They’re worn on the wrist or ankle, and there’s a rule that once you put one on, you shouldn’t take it off—but many people enjoy wearing them casually as accessories.
They’re also popular as matching items for sports days and school athletic festivals!
In this article, we introduce how to make misanga bracelets.
We cover a variety of designs—hearts, flowers, ribbons, leaves, and more—so feel free to use them as a reference and give it a try!
- [Crafts] For those working hard in club activities! A collection of handmade good-luck charm ideas
- [Great as a gift] Easy DIY scrunchie: how to make one
- How to make fabric straps: a roundup of handmade ideas
- Handmade Christmas Hair Accessories: A Collection of Ideas Using Ribbons and Resin
- Let's make a handmade smartphone case! A collection of simple and cute ideas
- [Make It With Your Favorite Character!] Handmade Ideas for Disney Ear Headbands
- Handmade omikuji ideas: DIY crafts you can make and play with
- Handmade accessory ideas that will delight the recipient! Easy DIY with everyday materials
- [Handmade] Simple DIY brooch ideas
- How to make a handmade scarf. Popular cute designs
- Craft projects recommended for adult hobbies: a stylish and cute collection of works
- Handmade tote bag ideas: from how to make them to design
- Easy way to make Christmas stockings
Let’s make friendship bracelets by hand! A collection of cute designs that will make you want to create them (21–30)
Braid with four threads! Thin friendship braceletNEW!

This is a friendship bracelet made with four strands of thread.
First, make two outward knots with the two strands on the left, then do the same with the two on the right, and then the two in the middle, in that order.
Next, return to the two on the left and this time make inward knots using the same steps.
However, keep making outward knots with the two middle strands throughout.
Repeat this process to create the patterned section to your desired length.
Once the pattern is complete, twist the threads to finish the bracelet.
This idea results in a thin bracelet, making it an easy-to-wear piece regardless of gender.
V-shaped braided friendship bracelet with 6 strandsNEW!

Here’s how to make a V-pattern friendship bracelet, one of the classic designs.
Use six strands of embroidery floss.
Tie an overhand knot and secure it to the table, then separate the strands into three on the left and three on the right.
The two inner strands create the V pattern, so make them a different color from the outer strands.
Work 4-shaped knots from the outer sides toward the center.
After finishing the first row, move to the second row: from the left edge make 4-shaped knots, and from the right edge make reverse 4-shaped knots.
Repeat this process to complete the V pattern.
Crochet is fun! Making friendship braceletsNEW!
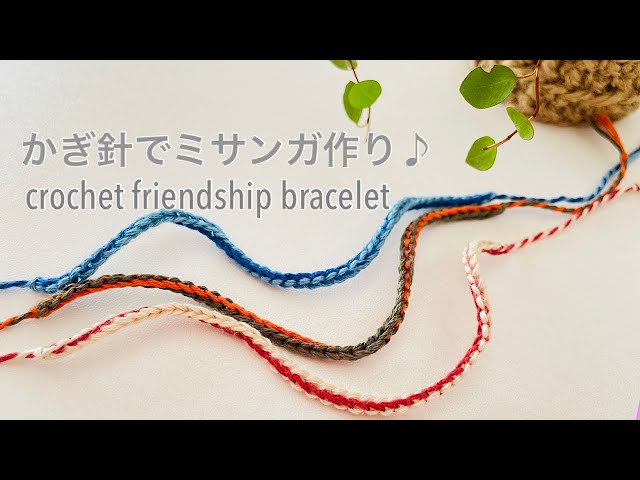
Would you like to try making a thin friendship bracelet “thread cord” with a crochet hook? You’ll use two strands of embroidery floss, tying the two together and crocheting with them.
First, leave about 10 cm at the end of the floss and make the first stitch.
From there, loop the strand you want as the main color over your hand and continue crocheting.
There’s only one stitch pattern, so just repeat it until it’s your desired length.
Once finished, leave about 10 cm and cut, twist the ends, and tie a simple knot.
Do the same with the end you left at the start, and your friendship bracelet is complete.
Cool! Twisted-braid friendship braceletNEW!

Recommended for men! Let’s make a simple yet cool twisted-braid friendship bracelet.
You’ll use four strands of embroidery floss; the two in the center act as the core and won’t show on the surface, so any colors are fine.
Alternately lay the left and right strands over the core and create a twisted braid.
Though the twisted braid looks complicated, there’s actually just one knotting method.
By alternating the knots, a naturally twisted pattern forms.
If you want it more colorful, use different colors for the left and right strands.
How to braid a heart friendship braceletNEW!

Would you like to try making a handmade friendship bracelet that’s said to grant wishes when it naturally falls off? With this idea, you can easily create a cute heart pattern.
Use eight strands of embroidery floss: place four pink strands on the inside, with two white strands on each side.
Then form the pattern using forward 4-shaped knots and backward 4-shaped knots.
The hearts will be made from the inner pink strands.
Once the pattern is done, braid both ends into three-strand braids to finish the bracelet.
Try making it with your favorite colors of embroidery floss.
How to make a misanga good-luck charmNEW!

Use three embroidery threads to make a friendship bracelet, then attach a strap fitting to finish it as a charm.
First, gather the embroidery threads together, tie a simple overhand knot, and secure them to the table with masking tape.
Next, start braiding from the leftmost strand using the number-4 knot.
Basically, repeat this knotting method to make the bracelet, and once you’ve finished, trim off the unbraided portions.
Apply glue to both ends to prevent unraveling.
Fold the bracelet in half, insert both ends together into the fitting, secure it, and you’re done.
Star-pattern friendship braceletNEW!
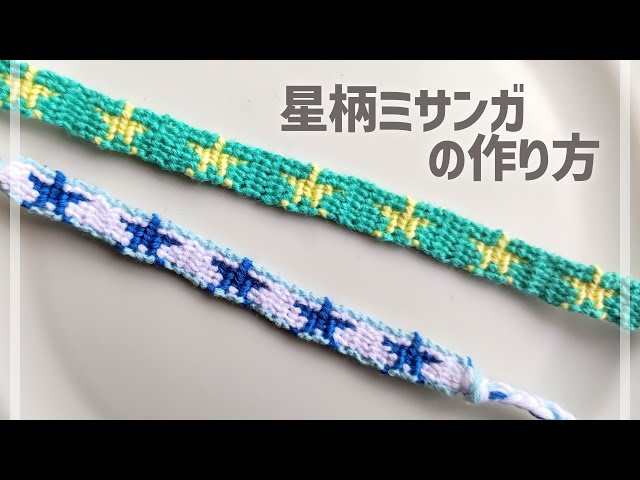
Prepare seven 90 cm embroidery threads for the main body of the friendship bracelet and one 230 cm embroidery thread for the star pattern.
Tie the eight threads together with an overhand knot, secure them to a table, and braid a few centimeters in a three-strand braid.
After that, use the basic “4-shaped” knot to weave the star pattern.
It’s important to place the yellow knots at the correct positions in each row, so take care not to make mistakes as you work.
Repeating the stars creates a vibrant look, while using just one as an accent makes for a simple bracelet.
Design it to your liking!