Let's make it with origami! Ideas for simple 3D creations

Origami tends to be associated with flat designs, but you can actually make lots of three-dimensional pieces too.
In this article, we’ll introduce ideas for 3D origami projects.
From simple shapes like hearts, stars, and dice to small containers and toys you can play with, we’ve gathered a variety of ideas.
If you want to try making 3D origami or are looking for something a bit more challenging than flat designs, feel free to use this as a reference.
All of these ideas involve relatively simple steps, so give them a try without hesitation!
- [For Adults] Simple yet Impressive Crafts: A Stylish, Eye-Catching Collection
- Simple origami that can be folded from a single sheet
- Kids will love it! Easy origami ideas—great as gifts too!
- Cool origami that boys will love and want to fold
- Origami ideas boys will want to make!
- [Origami] She’ll love it if you fold these! Simple ideas for girls
- [For Kids] Let's Fold! Today's Origami Idea Collection
- Popular characters that are easy to make with origami. A collection of creations you can enjoy with children.
- 3D craft ideas made with drawing paper and colored construction paper
- Easy flower craft ideas you can make with a single sheet of origami paper
- Children’s Origami: Easy Single-Sheet Flower Ideas
- Simple yet amazing crafts: craft ideas that elementary school students will want to make
- Kids’ Origami: Cute and Easy Ideas to Make for a Birthday
Let's make it with origami! Ideas for simple 3D creations (41–50)
Three-dimensional and cute! Pig box

Let’s customize the classic origami box and make a pig-shaped box.
Place the origami with the white side facing up, and first fold the bottom two corners to meet at the center.
Flip the paper over, and fold the remaining corners the same way.
Then flip the paper over once more and fold all four corners to the center.
You should now see two white squares on the back; fold both of them into triangles to make the ears.
After making three equal folds to crease the paper, unfold two of the four corners you brought to the center—the two that are not two-toned—and then refold them inward to finish shaping the box.
Let’s make it with origami! Ideas for simple 3D creations (51–60)
A box with a cute bunny-shaped face

Here’s an idea for making a box with a rabbit’s ears standing up.
First, fold the origami paper into a square and a triangle twice each to make creases.
Then do a cushion fold, and using the creases, collapse it into a square with the corners on the outside.
Open the central slit of the square and squash it into a rectangle; repeat on the other side.
Flip layers so that the folded parts end up on the inside, then fold the left and right edges of the revealed face to the center line.
These will be the rabbit’s ears.
Fold the back side the same way, then open it out from the center to complete the box.
Apple
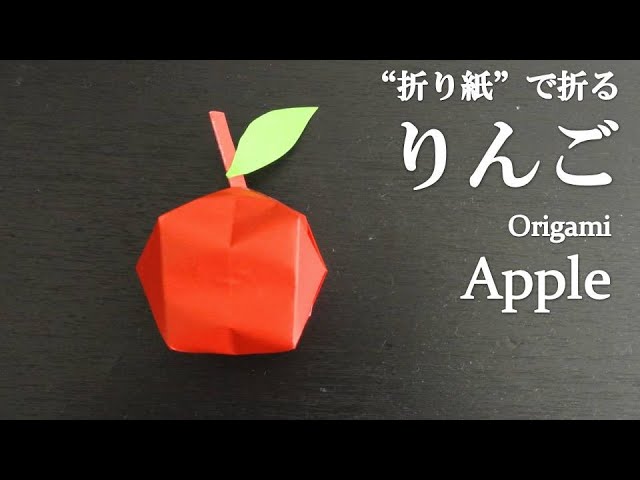
Why not try making a 3D apple out of origami? It’s a perfect new challenge for those who are tired of flat designs.
With just a single sheet of paper, you can realistically capture the apple’s roundness and the green of its leaf.
The steps are simple, so it seems like something you can enjoy with your child.
Folding and folding, watching the shape come to life is exciting.
The finished apple could make a seasonal decoration or even a small container.
How about making apples together with family or friends? It will surely become a lovely memory.
Stylish star box

Fold the origami paper in half, then fold the right edge to align with the top and bottom edges to make a crease.
Fold the left corner to the center point of the crease, then fold it back along the crease.
Next, align the right bottom edge with the folded-back crease and fold, then fold the paper in half so the shapes overlap neatly.
Using scissors, cut off the excess along the lowest diagonal line to make a pentagon.
Open the paper and fold all the pentagon’s corners inward, then fold the newly formed corners in the same way.
Turn the paper over, make creases by folding along the straight lines that connect each corner, and use these creases to raise the sides and form a star shape.
Easy! How to Fold a Cute Box

Even beginners at origami can make this! Here’s an easy way to fold a box.
First, flip the paper over, fold it into a triangle twice, and open it.
Fold each corner toward the center.
Open it up, then fold all four corners to the center along the crease lines.
After folding to the middle, lift one layer and fold it upward.
Keep folding along the lines, lift one layer, and fold it up.
Fold the triangular flaps to the back, then open it out so it forms a box shape.
Adjust the shape and you’re done! You can use it in many situations, so try making it to match the season.
How to fold a cute flower-shaped little box

Here’s a cute idea for a box that blossoms open in a flash.
First, fold an origami paper into a triangle twice, open up the pocketed part and squash it to make a square.
Place it with the corner that will be the center of the piece pointing down, then fold both bottom edges in to meet the center line.
Do the same on both sides.
Using these creases, open the pocketed sections again and squash them, then fold both side corners of every face in to meet the center line.
Fold the top corner down at the color boundary, then gently open it up to form a box.
Make two of these boxes and stack them to complete the flower box.
A box shaped like candy

This is an adorable candy-shaped box that adds a little surprise to everyday life.
The idea involves a series of steps that create fine creases.
Using those creases, you’ll ultimately form a hexagon in the center with triangles on either side, finishing it in the shape of a candy.
Since the creases are crucial, please proceed carefully with each step.
If the creases are properly made, the shape will hold without needing tape or other fasteners.
Use polka-dot or striped origami paper for a fun, pop look.