Recommended for elementary schoolers! A fun collection of craft ideas for 5th graders

Fifth graders are at an age where their interests broaden, and they enjoy communicating and playing with friends.
They are also becoming able to express their own opinions, and their thinking skills are developing.
As they get better at using their hands to shape their ideas, their creativity grows even more during this stage of elementary school.
Here, we introduce craft ideas recommended for fifth graders.
Using familiar materials, they can create projects that are fun and educational.
We hope this guide helps them enjoy crafting—whether by collaborating with friends or expressing their individuality.
- [5th Grade Elementary School] Independent Research Themes & Crafts | A Collection of Ideas That Lead to Learning
- Recommended for elementary students! A collection of fun craft ideas to make for 6th graders
- [Indoor Activities] A Collection of Craft Ideas Recommended for Elementary School Students
- Recommended for Elementary Students! A Collection of Fun Craft Ideas for 4th Graders
- Recommended for 5th graders! A collection of easy self-study ideas you can enjoy while learning
- Recommended for elementary students! A collection of fun craft ideas for 3rd graders
- Recommended for elementary school kids! A collection of fun craft ideas for 2nd graders
- Recommended Independent Research Projects for 5th Graders [Elementary School Students]
- Recommended for elementary school students! A fun collection of craft ideas for first graders
- [For Elementary School Kids] Handmade Toy Craft Ideas
- Recommended for lower elementary school students! A collection of plastic bottle craft ideas made with everyday materials.
- DIY science projects that elementary school boys will love: ideas you can make with everyday materials
- Simple but awesome! Craft ideas for upper-grade girls
Recommended for Elementary School Students! Fun Craft Ideas for 5th Graders (91–100)
Cute herbarium

Why not try making a herbarium, a popular interior decoration? Prepare a container, your favorite flowers and beads, and baby oil.
First, place the flowers and beads into the container, being careful not to overfill it.
Also, if anything tends to float when put in liquid, soak it in the liquid beforehand.
Once you’ve added all the parts, slowly pour in the baby oil, close the container lid, and it’s done.
You can also focus on choosing a stylish container and decorate it with stickers or washi tape to make it extra cute.
Torokira Keychain
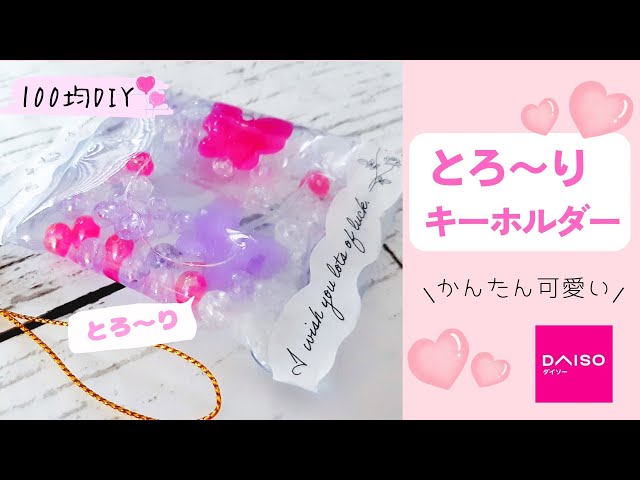
Do you know those cute accessories with a little doll floating in a tiny plastic bag? You often see them as prizes at festival raffles, but actually, you can make them yourself.
You only need items mostly from a 100-yen shop—like a soft card holder, beads and glitter, liquid laundry starch, and masking tape—so it’s a budget-friendly craft project.
Add cutouts of your favorite character or idol to the decorations, and it instantly becomes merch for your fave! You’ll want to make them for everyone!
Transparent cute coaster

Summer is supposed to be hot, but don’t you feel like the summers lately are getting hotter every year? When it’s hot, we crave cold drinks—so why not make coasters to brighten up your drink time and turn it into a summer science project? You’ll be using two-part resin and other chemicals, so be sure to have an adult or an older sibling help you when handling them.
Aside from working with the chemicals, it’s basically just decorating coasters, so even small children can join in! We’re looking forward to seeing your cool, refreshing coasters!
Handmade toy from a cheese box
@n.annlee321 Cheese boxes are cute, aren’t they? 🥰ParentingChildcareChildcare#HandmadeToys#100-yen-shop#100-yen shop DIYScrap Material Craftingwork
♬ Kekka Orai – My Hero Academia: Vigilantes Opening Theme Song – Kocchi no Kento
Here’s how to make a banana tart toy that can be used both as a trinket box and for pretend play.
All you need is a round empty cheese box and some felt.
First, use a hot glue gun to apply evenly spaced vertical lines around the side of the box lid.
Once dry, attach brown felt with double-sided tape to create the distinctive tart base.
Cover the top’s packaging surface with white felt, then prepare three long, thin strips of white felt and braid them; glue the braid along the edge.
Arrange felt bananas on top, paint the bottom part of the box brown, and you’re done.
10 Musical Instruments You Can Make with Plastic Bottles
@kajiijapn We’re introducing 10 types of instruments you can make with plastic bottles!Plastic bottle#Summer vacation homeworkSummer Vacation CraftIndependent Research
Original Song – Everyday-Item Instrument Unit kajii – kajii / Future Instruments Lab
Plastic bottles are often used as materials for crafts.
So this time, how about making musical instruments with plastic bottles? Empty bottles can become drums, flutes, or maracas… With a bit of creativity, they can transform into instruments you can actually play! Bottle caps can also be turned into instruments by combining them with other materials, so don’t throw them away—save them.
It’s also a great idea to keep notes on how the sound changes depending on where you make holes and what you put inside.
Handmade chenille keychain
https://www.tiktok.com/@n.annlee321/video/7365437076654886160Let’s make a cute bee keychain.
First, stick double-sided tape all over a chenille stem and shape it into a rectangle.
Wrap a yellow chenille stem around it, then wrap a brown one to create the stripes.
Make wings from a clear file sheet, attach them to the body with the brown chenille stem, and add eyes.
Finally, attach the keychain hardware and you’re done! With a bit of creativity, you can make all kinds of insects and animals, so try making your own original keychains.
Handmade Happy Noodles
https://www.tiktok.com/@n.annlee321/video/7317570138859900162Looks just like the real thing! Let’s handcraft some happy noodles.
Flatten a cotton ball made from yellow embroidery thread to form a lump of noodles.
Also, wrap another embroidery thread around chopsticks and soak it in water mixed with liquid starch.
Once it dries and you remove it, it will turn into curly noodles, so make some of those too.
Use a small paper cup as the container and attach a package label you designed with a design app.
Put in the noodles and a packet of toppings, then stick on the lid to finish! You might even be able to use it as a keychain if you add some parts.