[For Seniors] Recommended for day-service centers. A collection of craft ideas for April


April brings warmer weather and a lighter mood.
How about incorporating seasonal flowers like cherry blossoms and hyacinths, as well as spring-themed motifs, into your craft recreation activities? Participants can take their finished pieces home, so they can enjoy the feeling of spring there as well.
Craft activities that use the fingertips allow for focused engagement, which many older adults particularly enjoy.
We’ve gathered a wide range of projects—from simple to more elaborate—so please choose the ones that best suit each individual and give them a try.
Let’s all enjoy them together while communicating and connecting!
- [For seniors] Enjoy spring: April craft ideas
- [Day Service] Spring Take-Home Crafts: Ideas to Warmly Brighten Your Room
- [For Seniors] Enjoy the Arrival of Spring Indoors! Recommended April Origami
- [For Seniors] Enjoy Cherry Blossoms Indoors: Wall Decoration Ideas
- [For Seniors] Making a March Calendar: Introducing Spring-Themed Motifs and Arrangements
- [For Seniors] Feel the Arrival of Spring: A Collection of Cherry Blossom Craft Ideas
- For Seniors: Come, Spring! Recommended March Craft Ideas for Daycare Services
- [For Seniors] Make an April Calendar: Fun Ideas to Brighten Your Mood
- [For Seniors] Enjoy at Day Service: A Roundup of May Craft Ideas
- For Seniors: Feel the Arrival of Warm Spring. Cherry Blossom Wall Decoration Ideas
- [For Seniors] March Origami: Ideas to Brighten Your Room with Seasonal Flowers and Events
- [For Seniors] Embraced by Spring: Wall Decoration Ideas to Enjoy in April
- [For Seniors] Introducing Fun Crafts Made with Plastic Bottle Caps
[For Seniors] Recommended for Day Service. April Craft Ideas (21–30)
Flower leaning ornament
@aikoukai Creating a piece together with a 92-year-old client 🎵 It’s a cute flower stand display♪Caregiving#WelfarefacilityCreating WorksOccupational therapy
♬ Cute heartwarming BGM(1490583) – sanusagi
This is a vibrant, propped-up decoration with flowers arranged to pop out of the frame.
Cut cardboard to create two frames and use them with a sheet of origami paper sandwiched in between as the base.
For the flowers placed there, cut origami paper into long strips, shape them into petals, and combine them.
Make them in various sizes and colors to brighten up the whole piece.
It’s recommended to finish the frame in a color that complements the flowers, and the key is to emphasize the three-dimensional look of the blossoms.
dandelion fluff
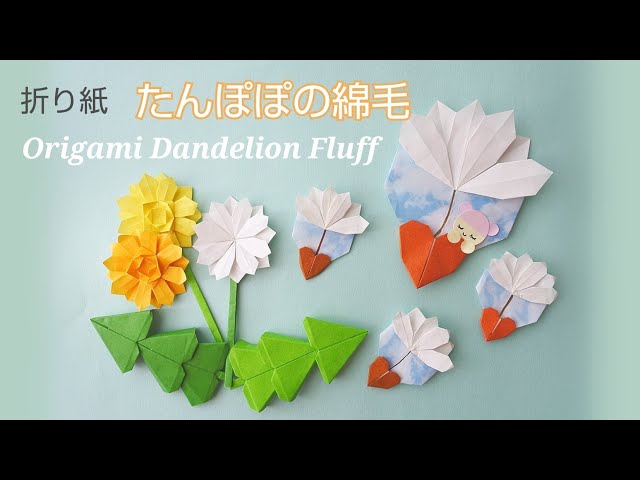
When you see dandelions in bloom, you can’t help but think, “Spring has come,” right? Older adults may also feel the arrival of spring.
In spring, you might make dandelion crafts as part of recreation activities.
It’s also a great idea to make dandelion fluff and display it together with the dandelion pieces.
If you use them as a wall decoration, they’ll create a lovely atmosphere indoors.
Seeing the displayed dandelions and fluff may bring back memories for some seniors—of their childhood or moments with family.
Be sure to enjoy a pleasant time together while sharing those memories.
For seniors: Recommended for day service. April craft ideas (31–40)
A school backpack from a single sheet of origami paper

The school backpack made from a single sheet of origami paper is a piece that combines folding and cutting steps to create its shape.
By proceeding in order, the structure is easy to understand, and you can work with your hands while keeping the finished form in mind.
Since you assemble parts with different roles—the body, shoulder straps, flap, and so on—the process of the shape gradually taking form is also easy to follow.
Though small, the finished piece is instantly recognizable as a school backpack, making it a handy origami craft for spring-themed displays or decorations.
Give it a try!
Wreath made from copy paper

This is a spring-perfect wreath inspired by double-flowered cherry blossoms, made by combining copy paper and paper cord.
Fold small, cut pieces of copy paper to create three-dimensional petals, then assemble them into the shape of double cherry blossoms.
Since the wreath will be arranged in a circle, it’s recommended to make flowers in multiple colors, such as white and pink.
The base of the wreath is made from paper cord—bundle and twist it, shaping it while keeping durability in mind.
Finally, attach the blossoms to the base and add decorations like ribbons to complete the wreath.
Four-leaf clover heart bookmark

This is a four-leaf clover heart bookmark that brings happiness.
Using a sheet of origami paper cut in half, you fold it so the clover appears to float above the heart.
The clover part involves somewhat delicate work, so take your time and proceed carefully.
Finish by folding the pointed tip at the top center to the back.
It’s not only easy to slip between pages, but the folded-back part can hook onto the edge of a page, making it very convenient.
It’s the perfect craft for those who enjoy fine, detailed work like origami or sewing.
Peach blossom ornament

Peach blossoms bloom in beautiful pale pink around late March.
Even if you want to go for a walk to see them, many people may find it hard to go out because March often has chilly days.
For those people, we recommend this “Small Peach Blossom Decoration.” It requires only a few materials, making it perfect for craft activities with seniors.
Prepare white, pink, and light green colored sand, artificial flowers, and a clear container—all of which you can buy at a 100-yen shop.
Then, layer the colored sand in the container in order.
The color scheme, like hishi-mochi, looks very cute.
Insert the artificial flowers, tie a string, and it’s done.
This peach blossom decoration will warm the hearts of those who see it, letting you feel the arrival of spring even while indoors.
Hyacinth

Using crepe paper—crinkled, stretchy paper—can be a fun idea! In particular, hyacinth decorations made with pink crepe paper look lovely, so I recommend them.
They’re easy to make: wrap green construction paper around a cardboard tube, like a toilet paper roll, then cut the crepe paper into squares and attach them to form flower shapes.
Finally, wrap green construction paper around the base to make the leaves, and you’re done! The beautiful look of hyacinths is sure to lift your spirits.