Easy handmade Christmas crafts: ideas you'll want to display


As Christmas approaches, it’s hard not to feel a little giddy, isn’t it? Here are some simple DIY Christmas craft ideas that let you fully express that excitement.
These projects use easy-to-find items like toilet paper rolls, cardboard scraps, origami paper, and pom-poms, so anyone can jump in! They’re perfect for decorating your room or giving as gifts.
Add your own twist and create one-of-a-kind Christmas goodies.
Wishing you a Christmas filled with warmth and kindness, along with your handmade creations!
- Christmas crafts using paper cups
- Christmas crafts for adults: stylish project ideas you'll want to display
- [For Adults] Simple yet Impressive Crafts: A Stylish, Eye-Catching Collection
- Let's make it with 100-yen shop materials! A roundup of Christmas craft ideas
- Craft ideas for a children's association Christmas party: a collection of easy and exciting projects
- [Handmade] Christmas trees you can make with everyday materials: a collection of eye-catching ideas
- Handmade winter garlands: cute ideas that are easy to make
- Handmade gifts perfect for Christmas: ideas for presents that are sure to delight
- [Easy & Cute] Handmade Christmas Decoration Ideas
- Handmade Christmas Hair Accessories: A Collection of Ideas Using Ribbons and Resin
- Easy Cute Christmas Origami
- Christmas crafts with pinecones! A collection of ideas you can make with your kids
- Handmade Christmas cards: A collection of ideas to make the recipient smile
Easy handmade Christmas crafts: ideas you'll want to display (81–90)
Santa walking with little pitter-patter steps
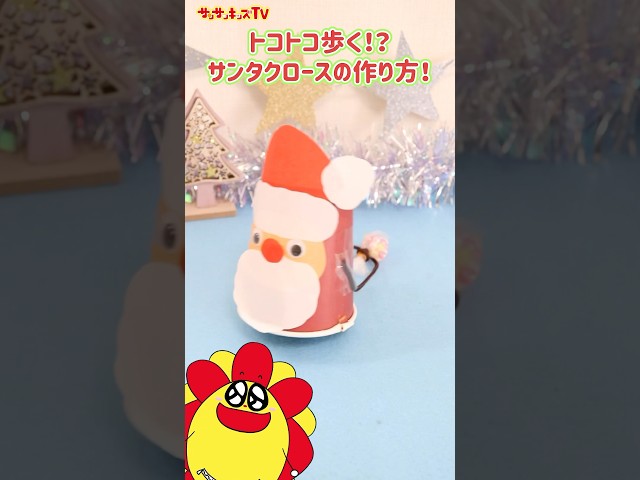
Here’s an idea for making a Santa who carries presents.
You’ll need: a paper cup, construction paper, a plastic bottle cap, a rubber bouncy ball, a rubber band, string, a clear bag, and a present.
Place the paper cup upside down and decorate it as Santa Claus using construction paper.
Put the bouncy ball inside the cap and close it, thread a rubber band through, then tape it in place.
Put the present in the clear bag and attach it to the paper cup with string.
Cut 1 cm slits on the left and right rims of the paper cup, then insert the rubber band from the cap into the slits to finish.
Twist the cap part and set it on a table—Santa will start walking!
Nebelspalte

Let’s make Näävelslöd-style ornaments using birch, a craft beloved in Scandinavia.
In Japan, we’ll use easily available thin wooden sheets (keigi) instead.
There are various kinds of Näävelslöd, but for Type A, cut the keigi into 7 mm-wide strips, mark the center, and assemble them in sets of four.
Use a hot glue gun to secure joints and glued areas.
Make two identical pieces and combine them to finish.
For Type B, prepare twelve 7 mm-wide strips in the same way, assemble them with a hot glue gun in sets of six, then join the two sets together to complete it.
The white wood look gives it a stylish Scandinavian feel.
Chewy Santa and the Reindeer

Let’s make Santa and reindeer puppets with mouths that open and close.
First, cut off the spout section of a milk carton.
Next, make slits from top to bottom on the two corners that are diagonal from each other.
Crease the bottom so it folds into two triangles—this creates the mouth that can open and close.
The side panels above and below the mouth will become the face and body.
Trim them to your preferred length and shape, then cover them with construction paper.
For Santa, you can cut one side into a triangle to represent his hat.
Finally, glue on the facial features made from construction paper and the reindeer’s antlers, and you’re done.
Patchwork Christmas tree

Here’s a patchwork tree made by connecting six square pieces.
Layer batting onto six rectangular fabric scraps, sew them with a machine, turn them inside out, and make six square pieces.
Once they’re ready, fold the edges into triangles and stack them.
As you stitch the overlapped sections together, attach buttons at the same time.
Add a hanging cord to finish.
For colors, it might be nice to alternate red and green for a Christmas feel.
You could also make it using a pack of Christmas-themed fabric scraps.
Felt Christmas stocking

When it comes to fabrics that are easy even for sewing beginners, felt is the go-to.
Using that felt, let’s make a Christmas stocking.
First, create patterns for the main stocking body, the cuff decoration piece, and the heel and toe contrast pieces.
Cut the felt according to the patterns and sew the pieces together—that’s it.
If you’d like something a bit more elaborate, try embroidering snowflakes.
You can make it larger to use as a wall decoration, or attach a looped ribbon to turn it into an ornament…
Feel free to use the finished piece in whatever way you like.
Froebel star

A Froebel star is a three-dimensional star ornament made by weaving long, narrow strips of paper into a cute, spiky shape reminiscent of sugar candy.
It’s named after the German educator Friedrich Fröbel, who devised it.
In countries like Denmark, it’s popular as a Christmas ornament.
Prepare four craft paper strips cut to 35 cm, arrange them like a pinwheel, and fold them together.
Using various colors makes it vibrant, and you can also make bicolor versions.
Give it a try!
Easy handmade Christmas crafts: ideas you'll want to display (91–100)
Stick Santa

Let me show you how to make a “Santa-stick” you can enjoy at Christmas.
Fold the origami in half diagonally into a triangle twice, crease well, then open it with the white side facing up.
Fold the left and right corners in so they overlap just slightly outside the center line.
Turn the paper over, then fold it in half by matching the top and bottom corners.
Take one layer of the top corner and fold it down to meet the bottom edge, then fold it back along the crease and return the folded-down part to the top.
Tuck the lower left and right corners slightly to the back, and you’re done.
Use pens or stickers to draw the face and clothing details, then attach a stick at the end.
You can make the stick by rolling up a piece of origami that’s been folded into a triangle!