[Day Service] Spring Take-Home Crafts: Ideas to Warmly Brighten Your Room


For crafts in day service programs, we recommend incorporating motifs that can only be enjoyed in that season.
Take-home projects using spring-specific motifs—such as cherry blossoms, tulips, carp streamers, and hina dolls—not only offer the fun of working with your hands, but also let people display the finished pieces at home to savor the season.
Even those who find it difficult to go out can feel the arrival of spring indoors.
We’ve included a wide range of items, from practical pieces like wall hangings, bouquets, and message stands to purely decorative creations.
Please make use of these ideas for spring-themed crafts.
- For Seniors: Come, Spring! Recommended March Craft Ideas for Daycare Services
- For Seniors: Simple and Lovely Crafts – A Collection of Take-Home Project Ideas for Day Service
- [For seniors] Enjoy spring: April craft ideas
- [For Seniors] Crafts to Make in March! Recommended Project Ideas
- Craft ideas with plum blossoms for seniors
- [For Seniors] Enjoy Cherry Blossoms Indoors: Wall Decoration Ideas
- [For Seniors] Have Fun Making Things Based on Today’s Mood! Today’s Recommended Craft
- [For Seniors] Making a March Calendar: Introducing Spring-Themed Motifs and Arrangements
- [For Seniors] Introducing Fun Crafts Made with Plastic Bottle Caps
- [For Seniors] Practical Crafts to Make in Day-Service Recreation: Idea Roundup
- Take-Home Craft Ideas for Winter: Perfect for Day Services for Seniors
- [For Senior Daycare Centers] Ideas for Summer Take-Home Crafts
- [For Seniors] Recommended for day-service centers. A collection of craft ideas for April
[Day Service] Spring take-home crafts: Introducing ideas to warmly brighten your room (21–30)
Simple bouquet
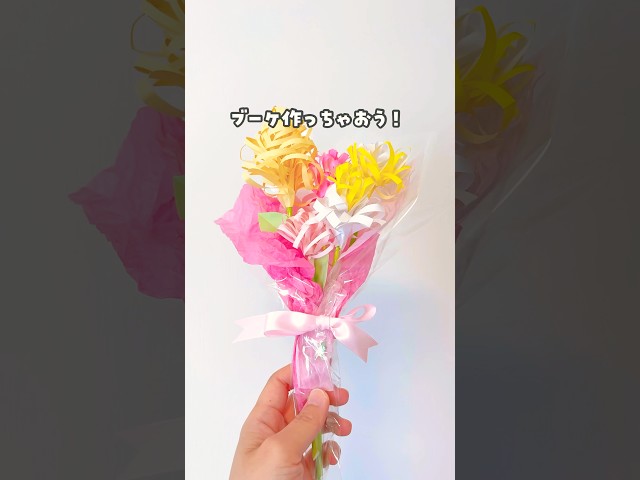
This origami piece stands out for its three-dimensional look, achieved by adding creative touches to the petal expression.
By leaving a border and making vertical slits in the paper, then curling them to create petals that clearly convey the feel of the seasonal event, a softly spreading flower shape emerges.
The work isn’t overly intricate, but the degree of opening changes depending on how you curl the strips, so it’s important to proceed with the final result in mind.
Bundling several together adds volume and creates a bouquet-like form.
Varying the color combinations changes the impression, allowing you to enjoy arrangements tailored to where you’ll display them.
Mini wreath of rape blossoms

This mini wreath, compactly shaped into a small ring and packed with the bright cheer of rape blossoms, is an origami piece that combines easy display with a touch of splendor.
Its hallmark is the process of making each yellow flower individually and arranging them with an eye for balance, advancing while envisioning the final look.
Rather than a simple repetition of steps, the placement of each flower changes the impression, making it enjoyable to experiment.
Another appeal is that once finished, it can be displayed almost anywhere—on walls, doors, or bulletin boards.
Lining up multiple wreaths creates a cohesive look that brightens the entire space.
It’s a seasonal origami idea that lets you enjoy both the making and the decorating.
Tulip wreath

This wreath, which arranges tulips into a circle while highlighting their shape, is an origami piece whose impression changes depending on how the flowers are placed.
Whether you align the direction of the flowers and stems or vary their angles slightly will affect how cohesive the design feels.
By considering color combinations, you can tighten the overall look or steer it toward a softer mood.
Introducing variations in the flowers’ heights helps prevent a flat appearance.
Finally, surveying the whole and adjusting the placement stabilizes the shape and improves how it looks when displayed.
The bright colors of the finished wreath gently stand out in a space and evoke the arrival of spring.
Hina dolls

Yakult containers are small and very well suited for making doll-shaped crafts.
Making Hina dolls with them turns out very cute and gives a sense of the season, so I recommend it.
First, apply glue to the lower part of the container and wind chunky yarn around and around.
It’s fun to mix two colors.
Make the imperial prince’s crown and the princess’s hair and crown out of felt, and fit them into the narrow part at the top of the container.
Make the scepter and fan from felt as well and attach them with glue.
And with that, your slightly artistic Hina dolls are complete.
Hanging Hina ornament

These are hanging hina dolls you can enjoy as a tabletop display.
First, drill a hole in a wooden board to make the base, insert a rod, and cover it with fabric.
You can choose any hanging ornaments you like! Use craft bands to make round kusudama-style decorations, or glue chirimen crepe fabric onto thick paper cut into your favorite shapes to create custom charms.
Connect the finished ornaments with string and attach them to the umbrella-shaped base.
When threading the ornaments, it’s also recommended to add bells or beads.
Celebrate Girls’ Day with a lovely tabletop tsurushi-bina display!
Easter calendar
@irohare2858 A craft project that both kids and adults can enjoy 🙌 Original calendar, April version! Definitely give it a try ❤︎Fun for both adults and childrenCreated by parent and childMaking a calendar at homeApril Calendar#fypシtranslation#IWantToGoViral
♬ Bibidi Babidi – Kanae Asaba
In April, there is a holiday called Easter.
It is a Christian event that commemorates the resurrection of Jesus Christ, but it also carries the meaning of celebrating the arrival of spring.
This idea is a calendar design that incorporates rabbits and eggs—well-known symbols of Easter.
Attach rabbits and eggs made from construction paper to the design surface, then glue jute twine beneath them by layering it in spiraling circles.
Finally, decorate the jute twine area with flowers made from origami, and it’s complete.
After making the calendar, why not celebrate Easter together with everyone?
A calendar of cherry blossoms and bush warblers
@nakanekd3ij I made the April calendar✨ Today was a warm day🙂 I heard this year’s cherry blossoms 🌸 are expected to start blooming on March 21. I’m looking forward to it♪Hoyu Day Service NakanoHoyo-kaiTranslationRecreationMaking a calendarJapanese bush warbler#CherryBlossom
Single-minded Cinderella! – 1st chorus ver. – CUTIE STREET
Announce the arrival of spring with a calendar featuring a design of a Japanese bush warbler and cherry blossoms.
The warbler’s wings are expressed with a check pattern on a vivid yellow-green base.
The cherry blossoms are crafted using two shades of pink, with folds to depict petals and a slight indentation at the center to create a three-dimensional effect.
Petals are also arranged around the blossoms, giving the piece a sense of motion despite being a flat work.
The calendar’s backing uses light blue—enjoy the contrast of sky, cherry blossoms, and warbler.