[Day Service] Spring Take-Home Crafts: Ideas to Warmly Brighten Your Room


For crafts in day service programs, we recommend incorporating motifs that can only be enjoyed in that season.
Take-home projects using spring-specific motifs—such as cherry blossoms, tulips, carp streamers, and hina dolls—not only offer the fun of working with your hands, but also let people display the finished pieces at home to savor the season.
Even those who find it difficult to go out can feel the arrival of spring indoors.
We’ve included a wide range of items, from practical pieces like wall hangings, bouquets, and message stands to purely decorative creations.
Please make use of these ideas for spring-themed crafts.
- For Seniors: Come, Spring! Recommended March Craft Ideas for Daycare Services
- For Seniors: Simple and Lovely Crafts – A Collection of Take-Home Project Ideas for Day Service
- [For seniors] Enjoy spring: April craft ideas
- [For Seniors] Crafts to Make in March! Recommended Project Ideas
- Craft ideas with plum blossoms for seniors
- [For Seniors] Enjoy Cherry Blossoms Indoors: Wall Decoration Ideas
- [For Seniors] Have Fun Making Things Based on Today’s Mood! Today’s Recommended Craft
- [For Seniors] Making a March Calendar: Introducing Spring-Themed Motifs and Arrangements
- [For Seniors] Introducing Fun Crafts Made with Plastic Bottle Caps
- [For Seniors] Practical Crafts to Make in Day-Service Recreation: Idea Roundup
- Take-Home Craft Ideas for Winter: Perfect for Day Services for Seniors
- [For Senior Daycare Centers] Ideas for Summer Take-Home Crafts
- [For Seniors] Recommended for day-service centers. A collection of craft ideas for April
[Day Service] Spring take-home crafts. Ideas to warmly brighten up your room (31–40)
Handmade Hina decorations made of felt

Felt crafts have a soft, fluffy touch that gives a sense of warmth.
Hina decorations made from felt would suit the atmosphere of the Peach Festival.
You can also use chirimen fabric to make the Emperor and Empress dolls.
Make two bases as well, and add peach blossoms made of felt or chirimen fabric.
If you attach a string, you can hang it on the wall, or you can paste it onto a backing board.
Using artificial flowers—like the ones sold at 100-yen shops—for the blossoms would also result in a lovely piece.
Enjoy creating it while chatting with seniors and having fun arranging the design.
Just cut and paste: felt Hina dolls

These are cute Hina dolls you can make using only items from a 100-yen shop.
Since they use spherical Styrofoam, the finished pieces have a plump, rounded look.
You’ll use chirimen fabric with adhesive on one side, and felt with double-sided tape applied.
Because there’s no sewing involved, it should be easy for older adults to try this craft as well.
If you make both the Emperor and Empress dolls, you’ll have a splendid Hina display.
It’s also lovely to decorate them by making a base from an empty box, for example.
Seeing the decorations might even help older adults recall Hinamatsuri celebrations spent with their families.
Roly-poly Hina doll
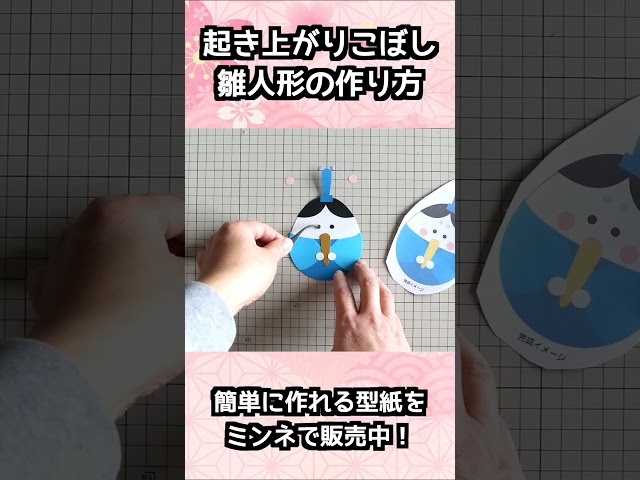
These wobbling dolls are adorable okiagari-koboshi-style Hina dolls.
You can easily make the wobbling mechanism using paper cups.
Create the Emperor and Empress with construction paper or origami, then attach them to paper cups cut to the right size, and you’re done.
Because they sway, these Hina dolls seem like something older adults could enjoy even after making them.
They also look cute displayed on a table or shelf.
Templates for the Emperor and Empress are available online, so using those can make the process easy and casual.
Hina decorations made of felt

This Hina doll decoration made of felt features gently swaying ornaments as its highlight.
By using plum blossoms and traditional Japanese-patterned fabrics, it’s likely to be a piece that will delight elderly people.
Draw a semicircle on copy paper or similar using a compass to create a fan shape.
Cut out thick paper, felt, and fabric to match this pattern to make a backing, then finish it with yarn (a type of cord).
Finally, add decorations such as flowers made from felt and fabric, and attach the hanging, swaying ornaments.
It’s a Hina Matsuri decoration that brightens up a space just by being displayed—give it a try!
Washi-Modern Hina Dolls with Lace Paper

This is a perfect idea for Hinamatsuri! First, cut a sheet of patterned origami paper and a doily in half, then fold both sides inward like a kimono.
Slip the folded doily inside the origami so the lace peeks out from the kimono for extra cuteness.
Once you decide on the placement, glue it down firmly and add the face parts and accessories.
Next, color the backing paper, and stamp around the border with a dauber or a balloon to make it festive.
Finally, attach the hina dolls, and your handmade, modern-Japanese Hinamatsuri decoration is complete.
Its vibrant colors will instantly bring a spring feel to your room, and the making process is fun, too.
[Day Service] Spring Take-Home Crafts: Ideas to Warmly Brighten Your Room (41–50)
Origami Hina Dolls

Let’s make the parts for the kimono, face, hair, hair ornament, and fan, and complete the Hina doll.
Use Japanese-pattern origami paper for the kimono.
Cut out a triangle at the center, attach the collar on the back, then fold it into a triangle.
Fold up both corners, then fold them back parallel.
Open the origami once and refold so that the bottom corner splits into two layers.
Fold the top of these two layers upward toward the back and pass it through the triangular opening to form the neck.
Next, fold in the left and right sides to make the sleeves, and fold the remaining bottom corner up to the back to finish the kimono! Make the remaining parts and complete your Hina doll.
Plum blossom ornament
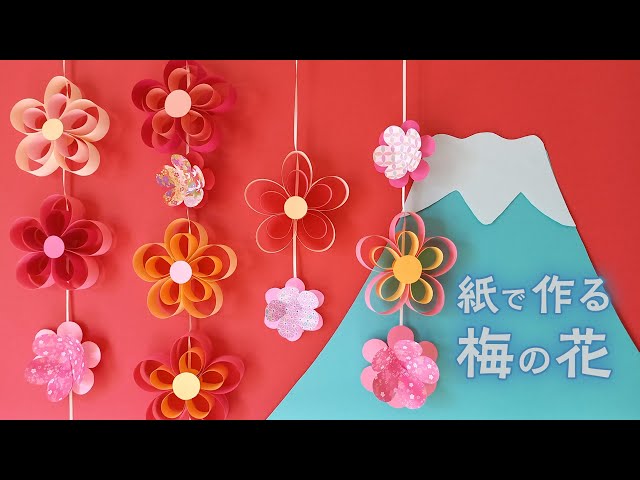
Decorations shaped like plum blossoms can create a scene that lets you feel the arrival of spring, even indoors.
The three-dimensional ornaments made by combining paper strips crafted from colored construction paper can be made in multiples and turned into a mobile to bring a spring atmosphere to your room.
If you prefer something simpler, you can use patterned origami or chiyogami, cut them into plum blossom shapes, and layer different colors and patterns for a cute effect.
Of course, combining both styles will make it even more festive, but since both involve using tools like scissors, glue, and a stapler, be sure to provide support if older adults are doing the crafting.