[For Seniors] Practical Crafts to Make in Day-Service Recreation: Idea Roundup


At day service craft activities, there are times when participants make items to take home.
I imagine many people display them at home, too.
This time, we’re sharing craft ideas for older adults that you can make and actually use!
We’ve gathered practical crafts you can keep using after you make them, as well as stylish pieces that look great on display.
Simply changing the origami patterns or the types of beads and ribbons can create a completely different feel, so have fun using these ideas as inspiration.
- For Seniors: Simple and Lovely Crafts – A Collection of Take-Home Project Ideas for Day Service
- [For Seniors] Small craft ideas: for yourself and as gifts!
- [For Seniors] Recommended for day services! Simple and cute small craft ideas
- [For Seniors] A Collection of Craft Ideas Using Paper Cups
- Take-Home Craft Ideas for Winter: Perfect for Day Services for Seniors
- For Seniors: Come, Spring! Recommended March Craft Ideas for Daycare Services
- [For Seniors] Simple Handicrafts Recommended for Finger Exercise
- [For Seniors] Recycle Everyday Materials: A Collection of Flyer Craft Ideas
- [For Seniors] Have Fun Making Things Based on Today’s Mood! Today’s Recommended Craft
- [Day Service] Craft Ideas for Seniors to Make in October
- [For Seniors] Easy Construction Paper Crafts Activity
- [For Seniors] Easy and Fun! Tsumami Zaiku Craft Ideas
- [For Seniors] Color Your Care Facility’s Spring: Wall Decoration Ideas
[For Seniors] Practical crafts to make in day-service recreation: Idea collection (41–50)
A fluffy, cozy pouch woven from cardboard

A fluffy, fuzzy pouch you can use for cosmetics or quick outings.
You’d never guess it was woven with cardboard.
Cut slits into both ends of a piece of cardboard and glue chopsticks to it.
Thread yarn through the slits and wrap it around the cardboard.
Using yarn attached to the chopsticks, weave over-under, over-under along the threaded yarn—similar to how you’d use a loom.
Once you’ve woven a sufficient length, cut it free from the cardboard.
Make two woven panels and tie the yarn at the ends to join them.
Turn it inside out, insert an inner pouch, add decorations, and you’re done.
Try making one with fluffy yarn!
[For Seniors] Practical crafts to make in day-service recreation: Idea roundup (51–60)
Cushions woven from cardboard
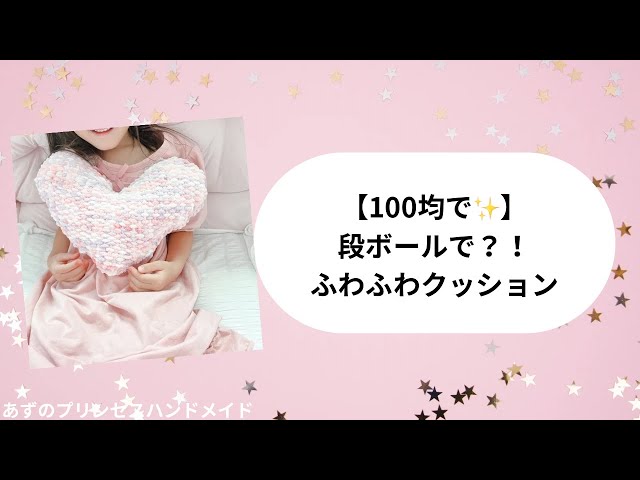
A cute cushion woven with cardboard feels nice to the touch and can be easily made with everyday materials.
Get your yarn, cardboard, chopsticks, and a comb ready.
Trace a heart shape made from construction paper onto the cardboard and cut it out.
Make small, frequent slits around the heart with scissors and hook the yarn onto them.
Next, use the chopsticks to weave the yarn so it goes over and under alternately; using a comb as you work will help the process go smoothly.
Tie off the yarn, trim it, and remove the piece from the cardboard.
Make a second heart of the same shape, stack the two together, and stitch around the edges with yarn.
Stuff generously with filling, and you’re done.
It’s a great project for parents and kids to enjoy together, so give it a try!
A scarf woven from milk cartons

With an empty milk carton and some disposable chopsticks, you can make a knitted scarf.
Cut several chopsticks in half and attach them to the milk carton.
Now you’ve got a simple loom.
You can also use thin black bobby pins instead of chopsticks, but the chopsticks are easier to knit with.
By threading the yarn through the chopsticks in sequence, you can knit, so even young children can make a project.
As the knitting progresses and the scarf grows longer and longer, kids will probably get excited watching it.
When you’re finished, add yarn pom-poms to complete a cute scarf.
a flower wreath

Let’s try arranging flowers made with paper quilling into a wreath! You don’t need any special tools, so it’s easy for seniors to try as well.
Make the wreath base by cutting thick paper (cardboard) into a donut shape.
For the petals, wrap thin strips of paper around a ruler.
Make four petals and glue them together.
Adding a rhinestone or pearl sticker in the center gives it a luxurious look! Create lots of petal pieces, lay them out on the wreath base, and you’re done.
It’s perfect for crafting at home or for day-service activity sessions, so be sure to give it a try.
Cute nameplate

Here’s a cute nameplate idea using felt, buttons, and lace.
Use a plastic nameplate as the base, and first cut felt in your favorite color to match its size.
Cut out the center, leaving about a 1 cm border, then attach it to the nameplate.
Add decorations like buttons, lace tape, or ribbons on top, and it’s done.
By decorating each one as you like, you can create a unique, personalized nameplate.
Shirt-shaped gift bag

Why not try making a shirt-shaped gift bag that’s perfect for handing out small treats? Its cute shirt design makes it ideal for easy, casual gifts.
Anyone can make it with just a single sheet of construction paper, so it’s a great craft for seniors.
Once you learn the folding steps, you can make it anytime.
It’s also a nice activity for spare moments at home.
You can customize it endlessly just by changing the size or color of the paper.
Be sure to have fun making them together!
Tulip

Tulips are a classic choice for schoolyard flowerbeds and a spring flower that pairs beautifully with windmills.
Their distinctive petals and leaves make them striking even as torn-paper collages.
For the tulip flower, imagine layering individually torn pieces and shaping them into a rounded form.
Using advertisements is recommended—you can discover unexpected color combinations! The stem is straight, so it should be easy to make.
The leaves are distinctive, so it’s better to include them, but it’s fine to skip them if that’s difficult.
Enjoy creating tulips in your favorite colors!